Michiel Schierbeek
Well-known member
Here is a try from me. Sorry got inspired again. :lecture:
Michiel
Michiel
- Selfportrait -

G1 + Revuenon 55/1.2
G1 + Revuenon 55/1.2
Great to see you here. Join our insightful photographic forum today and start tapping into a huge wealth of photographic knowledge. Completing our simple registration process will allow you to gain access to exclusive content, add your own topics and posts, share your work and connect with other members through your own private inbox! And don’t forget to say hi!
I haven't looked at this thread in eons. I absolutely love this shot. The colors just meld together so well. I would hang this on my wall.Here is a view from France inspired by Mark Rothko.
Michiel
- Window -

G1 + Revuenon 55/1.2
I like this one even more.
Yes, spending time on images to get the (personal) best out of them has been going on long before digital came along of course, the foremost example that always comes to mind first is Ansel Adams - there's no way he'd just print what came out of the camera, albeit from large format negative. A digital file is even more demanding in my opinion but then again with Photoshop at one's fingertips instead of developer, fixer, stop bath and all manner of toners to breathe in all night is certainly even more tempting to say the least.
One for the road:

Thanks Terry, appreciate your compliment!I haven't looked at this thread in eons. I absolutely love this shot. The colors just meld together so well. I would hang this on my wall.
")
I recognize that man. Beautiful, moody, evocative image, Mike.EP-1 CV 40mm f1.4
Blue man walking in the city.
Mike

Why thank ye kindly Terry. "Somewhere between a dream and reality", hmm quite what I had in mindI really must go back and start from the beginning on this thread as I've missed so much. This simply a stunning image somewhere between a dream and reality.
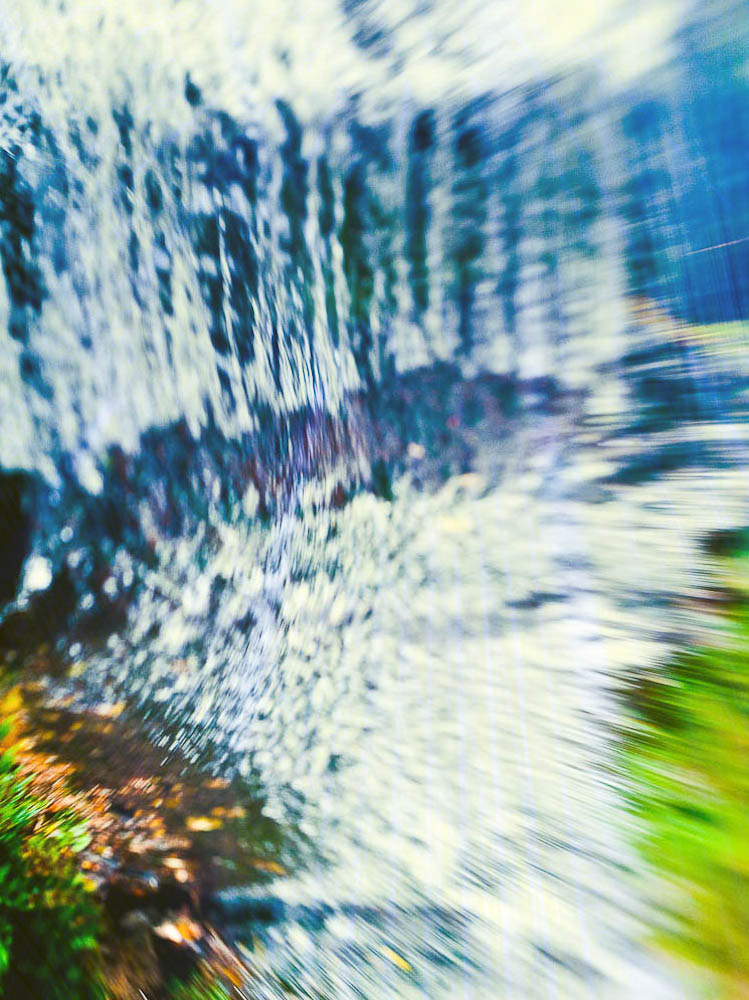
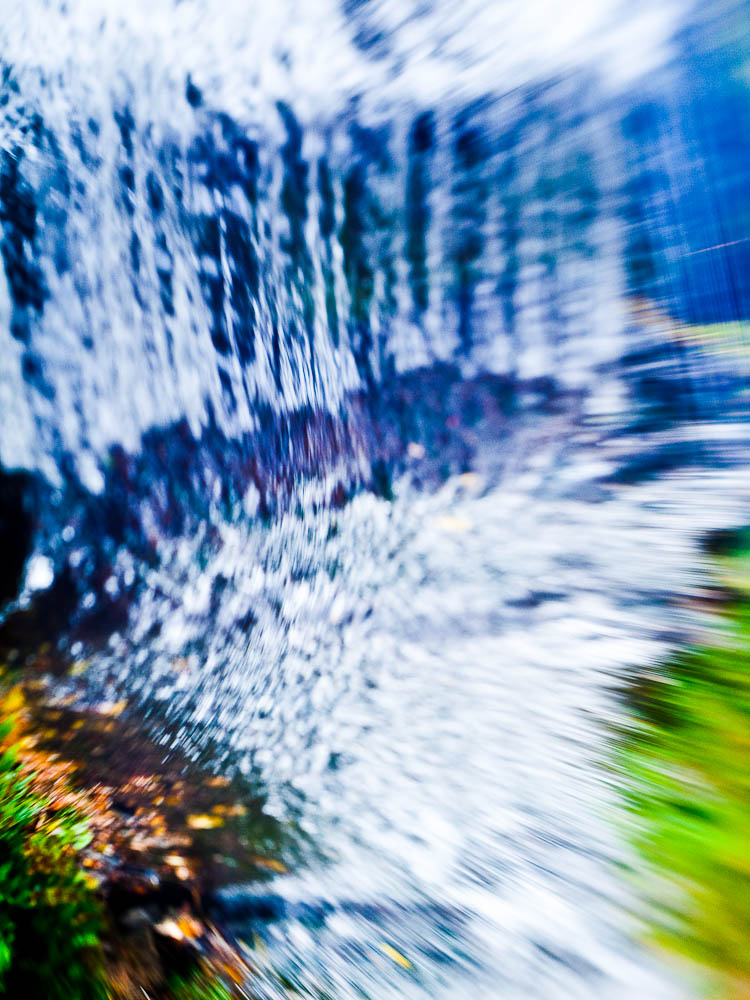
Nice dynamics again. Keep 'em coming (I sound like a badly pasted mp3 track ((previously known as a stuck record)))"Fall Falls Two"
A blend with some linear texture. Works OK in the top half of the image, but the blends comes through too strongly in the bottom half.
Nice dynamics again. Keep 'em coming (I sound like a badly pasted mp3 track ((previously known as a stuck record)))
OK, this needs a simple solution (easier done than written) - with a Layer of course.
Ctrl/Cmd J to "Juplicate" (Adobe engineer humour) the background Layer.
Click on the Layer Mask icon: the square with a circle inside.
Press G (for Gradient Tool) - up in the Options Bar click on the arrow to the right of the second item from the left and make sure either the first or second option is selected - Foreground to Background or Foreground to Transparent (when the Mask is active only Black and White are present in any case).
Press X if necessary to switch Foreground and Background Colours. In this case you want Black on White.
In the next Option along there are five small diagrams - make sure the leftmost one is active: Linear Gradient.
Leave Mode as Normal and Opacity at 100%
Check the following boxes: Dither/Transparency.
Making sure that the Mask Box is clicked upon and therefore active (shown by an additional set of frame lines around the box), Click at the bottom of the image itself and drag to the top and let go - you'll observe the result in the Mask icon itself, where Black at the bottom gradually goes up to White.
A simple mnemonic here: Black Blocks. Black will "block" any effect and conversely White will let the effect through.
Now click on the Image Icon itself to disable the layer Mask and work on the image.
Do what you have to do on the image and you'll observe that only the uppermost part of it is affected, said effect gradually disappearing as you look down the image. To further check the result Press Shift and at the same time click on the Layer Mask Icon toggling on and off to enable said Mask.
Adjust to taste. Any hiccups and I'll be glad to assist.
MichielHere is a try from me. Sorry got inspired again. :lecture:
Michiel
- Selfportrait -
G1 + Revuenon 55/1.2
Gotta keep trying though ...What we are short of in this thread are landscapes. Mike Regnier has many of those on his site.
but for the rest I tend to be old although I can look rather young. :ROTFL:Michael, thanks for this instruction. This was exactly what I was trying to achieve the other day and I just couldn't figure it out.Nice dynamics again. Keep 'em coming (I sound like a badly pasted mp3 track ((previously known as a stuck record)))
OK, this needs a simple solution (easier done than written) - with a Layer of course.
Ctrl/Cmd J to "Juplicate" (Adobe engineer humour) the background Layer.
Click on the Layer Mask icon: the square with a circle inside.
Press G (for Gradient Tool) - up in the Options Bar click on the arrow to the right of the second item from the left and make sure either the first or second option is selected - Foreground to Background or Foreground to Transparent (when the Mask is active only Black and White are present in any case).
Press X if necessary to switch Foreground and Background Colours. In this case you want Black on White.
In the next Option along there are five small diagrams - make sure the leftmost one is active: Linear Gradient.
Leave Mode as Normal and Opacity at 100%
Check the following boxes: Dither/Transparency.
Making sure that the Mask Box is clicked upon and therefore active (shown by an additional set of frame lines around the box), Click at the bottom of the image itself and drag to the top and let go - you'll observe the result in the Mask icon itself, where Black at the bottom gradually goes up to White.
A simple mnemonic here: Black Blocks. Black will "block" any effect and conversely White will let the effect through.
Now click on the Image Icon itself to disable the layer Mask and work on the image.
Do what you have to do on the image and you'll observe that only the uppermost part of it is affected, said effect gradually disappearing as you look down the image. To further check the result Press Shift and at the same time click on the Layer Mask Icon toggling on and off to enable said Mask.
Adjust to taste. Any hiccups and I'll be glad to assist.
You're welcome. This is why posting help is rewarding, meant for one and open to allMichael, thanks for this instruction. This was exactly what I was trying to achieve the other day and I just couldn't figure it out.
mixed them together with the smudge tool.