Tesselator
New member
/disclaimer
Well, I have to preface this with the disclaimer that according to some I've "come on to this scene with a very aggressive attitude" so relax the mind, don't become uptight, drop any petty past grudges (!!), realize it's only a discussion and that people have different views and ways of expressing them before reading this.
disclaimer/
Hand-hold a 200 (400mm equiv), Wow, OK... Well there's no magic to the focusing part - although I dunno what the VF2 looks like - how many pixels does it have?
Anyway most of the broad tips I could give are just the usual common sense ones. Assuming you're like me if you hand-hold a 200mm you'll get about one in five shots that are clear and without (too much) motion blur. With M-OIS you'll maybe get two out of five but probably more like 1.5 on average. I'm really picky though and more than about 1 pixel of motion blur and I press the delete key on it. The idea then is to increase this keeper ratio as much as possible.
For me the usual tips about planting the elbows have no affect or create the opposite affect by telescoping my heart-beat up through my arms. Kneeling with one knee up and placing the camera/lens on top of a knee is good. Pressing it up against a pole or a fence works. Rocks are fine but they will always scratch whatever they touch so unless you want your camera to look like one belonging to an embedded reporter in Iraq either carry a washcloth with you or shine on using rocks and boulders.
Doing one of these things will increase the keeper ratio from one in five to about three in five - better! But a tripod delivers 4 of 5 and more if you're careful - 9 of 10 maybe. The day I took these particular ones one other was there but on other days there's usually 3 to 6 other photogs shooting this kingfisher. Of them about half use a cable release in addition to a tripod and they're shooting shorter than me. 500mm on a FF is the typical down there, I'm at 600mm (equiv) with this lens and often I bring my 400mm or 500mm APO lenses which put me at 800mm and 1000mm (equiv) respectively.
That's stabilization. Focusing I think is a matter of only two issues. Well, two main ones anyway. One is getting to know the lens. Where is infinite? How far from MFD is it in radians - a quarter turn, half, other? Where is 10m and how much turning from either end is it? This takes about 15min. with the lens and that's about all usually.
The second is related to the first and it's just putting the above into practice with a little repetition. But you don't wanna do this with an actual bird at first or it's cause some unneeded frustration. I like cars for this. So with every new lens longer than 85mm I go out, set up on the street and practice following cars trying to keep them in focus. I also have to consciously tell myself to remember the information as I do it. I dunno maybe it's cause I play on-line games or something but if I don't then the exercise becomes one of futility and a waste of time.
When I set up on location ready to shoot some birds I have to look at and remember about the lens I'm using and then focus on a few things about bird distance to get it all coming back. But I'm an old fart too and don't remember having to be quite so conscientious about things when I was 20 and 30. So, this last bit may only apply to us old-timers, I dunno. But the familiarization and practice thing I've always done since I started shooting in the 60's.
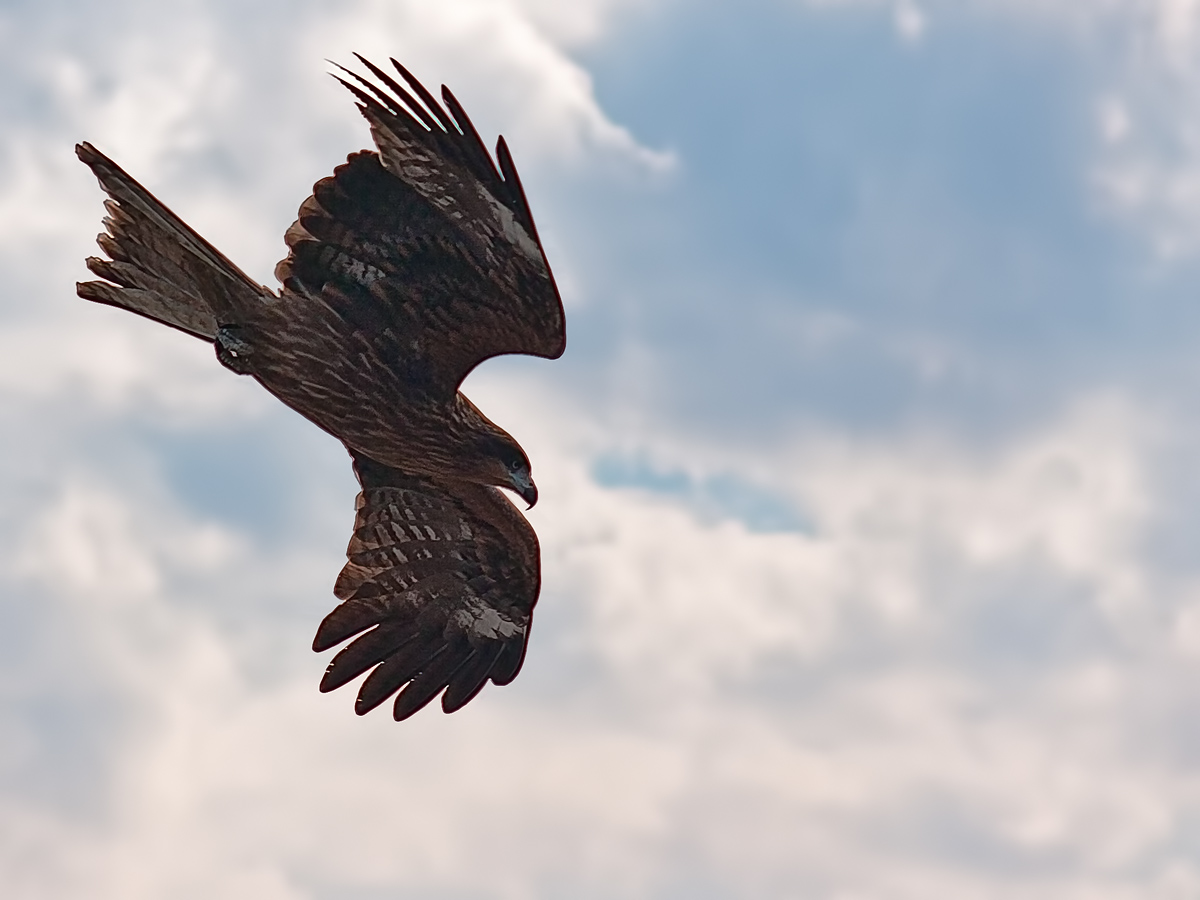
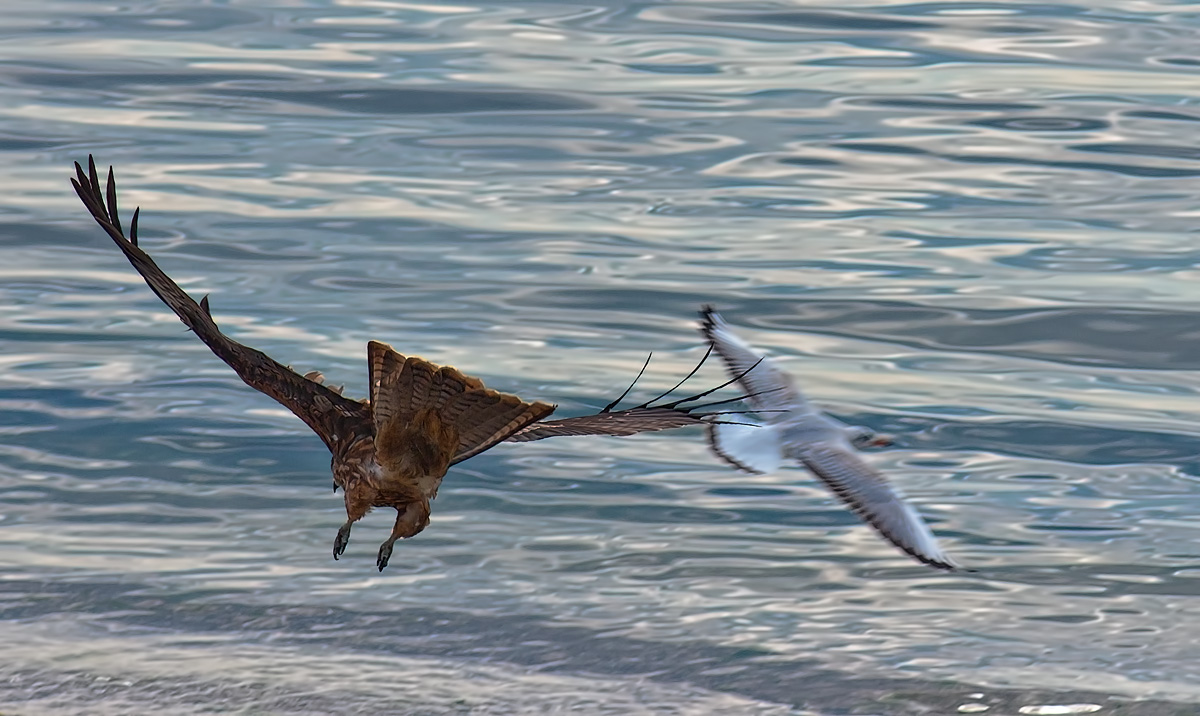
Besides lighting and camera settings that's about it. For lighting you want the Sun behind you and illuminating your subject. For camera settings you want (ideally) twice the shutter speed as the equivalent length. So if you're shooting a 200mm lens which is 400mm equiv. then you want at least 1/800s on the shutter speed. You should use the fastest "sweet spot" of the lens you're using and then adjust the ISO until you can achieve the 1/800s or whatever it works out to in your case. Spot metering your subjects prior to the shoot will help. If the ISO needs to go above 800 for that to happen then you probably need to face that you need a faster lens or more light. I find that these M4/3 cameras can only deliver exceptional looking images from about ISO800 and under when you need to crop much. And if you're shooting a 200mm lens you'll likely be cropping considerably for most birds. Here's some such using a Rokkor 100/2.8 - I was on and off the pod that day and don't remember just now which ones were hand-held and which were tripod shots. All very near 100% crops:
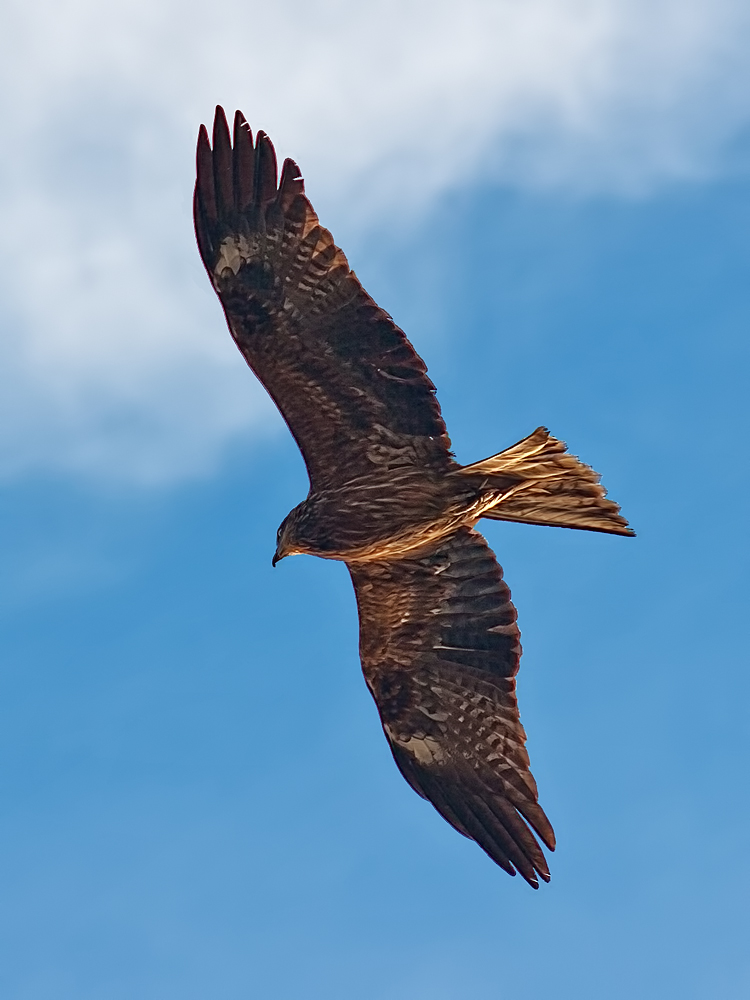
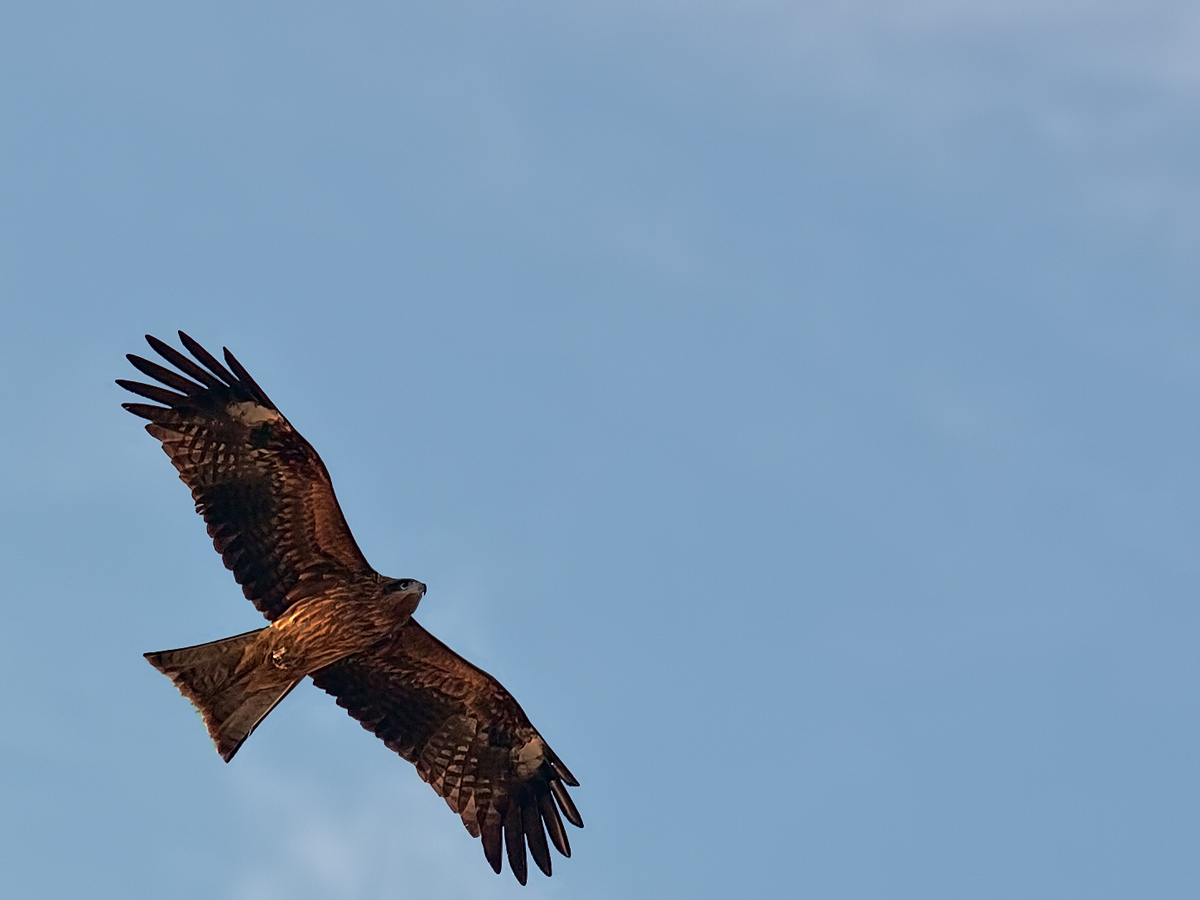
100% Crop

Etc. There's more if you want here: http://tesselator.gpmod.com/Images/_Image_By_Lens/ROKKOR_100mm_2.5/ and I've posted these here somewhere before too I think.
And of course finally there's post processing. Unless specifically noted all my images are processed and for extreme crops like this there is not "RAW Converter" that cuts the mustard. The very best one is CaptureOne and it's not what I uses when cropping like this. Photoshop will get you there though! The combo of Bridge, ACR, and PS is actually quite nice to work in for images like these. It's probably not needed if you're o a FF camera with great glass and not cropping much but otherwise it sure helps - even if you might spend a little longer per image. I could write a book (and have actually) on using PS and there are thousands of tutorials on the web that cover post processing images. So I'll leave that up to you to research.
Oh forgot about composition too. You might notice that very many of my images follow the rule of thirds at least. There's also the Golden Mean or Golden Ratio which is similar, also mathematical: http://cuip.uchicago.edu/~dlnarain/golden/ , but based on pi and hyperbolic tessellation. If you just get to know about them a little your brain can generally use them automatically while editing and cropping.") For shot-time composition there's not much you can do with longer lenses on the X and Y. Just getting it in frame is a challenge. There is on the Z tho! YAY for Z! Simply put images will appear sharper if there is a contrasting BG. I mean if the background is not sharp, but blurry! The really helps to isolate the subject and even tricks the mind into thinking the FG object is sharper than it is. YAY for trickery!
For shot-time composition there's not much you can do with longer lenses on the X and Y. Just getting it in frame is a challenge. There is on the Z tho! YAY for Z! Simply put images will appear sharper if there is a contrasting BG. I mean if the background is not sharp, but blurry! The really helps to isolate the subject and even tricks the mind into thinking the FG object is sharper than it is. YAY for trickery!
Others may know more! And for those who perceive this as "aggressive" well, you can just bit me! LOL
Well, I have to preface this with the disclaimer that according to some I've "come on to this scene with a very aggressive attitude" so relax the mind, don't become uptight, drop any petty past grudges (!!), realize it's only a discussion and that people have different views and ways of expressing them before reading this.
disclaimer/
Hand-hold a 200 (400mm equiv), Wow, OK... Well there's no magic to the focusing part - although I dunno what the VF2 looks like - how many pixels does it have?
Anyway most of the broad tips I could give are just the usual common sense ones. Assuming you're like me if you hand-hold a 200mm you'll get about one in five shots that are clear and without (too much) motion blur. With M-OIS you'll maybe get two out of five but probably more like 1.5 on average. I'm really picky though and more than about 1 pixel of motion blur and I press the delete key on it. The idea then is to increase this keeper ratio as much as possible.
For me the usual tips about planting the elbows have no affect or create the opposite affect by telescoping my heart-beat up through my arms. Kneeling with one knee up and placing the camera/lens on top of a knee is good. Pressing it up against a pole or a fence works. Rocks are fine but they will always scratch whatever they touch so unless you want your camera to look like one belonging to an embedded reporter in Iraq either carry a washcloth with you or shine on using rocks and boulders.
Doing one of these things will increase the keeper ratio from one in five to about three in five - better! But a tripod delivers 4 of 5 and more if you're careful - 9 of 10 maybe. The day I took these particular ones one other was there but on other days there's usually 3 to 6 other photogs shooting this kingfisher. Of them about half use a cable release in addition to a tripod and they're shooting shorter than me. 500mm on a FF is the typical down there, I'm at 600mm (equiv) with this lens and often I bring my 400mm or 500mm APO lenses which put me at 800mm and 1000mm (equiv) respectively.
That's stabilization. Focusing I think is a matter of only two issues. Well, two main ones anyway. One is getting to know the lens. Where is infinite? How far from MFD is it in radians - a quarter turn, half, other? Where is 10m and how much turning from either end is it? This takes about 15min. with the lens and that's about all usually.
The second is related to the first and it's just putting the above into practice with a little repetition. But you don't wanna do this with an actual bird at first or it's cause some unneeded frustration. I like cars for this. So with every new lens longer than 85mm I go out, set up on the street and practice following cars trying to keep them in focus. I also have to consciously tell myself to remember the information as I do it. I dunno maybe it's cause I play on-line games or something but if I don't then the exercise becomes one of futility and a waste of time.
When I set up on location ready to shoot some birds I have to look at and remember about the lens I'm using and then focus on a few things about bird distance to get it all coming back. But I'm an old fart too and don't remember having to be quite so conscientious about things when I was 20 and 30. So, this last bit may only apply to us old-timers, I dunno. But the familiarization and practice thing I've always done since I started shooting in the 60's.
Besides lighting and camera settings that's about it. For lighting you want the Sun behind you and illuminating your subject. For camera settings you want (ideally) twice the shutter speed as the equivalent length. So if you're shooting a 200mm lens which is 400mm equiv. then you want at least 1/800s on the shutter speed. You should use the fastest "sweet spot" of the lens you're using and then adjust the ISO until you can achieve the 1/800s or whatever it works out to in your case. Spot metering your subjects prior to the shoot will help. If the ISO needs to go above 800 for that to happen then you probably need to face that you need a faster lens or more light. I find that these M4/3 cameras can only deliver exceptional looking images from about ISO800 and under when you need to crop much. And if you're shooting a 200mm lens you'll likely be cropping considerably for most birds. Here's some such using a Rokkor 100/2.8 - I was on and off the pod that day and don't remember just now which ones were hand-held and which were tripod shots. All very near 100% crops:
100% Crop
Etc. There's more if you want here: http://tesselator.gpmod.com/Images/_Image_By_Lens/ROKKOR_100mm_2.5/ and I've posted these here somewhere before too I think.
And of course finally there's post processing. Unless specifically noted all my images are processed and for extreme crops like this there is not "RAW Converter" that cuts the mustard. The very best one is CaptureOne and it's not what I uses when cropping like this. Photoshop will get you there though! The combo of Bridge, ACR, and PS is actually quite nice to work in for images like these. It's probably not needed if you're o a FF camera with great glass and not cropping much but otherwise it sure helps - even if you might spend a little longer per image. I could write a book (and have actually) on using PS and there are thousands of tutorials on the web that cover post processing images. So I'll leave that up to you to research.
Oh forgot about composition too. You might notice that very many of my images follow the rule of thirds at least. There's also the Golden Mean or Golden Ratio which is similar, also mathematical: http://cuip.uchicago.edu/~dlnarain/golden/ , but based on pi and hyperbolic tessellation. If you just get to know about them a little your brain can generally use them automatically while editing and cropping.
For shot-time composition there's not much you can do with longer lenses on the X and Y. Just getting it in frame is a challenge. There is on the Z tho! YAY for Z! Simply put images will appear sharper if there is a contrasting BG. I mean if the background is not sharp, but blurry! The really helps to isolate the subject and even tricks the mind into thinking the FG object is sharper than it is. YAY for trickery! Others may know more! And for those who perceive this as "aggressive" well, you can just bit me! LOL