The GetDPI Photography Forum

Great to see you here. Join our insightful photographic forum today and start tapping into a huge wealth of photographic knowledge. Completing our simple registration process will allow you to gain access to exclusive content, add your own topics and posts, share your work and connect with other members through your own private inbox! And don’t forget to say hi!

Criticism of first scan

N

nei1

Guest
Ive just bought a minolta dimage scan 5400,the first version with the flourescent light source.This is a scan of an 8x 11mm minox b b&w neg scanned as such using the easy scan facility at maximum resolution.Its been quickly spotted,no sharpening added.Remembering that you can almost fit 10 minox negs onto a 35mm neg Im absolutely delighted with the result,but please shoot me down in flames if possible,Id be delighted.All the best,Neil:thumbup:
 
Last edited:
N

nei1

Guest
Thanks Robert,I put the neg in a minox 35mm size cardboard slide mount,(cutout is 8x11)and put that in the slide holder.
 

Robert Campbell

Well-known member
Ah, I should have guessed. It does mean cutting up the strip of negs, though. I have a Minox too, but have only scanned the prints; I might give this a try.
 

Cindy Flood

Super Moderator
It does look good. I really like the way the man and the iron fence are mimiced at the top of the photo and you have a nice range of tones.

It must be a challenge working with those tiny negatives.
 

helenhill

Senior Member
Well unfortunately i can't give you any Bad Press
Its FAB .....Mood,Tones & Atmosphere

Best- Helen:)
 
N

nei1

Guest
Thank you both,Cindy,Helen,it is a real effort in a wet darkroom which is why Im happy the neg scanned so well.The minox is a wonderful machine,a real pleasure to hold and use so to be able to pull out all the detail in one of these negs so easily makes it all the more a treat.
Bertie,the problem with the cardboard slide holders is that they trim a little off the neg and have slightly rounded corners,Im sure gepe made some plastic mounts that would be more suitable,if I find some Ill let you know,kind regards Neil.
 
Last edited:

Stuart Richardson

Active member
It looks good. I like the photo. One thing you might want to try is to scan it as flat as possible. Set the black and white points at the very edge of the histograms. Scan it like that, and then adjust the contrast in photoshop via curves. The scanner's curves and levels functions are very basic compared to photoshop's, so it is best to scan to get as much as possible of the negative's information, and then just discard that information as needed in photoshop. For the same reason, it is best to scan in 16bit, multi-pass with no sharpening. Obviously time constraints may dictate otherwise, but this is if you want the best scans possible. In the photo above, you might find you have more shadow detail than you think if you scan it that way.
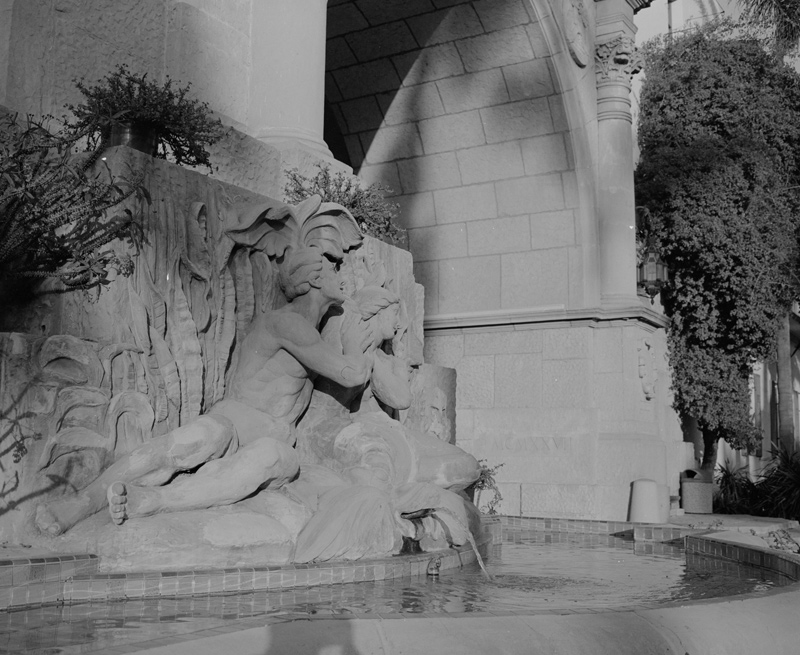
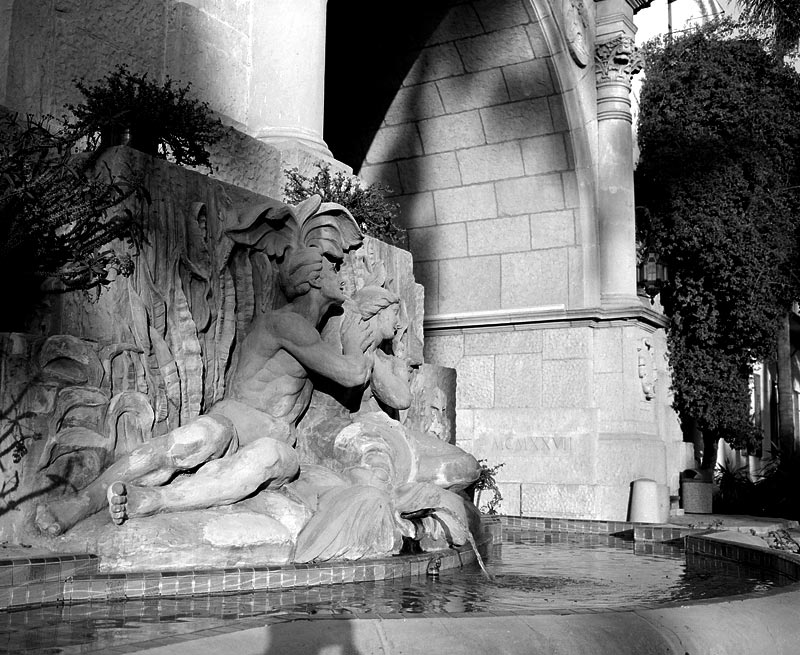
For example, here is a before and after from when I used to scan with the Minolta Scan Multi Pro:

Directly from the scanner:


And worked over in Photoshop -- please note some may prefer more shadow detail...I tend to like contrasty photos:


Also, my processing skills have advanced! That was several years ago. Today I would do more localized curves to keep some shadow detail in the archway, potted plants and so on.
 

Robert Campbell

Well-known member
Bertie,the problem with the cardboard slide holders is that they trim a little off the neg and have slightly rounded corners,Im sure gepe made some plastic mounts that would be more suitable,if I find some Ill let you know,kind regards Neil.
Thanks for the info etc; your scan is remarkable for such a tiny neg.
 

Cindy Flood

Super Moderator
I totally agree with Stuart on the flat scan. I scan with a Nikon V using Vuescan Pro (Hamrick.com). I aim for the flattest scan out of the scanner and then import the scan into Photoshop. I set the black and white point in Photoshop and add contrast with curves. This method gives you much more flexibility.
 

Stuart Richardson

Active member
Thanks Helen, I am glad you like it.

I should note, I did not mean setting the black and white point at 0 and 255, just at the very edge of where there is information on the histogram. So if there is a full histogram inside the 0 to 255 range, then just set the black and white point as close to the last bits of info as possible. That way you get as flat a scan as possible, but are also using as much of the scanner's gradation as possible. It's one of those things that is hard to explain and easy to show...
 
N

nei1

Guest
Thanks for the tip Stuart,this is just the sort of advice I need,direct and simple,thanks Cindy for the confirmation of the strategy.Do either of you have ideas on sharpening?I couldnt see much difference until I got to the extremes on the slider where it appeared to solarize so I cancelled the operation.Is this used more for colour or is it more noticable in a print?
All the best,Neil.
 

Cindy Flood

Super Moderator
I like my scan to be as full of info as possible, so I wait till I bring it into Photoshop to apply the sharpening. If you are just going from scanner to web or print, it is OK to sharpen in the scanner program. When you sharpen and increase contrast on the edges, you loose greyscale information (with the increased contrast), so I like to do it in PS. I sharpen then according to whether it will go to web or print. I then have my original scan in its unsharpened form to archive.

I hope others comment on their workflow here. I feel that there is a lot to learn about scanning and not much information out on the web. I'd like to hear others ideas on any aspect of scanning. I hope we can keep this thread going.
 

Stuart Richardson

Active member
If possible, definitely wait until photoshop to do any sharpening. Depending on your scan software, this may mean just turning off sharpening, or actually putting in a negative value (the Imacons for example need -50 to have it turned off...0 is still applying a light unsharp mask). Don't be afraid of sharpening though, it is a necessary evil. The scanning process blurs the finest detail slightly, and in order to bring back the original impression of sharpness, you need a bit of sharpening. As Cindy says, what it is really doing is adding a bit of edge contrast -- it puts a lighter pixel next to a darker pixel in order to make the edges more apparent -- when it is overdone, it can lead to a halo effect. Photoshop and goes beyond just unsharp masking to things like adding a bit of noise at the finest level of the image...this gives the impression of texture and thus sharpness. The algorithms that it uses are so much more advanced than the old scan software, that it really makes sense to take advantage of them.

Some people are fans of "capture sharpening" which is basically sharpening a bit right after you import your photo into photoshop. The theory here is to bring your photo or scan back to where it was when you took it...to get rid of that slight softness. Then you go about your business and sharpen again when you are ready to output the photo.

In general, other than capture sharpening, it is best to sharpen your photo at the very end of your editing. So if you want to make a 800x600 web jpeg, do all your editing, resize it to 800x600 and THEN do the sharpening. View it at 100% detail so you can see exactly what the sharping is doing. If you have a photo with more pixels than is possible to display on the screen, view the image at 50% or 25% to gauge the effect of sharpening. When making a print, 50% and 25% are closer to what your eye will see than 100%. So if you look at the detail at 100% and it seems oversharpened, it might still look good on the print. Like many things in photography, there are elements of personal taste as well as just experience and getting a feel for it.
 
Top