Ok first my disclaimer: As previously stated I am not an hdr expert by any means. I'm sure everyone familiar with either Ps HDR Pro or Photomatix could coax better results than I did. But maybe that is some of the point I'm going to make: How much learning curve is there with the hdr software? This was just a rough test, please don't think I would send anything remotely like any of these images to a client (this is a junk image anyway). There is a lot more work to do!
I can 'almost' get a reasonable image out of the lightest single frame, but the ceilings don't end up with enough detail. I bracketed 6 stops, most of which was for the lights in the ceiling (the darkest image is almost black except for the light fixtures themselves). Note this may be a unique situation vs landscape. It is also probably why all the software ended up with a dark rendering of the final image. Oh, these are IQ180 raw files...
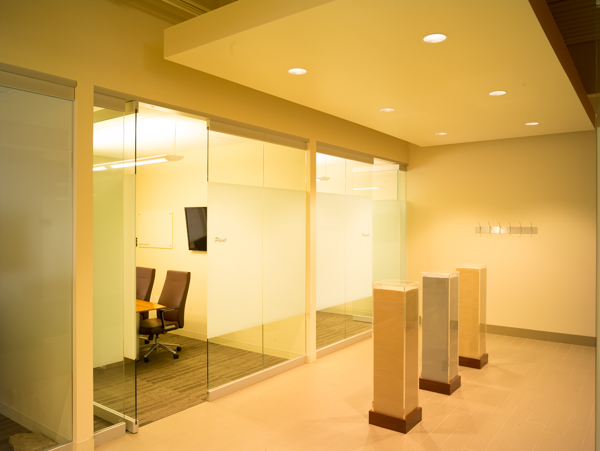
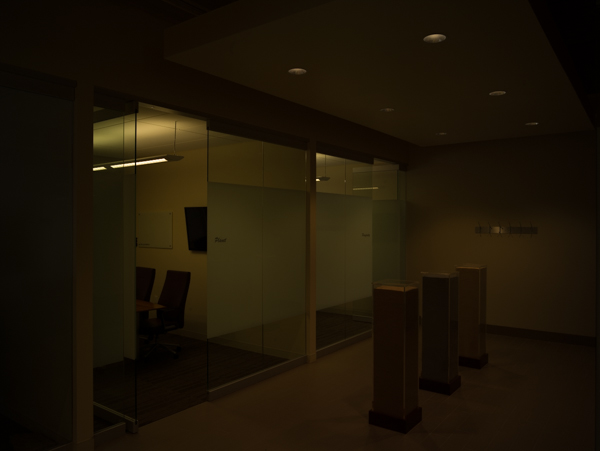
Here are the lightest and darkest frames, no adjustments. There are no blacks in the light image and no pure whites in the dark image:
Here is what I did in each case:
HDR Pro:
I tried working on the raw files but they must be too big; I kept getting the dreaded "Error 54: Uncaught JavaScript exception: Error #". So then I rendered tiffs in C1 with an LCC applied. After bringing them into Ps I couldn't get rid of colored halos that appeared around the lights, so I gave up and just blended manually with a luminosity mask. In order to make the contrast and colors reasonable the ceilings started to blow out. I could not get a reasonable balance. Sorry too short on time (lazy?) to post those images now...
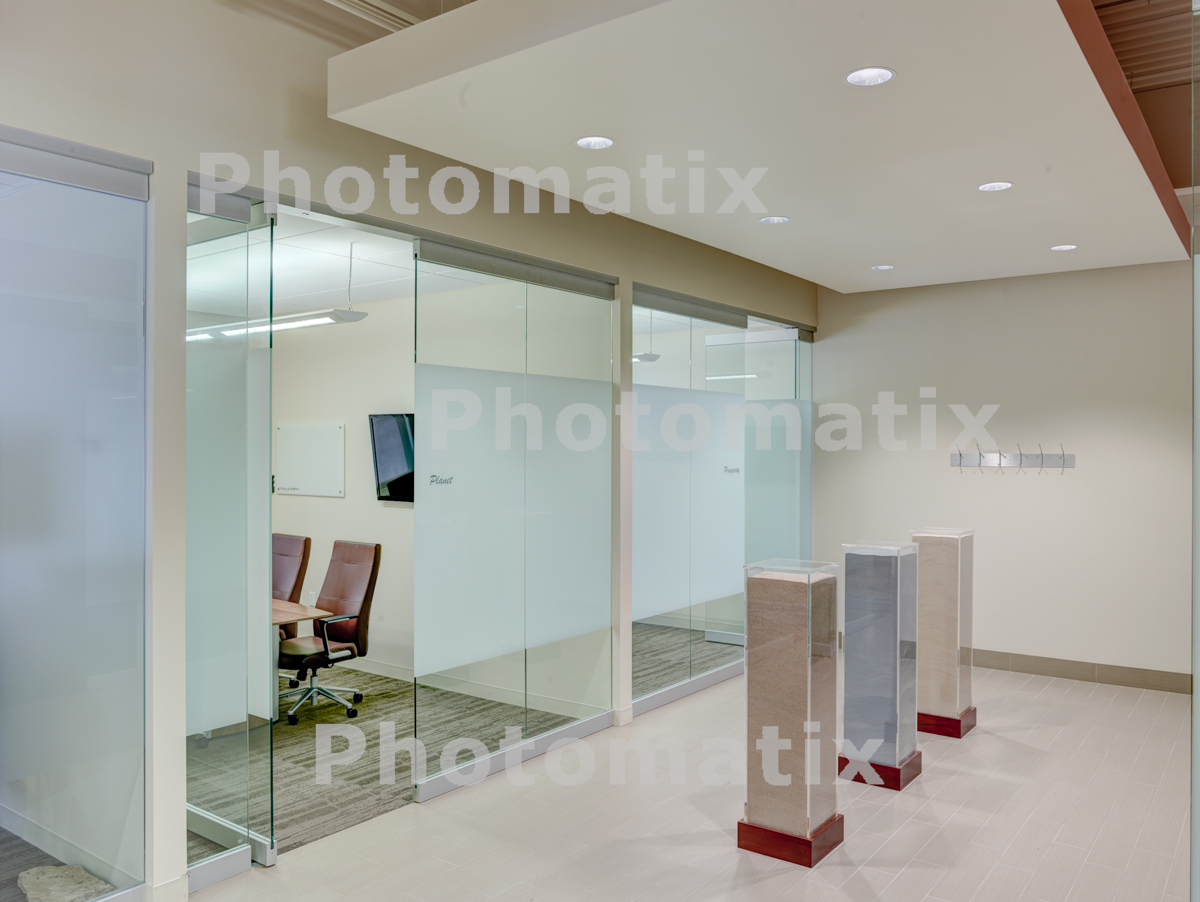
Photomatix:
Images went into C1 first to apply an LCC, so they were rendered tiffs that went into Photomatix. I used the "Indoors" setting which seemed to give me the best preview. After mapping and re-importing to Lightroom, I made the following adjustments after white balance:
Exposure +.35
Contrast -39
Shadows +35
Vibrance -9
Browns and reds were still way too strong so I went to the HSL panel and lowered Saturation:
Red -25
Orange -14
This is the result:
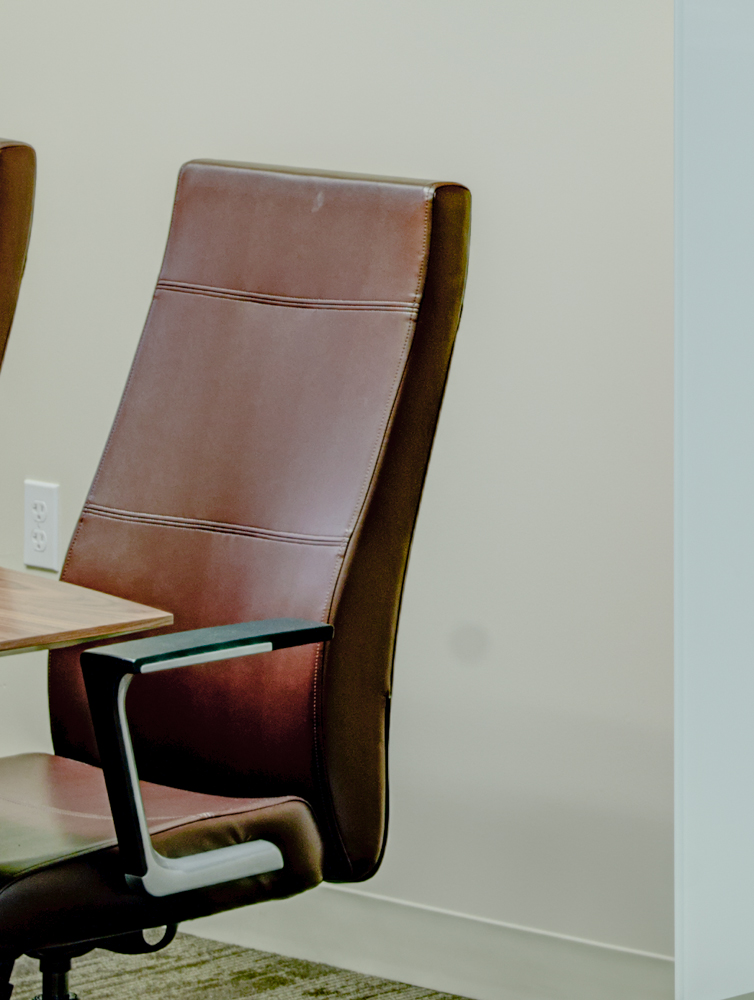
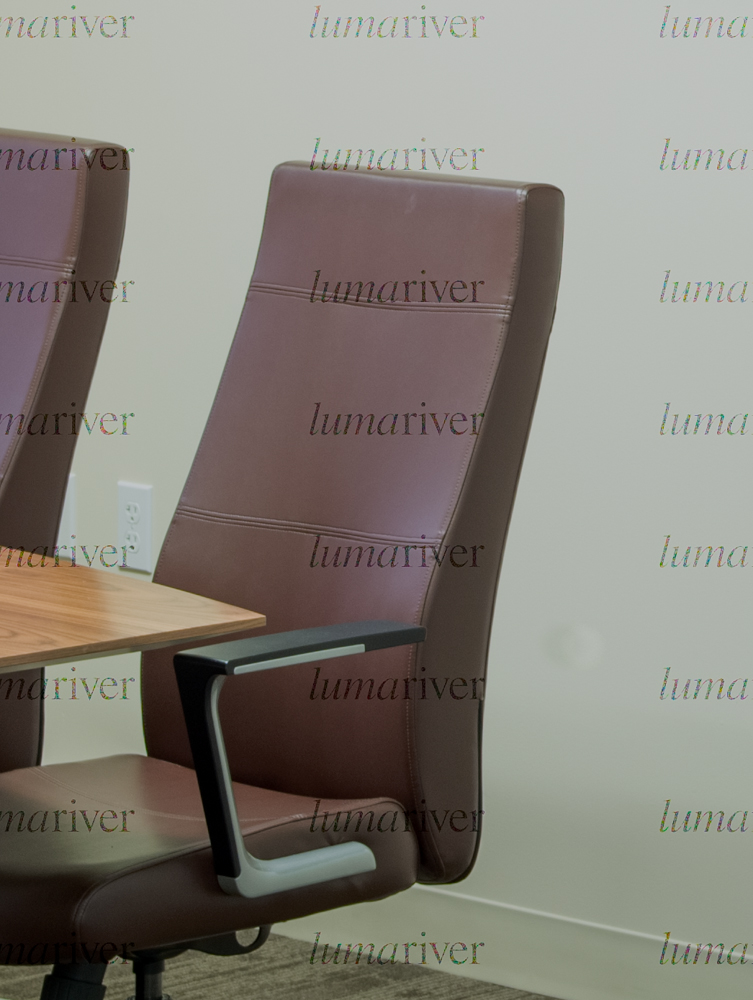
The chair is just awful:
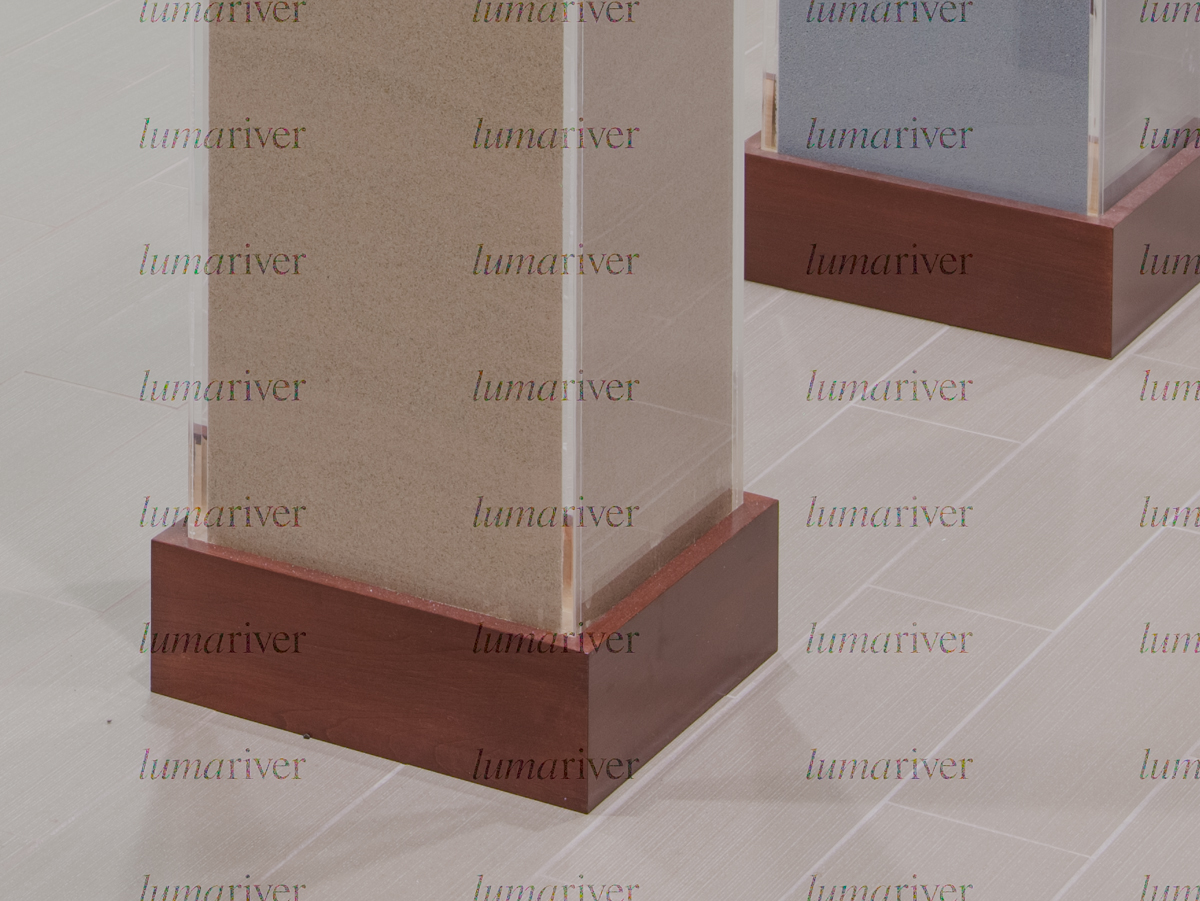
And the wood bases:
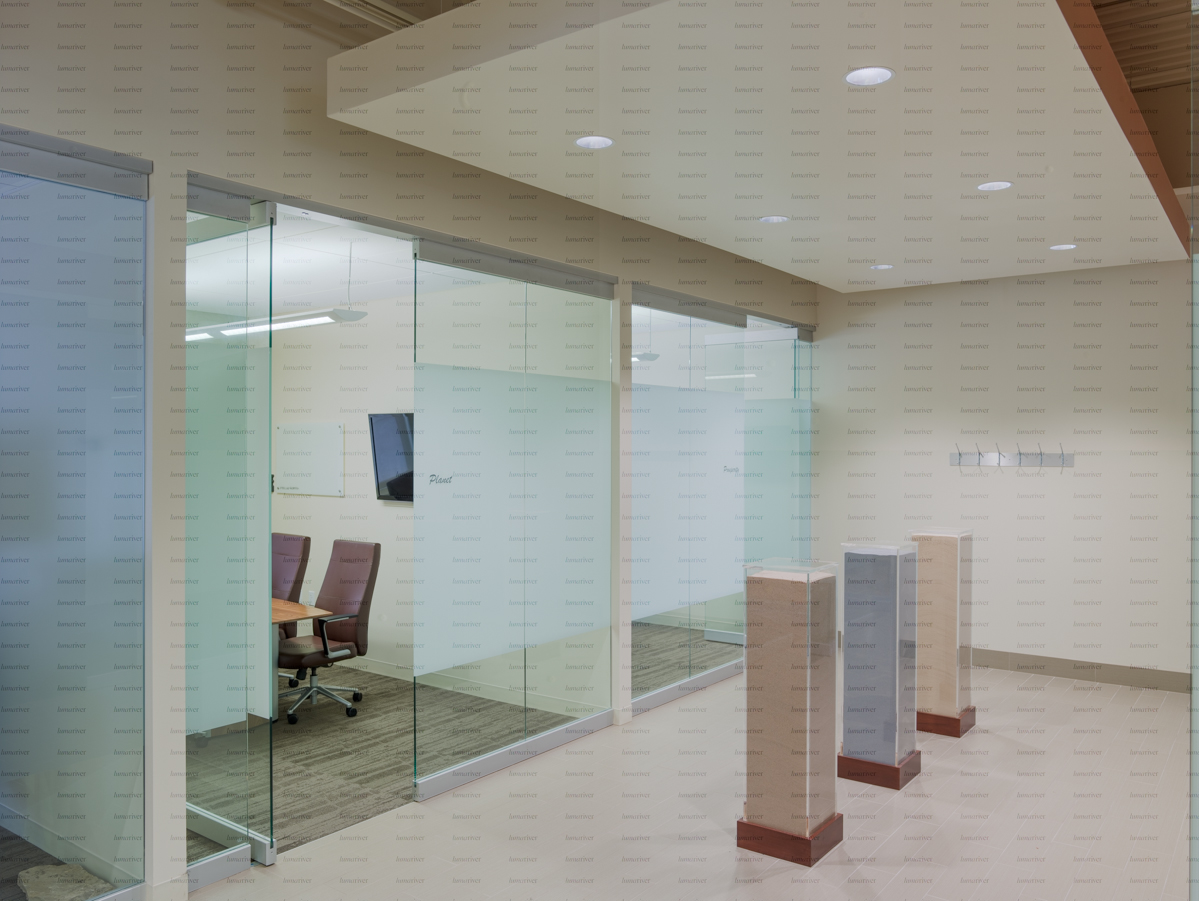
Lumariver:
I opened the individual raw files straight into Lumariver and applied an LCC to each one on import (yay!!). I think everything was left to default, then saved out as a dng raw file back into Lightroom. After white balance, these are the LR adjustments:
Exposure +1.35
Shadows +76
Tone curve to lighten the image more
The Lumariver controls have the ability to lighten during the process, but I wanted to see what happened on default. Even though I pushed this pretty hard in Lightroom, there was still almost no noise! Here are the images:
Sooo much better!
Dave