The GetDPI Photography Forum

Great to see you here. Join our insightful photographic forum today and start tapping into a huge wealth of photographic knowledge. Completing our simple registration process will allow you to gain access to exclusive content, add your own topics and posts, share your work and connect with other members through your own private inbox! And don’t forget to say hi!

Focus stacking or hyperfocal in landscapes with tech cam

Massive Si

Active member
Hi
I have a general query for those using a tech cam, without TS lenses, for landscape focusing

I have a WRS and a 35 XL on an IQ350 back, and I am curious what approaches other people take when composting their scenes for maximum acceptable sharpness

When you want both close and infinity objs in focus, do you bother with focus stacking or do you employ a hyperfocal method such as double the closest object's distance?
do you alternate depending on the situation?

thanks
 

Shashin

Well-known member
I don't use a tech camera, but a medium-format one. I focus on the foreground subject and stop down. I don't mind using f/16 apertures and occasionally f/22. I find sharpening in post mitigates the slight loss through diffraction. I also find it looks more natural--focus stacked images can kind of remind me of cell phone images with everything crisp and crunchy from front to back.
 

rdeloe

Well-known member
There are depth of field apps, and then there are depth of field apps.... The most sophisticated one I've ever seen is published by Digital Light and Color. Here's the link to the site: https://www.dl-c.com/DoF/ The author has published a comprehensive manual for the app. It's actually a nice tutorial on depth of field, and discusses some shooting strategies. Even if you decide not to use the app, it's worth reading through the background material.

I've used focus stacking, but rarely. Instead, I mostly use tilt (which is not what your asked about, I know). Sometimes the only option is to rely on depth of field. Like Will, I'll trade off sharpness and detail where I want it for a bit of diffraction every time. I routinely shoot at f/16, and will close down more if I have to. In terms of where to focus, I don't have just one strategy; it depends on the picture. For example, sometimes the foreground matters more than the background, or the other way around. If I'm not sure I'm getting what I want with the point of focus I've chosen, I'll move the focus point in front and behind in some other frames.
 

Greg Haag

Well-known member
Hi
I have a general query for those using a tech cam, without TS lenses, for landscape focusing

I have a WRS and a 35 XL on an IQ350 back, and I am curious what approaches other people take when composting their scenes for maximum acceptable sharpness

When you want both close and infinity objs in focus, do you bother with focus stacking or do you employ a hyperfocal method such as double the closest object's distance?
do you alternate depending on the situation?

thanks
I do not have the 35XL, so I cannot speak to that, but I have the Rodenstock 32mm that does not have TS. Honestly, there are not many situations where I cannot achieve acceptable depth of field (for my purposes in a single image). With that lens if I have a question, I will usually take 3 images with my foreground, mid and background in focus and blend in Helicon. I am shooting with the Cambo WRS 1600 with IQ4 150 my 32mm is w/o TS, my 90mm & 180mm have TS. As a side note on focus stacking, so many times there is just enough wind that I wind up with having a hard time blending focus stacked images, but that may be operator error on my part.
 

dchew

Well-known member
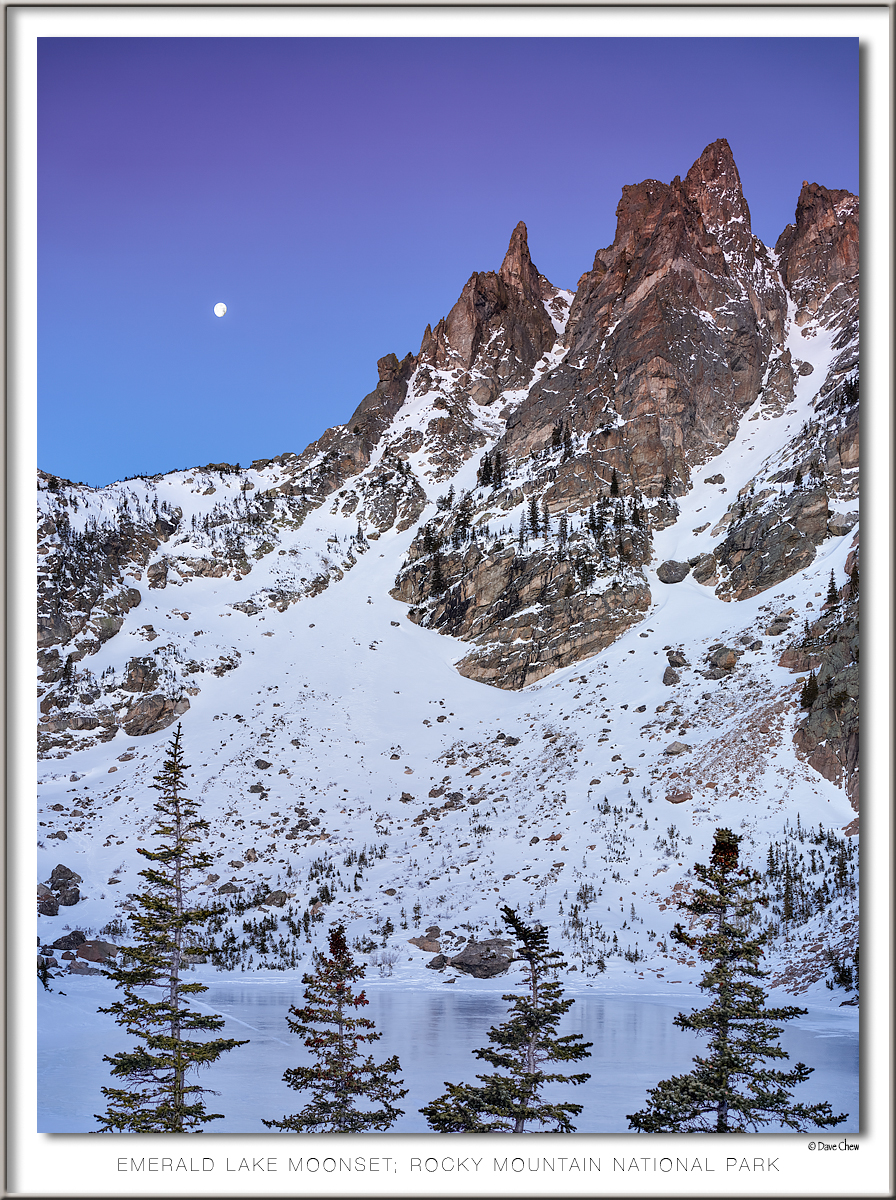
My approach is similar to Rob's. I start with tilt. If that doesn't work because of the scene, then I will usually try DoF up to f/16. There are timse when I rely on focus stacking, but usually it is my last resort for a specific situation. Here is an example where I couldn't quite get tilt to work, so I took two images; one for the trees in front, one for the background.

Dave


vieri

Well-known member
I never use focus stacking, and never use tilt either. While diffraction is a very real physical phenomenon, to me it's slightly overrated on forums - it often becomes a matter for pixel-peepers and lens testers, rather than for photographers. What I mean is that first, as others said its effects on images can be mitigated; then, depending on the lens the increased sharpness even on the focus plane created by stopping a lens down can "push" the visual effects of diffraction a stop further (or more). I.e., in my lens tests, for 33x44 MF sensors I noticed that f/11-f/16 are very safe apertures to use with basically no loss of quality due to diffraction (see HERE if interested). At the moment, I am testing now all my Rodenstock XT lenses on the IQ4 150Mp, and will share the results as soon as I'll have them.

Personally - and of course YMMV - for near-far compositions, I mostly use wide and ultra-wide lenses, where the problem is much less evident since it's easy enough to keep things in focus from my feet to infinity using careful placement of the focus point when using a 23mm on 40x54mm sensor, or a 21mm on 33x44mm sensors; when I use longer lenses, is generally not for near-far compositions, but for far-farther ones, therefore making the problem much less evident as well.

That said, there is no point for me in having a perfectly sharp, non-diffracted image of something that is not in focus where I need it to be; I'd happily trade some slight diffraction for an image composed and focussed the way I want it, rather than the other way round.

A note on tilt: tilt, as the name says, tilts the focus plane - this can help bringing near-far composition all in focus, but doesn't work in all situations either (i.e. if you are in a cave and need both the cave's roof, floor and what is out of the cave to be in focus). There is no magic bullet here, just experience and knowing which tool to use for every different scenario :)

Best regards,

Vieri
 

docholliday

Well-known member
I never use focus stacking, and never use tilt either. While diffraction is a very real physical phenomenon, to me it's slightly overrated on forums - it often becomes a matter for pixel-peepers and lens testers, rather than for photographers. What I mean is that first, as others said its effects on images can be mitigated; then, depending on the lens the increased sharpness even on the focus plane created by stopping a lens down can "push" the visual effects of diffraction a stop further (or more). I.e., in my lens tests, for 33x44 MF sensors I noticed that f/11-f/16 are very safe apertures to use with basically no loss of quality due to diffraction (see HERE if interested). At the moment, I am testing now all my Rodenstock XT lenses on the IQ4 150Mp, and will share the results as soon as I'll have them.

Personally - and of course YMMV - for near-far compositions, I mostly use wide and ultra-wide lenses, where the problem is much less evident since it's easy enough to keep things in focus from my feet to infinity using careful placement of the focus point when using a 23mm on 40x54mm sensor, or a 21mm on 33x44mm sensors; when I use longer lenses, is generally not for near-far compositions, but for far-farther ones, therefore making the problem much less evident as well.

That said, there is no point for me in having a perfectly sharp, non-diffracted image of something that is not in focus where I need it to be; I'd happily trade some slight diffraction for an image composed and focussed the way I want it, rather than the other way round.

A note on tilt: tilt, as the name says, tilts the focus plane - this can help bringing near-far composition all in focus, but doesn't work in all situations either (i.e. if you are in a cave and need both the cave's roof, floor and what is out of the cave to be in focus). There is no magic bullet here, just experience and knowing which tool to use for every different scenario :)

Best regards,

Vieri
Exactly! For most people, focus stacking, tilt-shift-swing, and diffraction are all overrated. It's a bunch of buzz words and a sticking point for pixel peepers and armchair "technical" photographers.

People are so overly fascinated with focus stacking that nowadays, they over use it and want everything tack sharp. They spend so much time worrying about diffraction that they think they can't go above f8 so they want to stack everything and if they can't stack it, they dwell on finding a way to T-S the image to death, especially on small(er) formats. I have a feeling that the crappy cell phone camera with it's always in focus images that is driving that a bit. It's like we are at the antithesis of the bokeh, bokeh, bokeh fad.

The only time I have ever found diffraction to be important is when shooting fabrics or other fine detailed items in a macro situation where the detail quality was important. And even then, good lighting and proper post sharpness can mitigate it to where it's not noticeable in production imaging. For landscapes, most people wouldn't know diffraction from a slight bit of motion blur due to wind or heat distortion on a hot day!

Tilt-shift-swing was more important in the large format days as the lenses really needed those functions to establish basic focus, but the smaller the format, the less it's needed to get proper DOF. I rarely use/need it in studio and when I do, it's usually very minor amounts. When I use the HTS, it doesn't look like the marketing material - it looks like I haven't even turned the knobs much at all.

It's so much more important to get a properly lit and composed shot than it is to get uber-super-depth-of-focus, yet I see people make an excuse for bad composition or layout by stacking it to death with 100+ frames and saying "but it's sharp!". Both stacking and T-S have it's purposes. Neither of them are a fix-all. One can simply get a subject completely in focus by moving the camera back, using a longer lens, and moving the background further away. It's about understanding the range of focus for a particular f-stop and subject-to-lens distance. Since most landscapes are near infinity focus for the background, it's a choice of lens and lens to nearest important item distance that's more important to getting the foreground to background in proper focus.
 
  • Like
Reactions: med

diggles

Well-known member
for near-far compositions, I mostly use wide and ultra-wide lenses, where the problem is much less evident since it's easy enough to keep things in focus from my feet to infinity using careful placement of the focus point when using a 23mm on 40x54mm sensor, or a 21mm on 33x44mm sensors
Hey Vieri,

This is an area I struggle with. It's a lot to ask, but would you mind providing image examples highlighting the focus point? Possibly even providing settings. I believe many forum members would find it super beneficial.

Warren
 

GrahamWelland

Subscriber & Workshop Member
When I first started with technical cameras a long time ago now I was shown by my dealer how to determine the actual hyperfocal settings at each aperture. With my Alpa with no tilt, set the desired aperture as required, and then start at infinity and shoot a series of incremental slightly closer images at different distances and compare them until infinity is acceptably sharp with as much foreground as needed. Use that actual distance as your true hyper focal distance for your lens/camera/back combination. Since it was back in the days of using laser distometers, we’d also measure the distance to the acceptably sharp foreground element and record that too.

A bit of a faff to do but you knew that you had a handcrafted hyperfocal for each lens and desired apertures and accommodated any tolerances in the back / lens geometry (back when we’d shim Alpa mounts) and also based on actual MFDB CoC for what’s sharp enough for you. Hyperfocal apps and tables are fine but this method meant that you got your own accurate values for your camera set up. Using that value you basically have a set & forget P&S technical camera.

However, these days I focus on what is the most important element in the scene and stop down if need be. Perfection be darned, especially when it comes to print anyway.
 
Last edited:

vieri

Well-known member
Hey Vieri,

This is an area I struggle with. It's a lot to ask, but would you mind providing image examples highlighting the focus point? Possibly even providing settings. I believe many forum members would find it super beneficial.

Warren
Hello Warren,

Graham's advice is great to establish your hyperfocal point empirically for each lens and each aperture - if we are talking about manual focus lenses, possibly with a good, long throw and a good depth of field scale; you didn't specify what camera / lenses you use, but of course for modern, autofocus lenses with no depth of field / distance scale on them, there is nothing you can do to actually build a list of preset hyperlocal points.

If you don't want to do the work once and always use hyperfocal, or if you prefer to use focus + depth of field according to each scene rather than hyperfocal (which could make sense, according to the situation) then a good rule of thumb, if your lenses are calibrated correctly, is the old 1/3 - 2/3 depth of field rule; so, if you roughly place your focus one third in the scene, you can use that as a good starting point for a case-by-case approach rather than infinity to fine tune as Graham said - starting at infinity will work, but in most cases of near-far compositions it will make the process much longer, in terms of time, since you'll probably have to get about 2/3 away from infinity anyway, for maximum close distance sharpness.

All theory aside, live view actually helped dramatically - just use the focusing approach you favour, stop down the lens of your camera has a depth-of-field button (or just take a test shot if it doesn't), zoom in as much as your camera lets you and check focus at infinity and at close distance until you are happy with what you are seeing.

Personally, at this point in my journey with landscape photography, once I am familiar with my current cameras I just know where I need to focus with each lens out of experience. Now that I moved to Phase One, I am using the time at home to familiarise myself with camera and lenses and get to know them, so that when I'll be in the field again, I won't have too much of a learning curve ahead of me before I can again focus by eye.

Hope this helps! Best regards,

Vieri
 

diggles

Well-known member
Hey Vieri,

Thank you for your thoughts on this, it is very helpful.

you didn't specify what camera / lenses you use
The camera set up I'm using when I'm thinking about technical details like this is a WRS 1600 + CFV II 50c back with various Rodenstock HR and Digitar lenses. Until I got this set up I almost always shot from the hip. Basically picking f8-f16 and focusing on the main subject. The near/far focus was just what it was.

Since getting the technical camera and these lenses I've discovered that I need to focus on the furthest item I want to be in focus, and the aperture I use will effect how much of the scene from the focus point to the foreground will be sharp. With the 23HR basically everything is in acceptable focus, but even with the 32HR the foreground starts to lose it's sharpness unless I use f11 or f16.

Based on what I've experienced, anything after the furthest focus point is out of focus. This is what I am struggling with. For instance, take this picture of trees, it was taken with the 180HR–since the depth of field is much shallower on this lens maybe it will emphasize what I mean:
_HBLD-0903-180HR.jpg

When photographing this scene I took multiple shots focusing on different areas like @Greg Haag suggested above–which seems like a great way to get to know your lenses btw. When I focused on the row of trees in the front then everything behind them was out of focus, not acceptable. The shot with the best front to back focus was the one where the focus point was almost the very back row of trees in the scene. The trees behind that point are out of focus, but it didn't matter. So I guess I was using the 1/3 to 2/3 rule as you described above, but didn't realize it :)

This image was taken with the 50HR:
_HBLD1386-50HR-f16.jpg

My main point of focus was the tree in the middle, but I wanted the one in the foreground on the right and the ones in the background on the left to be sharp as well. I was pretty sure that if I shot it straight then I wouldn't have everything in focus like I wanted. Since my copy of the 50HR is the T/S version it seemed to me that using swing should work well. After configuring the swing to get everything in focus as best as I could tell on live view, I took one shot at f/11 and another at f/16. Both apertures kept everything I wanted in focus.

Here is one more example that I took in 2010 with a Canon + 24mm:
_Y4H8429.jpg

This one was taken at f11. The point I focused on was the mountain peaks. They look nice and sharp, but the rock in the foreground is not acceptably sharp for me. My plans are to revisit this scene with the tech cam + the 23HR and 32HR. Based on my experiences and the comments above, here are my thoughts on different techniques I should try to get acceptable results:

  1. Try the 1/3 to 2/3 rule or start at infinity and work my way forward. Take multiple shots and see which focal point gives me the most acceptable focus.
  2. This scene could probably work well with focus stacking. Take one image with the rock as the focal point and another with the mountains as the focal point and merge them in Photoshop.
  3. Maybe this could work with tilt, I'm not sure if the mountains will stay in focus though, but try it and see.

Here is an example where I couldn't quite get tilt to work, so I took two images; one for the trees in front, one for the background.
In terms of where to focus, I don't have just one strategy; it depends on the picture. For example, sometimes the foreground matters more than the background, or the other way around. If I'm not sure I'm getting what I want with the point of focus I've chosen, I'll move the focus point in front and behind in some other frames.
I am using the time at home to familiarise myself with camera and lenses and get to know them, so that when I'll be in the field again, I won't have too much of a learning curve
It seems that the common thread is to keep practicing, try different approaches, and see what gives you the results you are looking for.
 

stngoldberg

Well-known member
I really value this site and the views and opinions of the contributing members. Since my camera is an Arca Swiss, every lens automatically has a tilt ability, so when I photograph landscapes I usually add one degree of tilt for every 32mm of focal length. In addition I also use the hyperfocal distance.
stanley
 

rdeloe

Well-known member
Here is one more example that I took in 2010 with a Canon + 24mm:
View attachment 184320

This one was taken at f11. The point I focused on was the mountain peaks. They look nice and sharp, but the rock in the foreground is not acceptably sharp for me. My plans are to revisit this scene with the tech cam + the 23HR and 32HR. Based on my experiences and the comments above, here are my thoughts on different techniques I should try to get acceptable results:

  1. Try the 1/3 to 2/3 rule or start at infinity and work my way forward. Take multiple shots and see which focal point gives me the most acceptable focus.
  2. This scene could probably work well with focus stacking. Take one image with the rock as the focal point and another with the mountains as the focal point and merge them in Photoshop.
  3. Maybe this could work with tilt, I'm not sure if the mountains will stay in focus though, but try it and see.

It seems that the common thread is to keep practicing, try different approaches, and see what gives you the results you are looking for.
Great follow-up Warren!

The scene in the above picture is meant for tilt. Were I setting up for this, I'd imagine the plane of sharpest focus running from the foot of the rock in the foreground, and then running through the mountains. I'd put it just below the "notch" and see if the wedge that defines the area of acceptable sharpness on either side of the plane of sharpest focus at f/8 is getting the surface of the water, and the tips of the trees at left. If the water is sharp but the tips of the trees are not, I'd check to see if raising the plane of focus up does the trick. If the water is still sharp and the tips of the trees still soft after doing that, then I'd go to f/11, and then f/16 if necessary.

The problem with the old 1/3rd & 2/3rd trick when you're not using tilt or swing is that not all lenses distribute the area of acceptable focus on either side of the plane of sharpest focus that way. This is something you can easily figure out just by looking at depth of field tables. It's going to depend on focal length and focus distance. For example, on my 33mm x 44mm sensor, my 35mm lens at f/8 has almost 0.76m in front and 1.46m behind at 1m, but at 10m it's 2.35m in front and infinity. My 180mm is almost 50/50 at 1m, and 8.92m to 11.4mm at 10m.

Typical depth of field tables, charts and calculators are often rightly criticized for inaccuracy due to inappropriate circle of confusion and other considerations. Plus the aperture on the dial is rarely the actual f-stop. The DoF app I mentioned previously addresses these concerns (but I do find it rather unintuitive). I will use a depth of field calculator on the web simply to get a sense for how the lens behaves, and then I rely on live view, careful inspection, and making a few frames at different focal points to get it right if I can't use tilt and it really matters exactly where the region of acceptable sharpness is in the picture.
 

Shashin

Well-known member
I think what is missing from these conversation is how the viewer cognitively sees an image. A sensor with more pixels is not "bigger," it just records higher frequency information. If you are simply judging by 100% monitor view, you have a strange viewing condition that is simply getting closer as the resolution increases. But that does not change the perception of the viewer with the final displayed image.

When someone looks at an image, they first go to the high-contrast elements that seem central to the subject of the image. They do not look at low-contrast areas. This has been repeatedly shown in eye-tracking experiments. So having a image tack-sharp throughout the object distances is not necessary for an image to appear sharp. And at 50MP, even with 40" prints, the print will hold less detail than the file can show. While obviously, taking care of your technique is important, maximizing resolution (different from sharpness) gives diminishing returns.
 

vjbelle

Well-known member
I'm a little late to this discussion and all advice given is very solid. I do take a slightly different approach as I never shoot beyond f11 and depending on the lens would like to shoot at f8. This usually requires me to take 2 or 3 shots to increase the focus area on the important parts of the image. It's very easy and fast and Helicon or Zerene easily stacks the image. I've taken this approach for a long time with great results.

Victor B.
 

vjbelle

Well-known member
Hi Lou..... I initially focus (at taking aperture) on the leading edge of what I feel must be in focus. I then look for the point (at 100%) to see where focus just begins to soften and refocus at that point. Usually at that point I have expanded the important areas of the image enough to stop. I don't normally need any more than two images. Helicon or Zerene combines those quickly and I have mitigated diffraction to a good extent. This takes very little time and the resulting image, to me, is worth the extra effort.

Victor B.
 
Last edited:

tcdeveau

Well-known member
Definitely some good info in here.

I'm also of the 1/3-2/3 camp, but lately for landscapes, just figure out what the focal point of my image is, stop down to f8-11, and focus there.

Going to investigate the use of tilt in my own stuff with my tech cam setup at some point if i ever get it up and running again.
 

GrahamWelland

Subscriber & Workshop Member
Btw with the 23mm Rodie on a Phase One full frame MFDB it’s basically infinite focus from your toes to infinity. When I used that lens it was subject to horrible center flare if any light hit the side of the lens. I believe they fixed that but I used to have shoot two images - one as needed with full frame with hot spot and then another with hand covering the edges and vignetting but keeping the center fare free. In post I could combine them.
 
Top