Krosavcheg
Member
I haven't been shooting with my IQ160 as much as I would have wanted for various reasons.
Just had few model sessions here and there and I noticed that my retouching techniques carried over from 135 format experience don't really yield acceptable (to me) results.
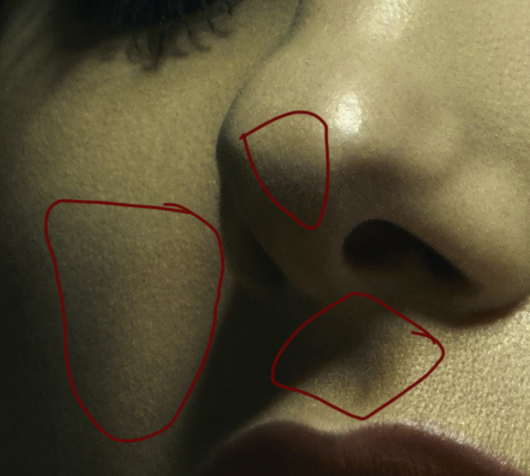
From what I can see, MFDB captures the fantastic level of detail as well as tone. (Un)fortunately(?) it tends to pick up sub-surface tonal shifts (sub epidermic pigmentation, blood vessels, discolouration, etc)that during dodge&burn tend to shift towards orange in brights and magenta-mauve in darks.
Though even D&B on the fine detail will essentially produce same effect. Additionally, skin tends to be very yellowish.
So far I shot on location with direct natural light (I like the contrasty lighting), that might explain the tonality. However, just few days ago I shot with studio strobes in a controlled light environment and results exhibited exact properties I described.
Most likely explanation is of course that I am using IQ/Photoshop combo similar to using a laptop to prop up a door.
Just wondering if anyone could point me in a right direction so I can investigate further.
Best Regards
Just had few model sessions here and there and I noticed that my retouching techniques carried over from 135 format experience don't really yield acceptable (to me) results.
From what I can see, MFDB captures the fantastic level of detail as well as tone. (Un)fortunately(?) it tends to pick up sub-surface tonal shifts (sub epidermic pigmentation, blood vessels, discolouration, etc)that during dodge&burn tend to shift towards orange in brights and magenta-mauve in darks.
Though even D&B on the fine detail will essentially produce same effect. Additionally, skin tends to be very yellowish.
So far I shot on location with direct natural light (I like the contrasty lighting), that might explain the tonality. However, just few days ago I shot with studio strobes in a controlled light environment and results exhibited exact properties I described.
Most likely explanation is of course that I am using IQ/Photoshop combo similar to using a laptop to prop up a door.
Just wondering if anyone could point me in a right direction so I can investigate further.
Best Regards


")