The GetDPI Photography Forum
Great to see you here. Join our insightful photographic forum today and start tapping into a huge wealth of photographic knowledge. Completing our simple registration process will allow you to gain access to exclusive content, add your own topics and posts, share your work and connect with other members through your own private inbox! And don’t forget to say hi!
Fun with MF images - ARCHIVED - FOR VIEWING ONLY
- Thread starter Guy Mancuso
- Start date
- Status
- Not open for further replies.
Shashin
Well-known member
Tom, from the last two images, which are really great, they are also kind of indicating this is not your usual light. I find how light can be very different when you go to new places fascinating. When I went to Tibet, it took some time to come to terms with 4,000m less atmosphere above me, even though I was used to working at 3,000m in the Japanese Alps.
Will:
You're correct about my usual light and I agree that light in other locations can be remarkably different.
I live in the NE US, as do you. Our light typically is from cloudy skies with a dynamic range of + 2ev. OK, I'm exaggerating, but we just don't get the same skies (light) as the western states. In my travels, the most remarkable light I have seen is in New Zealand. Beautiful clouds, rain, dramatic light with crystal clear air.
Tom
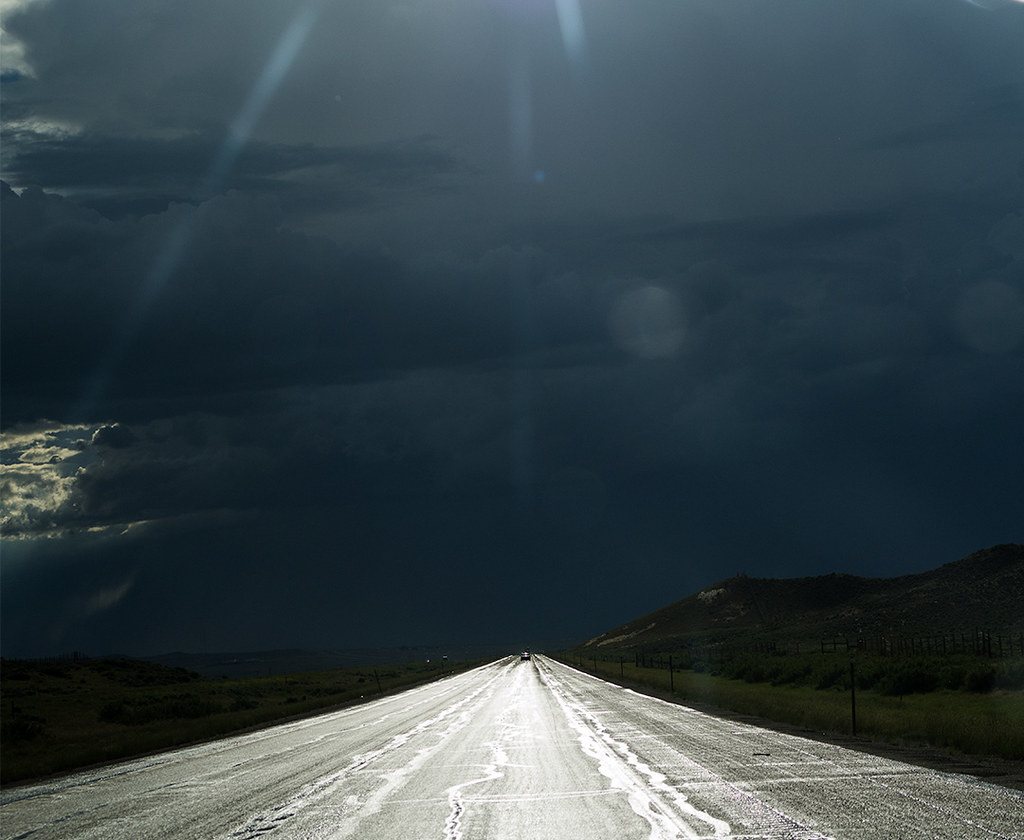
I might add that my usual technique is not to shoot from a moving car either! It wasn't safe to stop. A testament to the 645D, you can even use it handheld from the passenger seat at 70 mph and get a useable photo
You're correct about my usual light and I agree that light in other locations can be remarkably different.
I live in the NE US, as do you. Our light typically is from cloudy skies with a dynamic range of + 2ev. OK, I'm exaggerating, but we just don't get the same skies (light) as the western states. In my travels, the most remarkable light I have seen is in New Zealand. Beautiful clouds, rain, dramatic light with crystal clear air.
Tom
I might add that my usual technique is not to shoot from a moving car either! It wasn't safe to stop. A testament to the 645D, you can even use it handheld from the passenger seat at 70 mph and get a useable photo
Swissblad
Well-known member
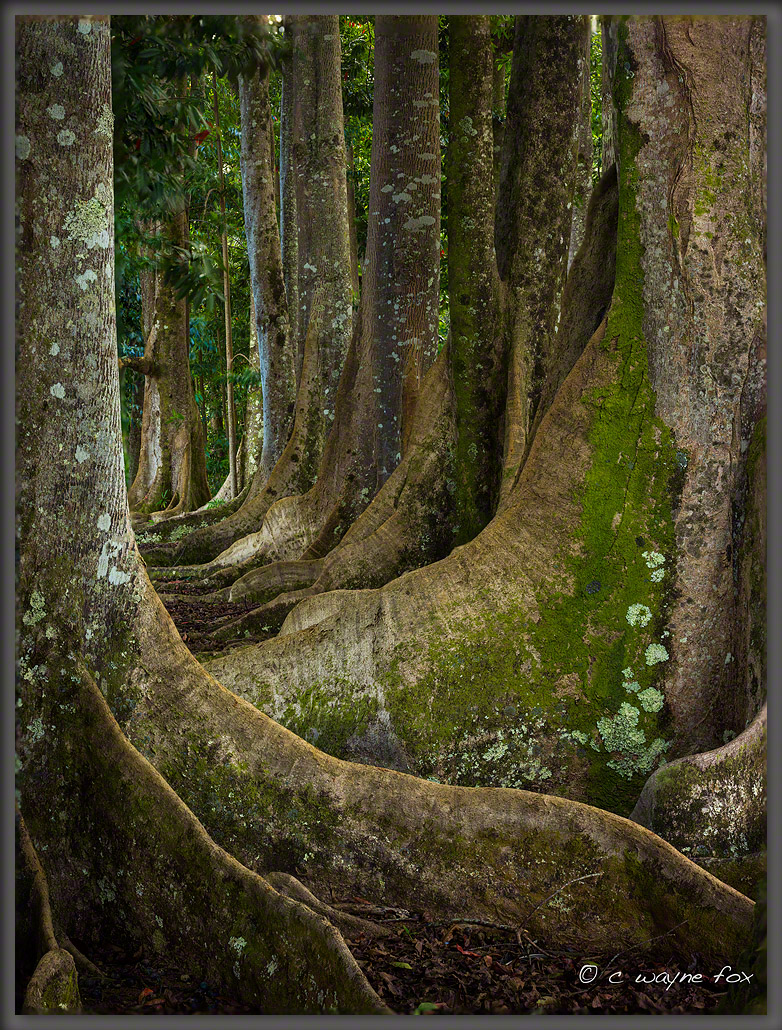
Great story and images - I really like "Reach" - need to learn more about the making process you used.Reach - Same trees as can be seen on the right side of Hang'n Out. Two shot hand blended HDR using masks. Tried processing this over and over again until I got to this. 35mm, ISO 100, 10sec and 2.5 sec, f/13 (should have used f/16 because near cliff rocks a bit soft).
johnnygoesdigital
New member
I have no political agenda. You seem to, but I have made a thread over in the Sunset Bar if you want to keep going...
Most photographers have a profound connection to the natural world - the luminescence cannot be ignored, it's what motivates us to document these precious landscapes to bring awareness or quiet introspection. Your input is not trivial, you're obviously very passionate about many things, we're artists, how can we not be?
I have no agenda. To form a conclusion about someone or something is not without fault, but instead, view their photography and their interpretation of their natural world because now we're speaking the same language.
Last edited:

GrahamWelland
Subscriber & Workshop Member
Nice - easy to forget just how good this stuff and perhaps more importantly has been for many years! Sure, an IQ back has better usability and features plus arguably even better DR but the backs have always been fabulous with color and tone.
I was considering selling my P25+ when I get my IQ260 but images like these remind me why I really shouldn't.
:thumbs:
I was considering selling my P25+ when I get my IQ260 but images like these remind me why I really shouldn't.
:thumbs:
GrahamWelland
Subscriber & Workshop Member
Thanks Swissblad.Great story and images - I really like "Reach" - need to learn more about the making process you used.
I'm learning this stuff and I'm no photoshop expert. Most of what I post, I'd like to change this or that or something. I think for example that Hang'n out is way overboard saturated. What was I thinking.
As for Reach, I used an exposure for the sky and let the trees go to silhouette. Then another that had the trees and rocks exposed well but the sky was completely washed out. I processed each in lightroom to get the best rendition for the sky in one and the foreground in the other. Then to photoshop.
Went; files - scripts - load files into stacks. This is where I had to do things over and over again. Remember, I'm no expert. I alternated between having one or the other on top and which one I would mask. Anyway, I used the channels pallet (window?) to use the blue channel to make the mask on the overexposed shot. The blue channel seemed to make the most restrictive mask. So, click on the channel you want (blue), then Load it - click the round circle of dots icon which loads the channel. Go to the Layers pallet (window?) and click on the little icon button on the bottom that will create a vector mask. There you go. When you get the marching ants you can control/command H to hide the ants. The selection is and will remain active so when your done, go control/command D to deselect. If you forget, it can screw you up. I set up my workspace to have both the layers pallet and the channels pallet open at the same time.
After masking and getting the two (or more) files together, then you can do your normal adjustments to finish processing your image.
I use Tony Kuyper's TK-Actions. Tony Kuyper Photography Very much worth trying. Sean Bagshaw has a set of videos that explains nicely how to use the actions. The Complete Guide to Luminosity Masks Also valuable is Ian Plants video series. Ian Plant Dreamscapes Nature Photography Workshops Books Instruction I have the tutorials and videos on my iPad and can access them as I'm working on a photo and get stuck. It's also nice away from the computer and if I have time I can review things wherever I'm at.
Hope I didn't make things more confusing. Again - remember - I'm no expert. I probably said things wrong, but I gave it a shot.
Good luck.
Rick
Thanks Graham. You're quite right about toning down the left side.Tone down the highlights on the left and this wonderful image could be a classic. I love the tonality and glow of the road against the ominous sky.
Very nice! :thumbs:
Tom
Swissblad
Well-known member
Thanks for the detailed reply, Rick.Hope I didn't make things more confusing. Again - remember - I'm no expert. I probably said things wrong, but I gave it a shot.
Good luck.
Rick
Will give it a try.
S
")
Cemal Emden
Active member
hasselblad h5, hts, 35 mm, 5 nd
Cemal Emden
Active member
hasselblad h5, hts, 35 mm
Swissblad
Well-known member
Lovely - would a larger view be possibleA stitched Pano, from a lookout on the way up to Remarkable's ski field Queenstown, NZ

Phase One 645DF+, IQ140, SK 80mm LS
Taken from the appropriately named Going to the Sun road through Glacier National Park
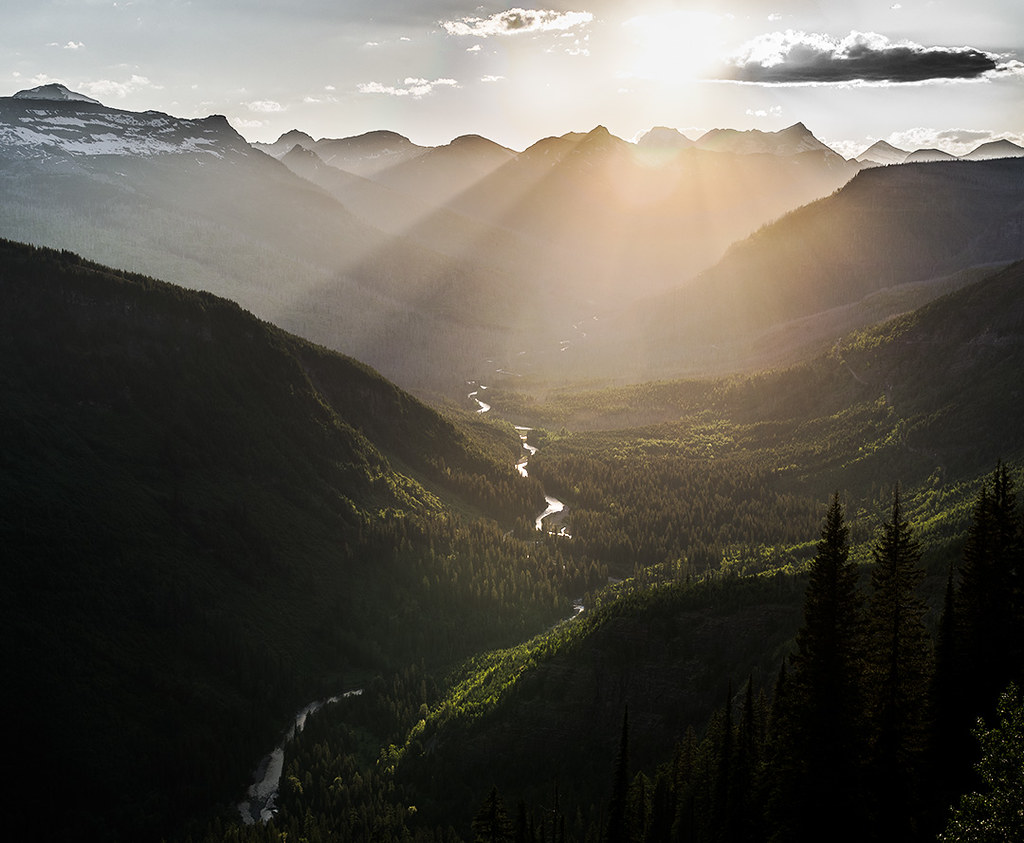
Untitled_HDR2 copy by tsjanik47, on Flickr
Untitled_HDR2 copy by tsjanik47, on Flickr
wentbackward
Member
Wayne, this is wonderful ... well frankly many shots in this thread are wonderful, this is even wonderfullerrer!
- Paul
wentbackward
Member
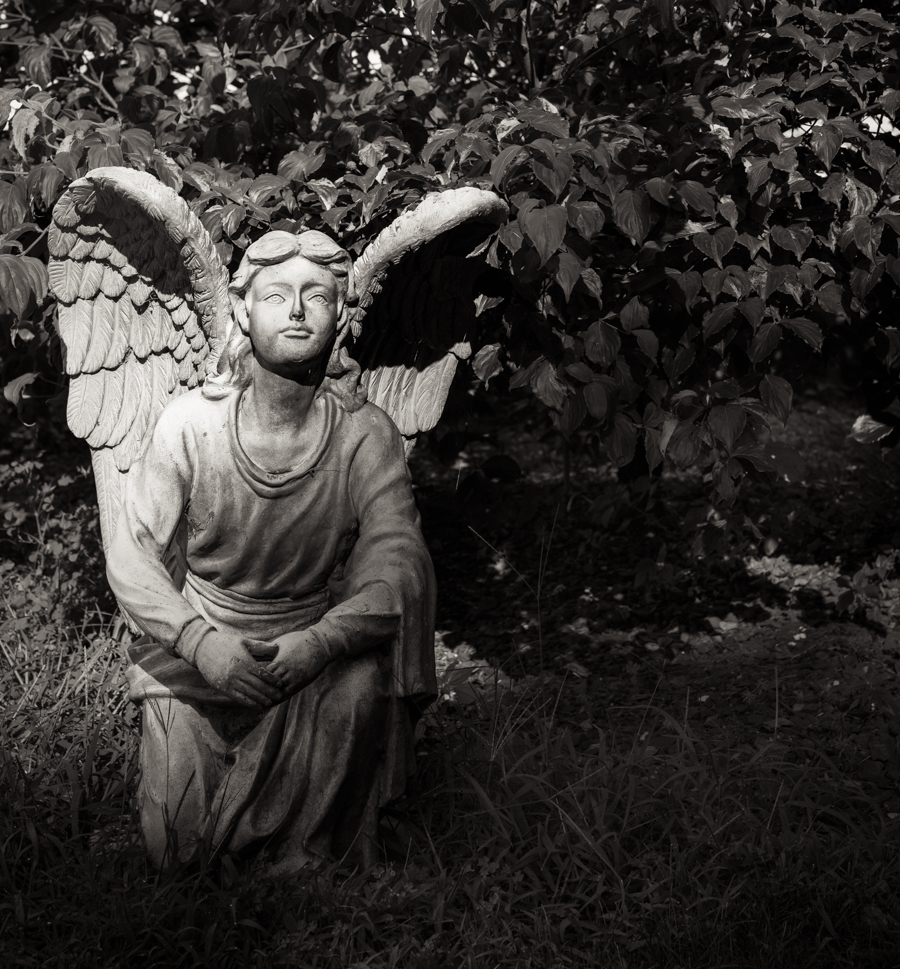
Another image that deserves more than a 'like'. So peaceful and serene.Achromatic 260, Techno, Rodi 90 (Galway, Ireland)
Woody Campbell
Workshop Member
Kind of ordinary. S2+70mm

Woody Campbell
Workshop Member
Ditto
- Status
- Not open for further replies.