The GetDPI Photography Forum

Great to see you here. Join our insightful photographic forum today and start tapping into a huge wealth of photographic knowledge. Completing our simple registration process will allow you to gain access to exclusive content, add your own topics and posts, share your work and connect with other members through your own private inbox! And don’t forget to say hi!

Technical camera Images before and after movements..Show us your images!!

aztwang

Member
I thought it would be very interesting to see the effects of movements in your images using your technical rigs. Please post at least 2 images , before and after and note your set up and amount of movement you felt necessary and why. This
should make for interesting conversations...especially for me who has no experience using a technical camera and would love to learn more.

Cheers

Don
 
Last edited:

dave.gt

Well-known member
Re: Technical camera Images before and after movements

I thought it would be very interesting to see the effects of movements in your images using your technical rigs. Please note your set up and amount of movement you felt necessary and why. This
should make for interesting conversations...especially for me who has no experience using a technical camera and would love to learn more.

Cheers

Don
Don,

This is s great idea! To me, at least, it is a mystery, and what better way to learn the way of tech cameras?:thumbup:
 

archivue

Active member
Re: Technical camera Images before and after movements

With my RM3D i'm shooting architecture most of the time... and most of the time tilt isn't an option.
So the camera is leveled, and i use shift to frame... that's it !


I thought it would be very interesting to see the effects of movements in your images using your technical rigs. Please note your set up and amount of movement you felt necessary and why. This
should make for interesting conversations...especially for me who has no experience using a technical camera and would love to learn more.

Cheers

Don
 

med

Active member
In my experience with a view camera shooting 4x5, using tilt affects the focus significantly enough that you need to adjust focus/tilt numerous time to obtain the results that I want on the groundglass, however the tilt mechanism on my view camera is not "on axis".

With an on axis tilt mechanism such as the Arca tech cameras, is it possible to use tilt without the back and forth focusing that I'm used to, without the use of good live view or a ground glass/sliding back? I suppose just like calibrating infinity/hyperfocal, you can do some calibration at certain apertures/tilt amounts so you "know" where focus lies, even with tilt applied, although I suppose rise/fall could affect this.

Or do you just shoot, review, adjust, rinse, repeat, until you have the results you are looking for?

I ask because I have an older 22MP back that has pretty much useless focus reviewing capabilities. Shooting tethered is the only reliable way to check focus, and doing tethered in the field requires a laptop and a power source for the back which is not really an option in most cases.
Quoting myself as I think I answered my own question... I think I thought tilts with systems like the RM3di were in fact yaw free, but it doesn't look like they are (although they are close with wide angles) so either ground glass, live view, or shoot/adjust/adjust/repeat is necessary for judging focus on tilts properly.
 

TimG

Member
I also spent the best part of 8 years shooting 5x4 on a Linhof technikarden, now I use a Cambo WRS 5000 with an IQ260 with T/S lenses,

You're asking the very same question I had before I bought my kit - exactly how does the focusing work, like you say - with my 5x4 kit, I'd be under the hood, rolling the focus back and forth, with my right hand on the tilt - adjusting both at once, with the loupe pressed against the groundglass, until I thought it was just right.

When I got my WRS I thought I'd use the groundglass - the reality is that it's so small I just don't bother.

Because the lenses are in helical focussing mounts, I know from practise that if I set my rodenstock 32 to infinity and apply around 1 degree of front tilt, maybe 0.5 or 1.5 depending on tripod height, I don't need to check anything - the images will be deadly sharp, occasionally I'll apply some swing, occasionally I'll take a couple of test shots to make sure everything is perfect, but generally - I've never needed to spend ages focussing,

Sometimes I do use live view, (which sucks on the IQ260) but I normally just use it quickly to check composition with things like rise and fall, never for focus - to be honest when I tried an IQ250 with great live view I didn't use it for focus.

Or do you just shoot, review, adjust, rinse, repeat, until you have the results you are looking for?

I ask because I have an older 22MP back that has pretty much useless focus reviewing capabilities. Shooting tethered is the only reliable way to check focus, and doing tethered in the field requires a laptop and a power source for the back which is not really an option in most cases.
 

Jack

Sr. Administrator
Staff member
Here's a link to a post from a few years ago where I tested the then "new" Cambo TS mounted lenses: https://www.getdpi.com/forum/digita...w-rs-rodenstock-40mm-hr-digaron-ts-mount.html

Here is a copy of the review itself. I think it shows how beneficial rise/fall and BOTH tilt and swing together can be (PS: This was done with a P65+ back.) :

Thanks to our good friends at Capture Integration, I was able to borrow their Cambo W-RS tech camera with a Rodenstock Digaron HR lens mounted in a Cambo TS lensmount for a quick field test.

Some background. I have avoided investing in a tech camera kit since one of the main features I wanted was separate tilts and swings up front with rise, fall and shifts at the back, and only recently has that option become (readily) available. Sinar released the Arctech about a year ago, and to date I have not been able to even look at one, though I understand there are a few floating around. Arca recently introduced their RM3D tech camera that incorporates a front standard tilt with rear rise/fall and shifts, all while using a dedicated focusing helical on the camera for all lenses. Without going into laborious detail, both of the aforementioned solutions will accomodate my desires, but if I understand their operation correctly, require some added camera gymnastics to get a combination of swing, tilt, rise and focus at the same time. For me, that trio is an often desired combination of movements when photographing three-dimensional subjects with broad near-far subject distances. Which brings me to the main feature that intrigued me about Cambo's TS lensmount solution -- it allows separate tilt and swing adjustments up front on the lens axis while allowing rise, fall and shifts at the rear. (There are a few excellent view camera choices which offer all of these movements, even independently at both ends, which is an obvious advantage for precise adjustments. However a view camera makes for a significantly larger package to transport, is more complicated to set up and use, and is virtually impossible to use hand-held, so I leave them out of the tech camera discussion.)

So armed with the Cambo and 40 HR, I mounted my P65+ back and set out to photograph a decent test subject. In this case, an old passenger train car. I'm going to get straight to picture examples showing results, and leave out all the preparatory discussion on how to use a tech or view camera. While the how-to portion is a worthwhile discussion, it's lengthy, and most folks considering a tech camera purchase will already know the basics of working them. For those of you who don't, you'll hopefully at least be able to see why a camera with movements is worth considering.

Here's the "normal" shot. For this one, the Cambo is leveled and zeroed, meaning no movements of any kind have been made:


The first problem we note is my shadow is in the image, which is an absolute no-no. So the first movement I make is rise, or back fall. Here I used 5mm rise, and note it has the effect of moving the camera to a shooting position several feet higher -- note that the camera has not moved at all, the only adjustment is 5mm of rise:


Note that my shadow is gone, and I have more room over the train car, all good things. The three red squares indicate where I'll be pulling crops from. The far left is the "near" subject point, the center is the "focus" point and the far right is the "far" subject point. Our goal is to get all of them into acceptable focus. I shot all of these frame at f10 as that is near the ideal performance aperture for the lens before diffraction starts deteriorating the fine detail. Here are the crops from the frame with no tilts or swings and only the 5mm rise:

First the focus area, and as you can see we have good focus:


Next the far end, and you can see we are well out of focus, having run out of DoF:


Finally the near end -- and note it is in good focus as well. This is because it happens to lie in the same plane as my main focus area:


Next let's take a look at what happens when I add one degree of swing toward the train car. (Note that from years of experience of shooting Large Format view cameras and tilt-shift lenses, I have a pretty good idea how much tilt or or swing I am likely to need to solve most problems, so I had a good idea where to start for this one.) Anyway, as you can see, focus has clearly improved over the frame above, though still a bit soft for my tastes:


Now for the near zone. Unfortunately our swing has moved the plane of focus closer to the camera at this side of the frame and now our near end is seriously out of focus:


Here is where the "magic" of having tilts and swings comes into play. Let's take a look at what happens to the image when I now add one degree of forward tilt while keeping the one degree of swing.

First the far end. Wow, pretty darn sharp!:


But what about our near end? Well, presto, it popped back significantly too. Not perfect, but all-in-all a very good compromise IMO:


Note that I also took a set using 1/2 degree of tilt and 1/2 degree of swing. This combination ended up favoring the near end slightly at the expense of a slightly softer far end, for roughly the same final result. I opted for this version as it worked best for the entire side of the car, keeping critically sharp along it's entire length, which I felt was the more important subject. As with most things, there are compromises, and it's physically impossible to render all points on a three-dimensional subject in perfect focus on a two-dimensional sensor. But at least with some minor camera movements, we can get a lot closer than we can without them.
 

dchew

Well-known member
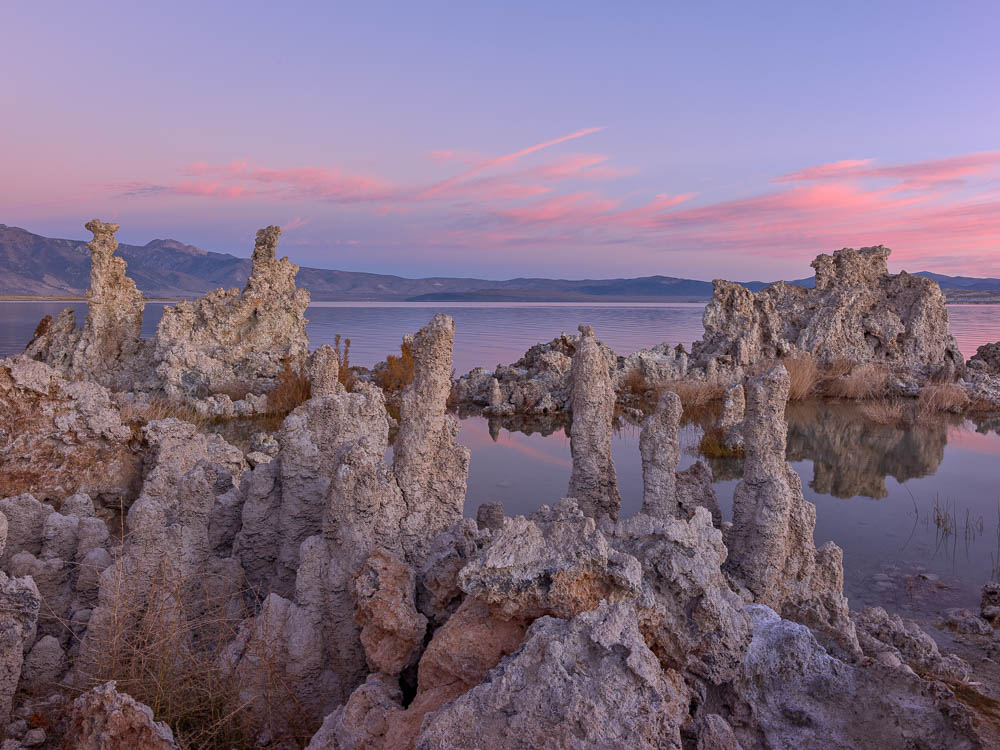
I will try to show the less obvious effect in landscape images. These are not direct comparisons but hopefully highlight a difference.

First, an image with the camera pointing down. Rodi 40hr on a 54x40 format. You can see the tufa distortions.


Next, straightened in LR. It fixes the distortions, but I still get the impression of looking down into the tufas, especially in the lower left.


Here is a different position, but the same general area and same lens/back combo. Camera level, back rise used instead of pointing the camera down. This perspective seems more natural to me.


One thing I will never know: is that perception just me because I was there, or is the "viewing down" still noticeable to others even after the vertical transformation in LR?

Dave
 

algrove

Well-known member
Dave
Been to Mono Lake many times. I have no problem with your LR corrected file. But perhaps I am not picky enough with my own images.
 

photographist

New member
If I understand your question correctly, yes, I 'feel' it too. Images 1 & 2 give me an uneasy gut feeling. The feeling does seem to be focused around what my 'visual inner ear' tells me should be vertical with the tufas.
The 3rd image feels like a natural perspective where as the first two feel like a wide angle lens angled somewhat down (as you described they are :) ). However, I'm used to looking for perspective 'issues' so like you, it could simply be my experiences showing through.

I will try to show the less obvious effect in landscape images. These are not direct comparisons but hopefully highlight a difference.

First, an image with the camera pointing down. Rodi 40hr on a 54x40 format. You can see the tufa distortions.


Next, straightened in LR. It fixes the distortions, but I still get the impression of looking down into the tufas, especially in the lower left.


Here is a different position, but the same general area and same lens/back combo. Camera level, back rise used instead of pointing the camera down. This perspective seems more natural to me.


One thing I will never know: is that perception just me because I was there, or is the "viewing down" still noticeable to others even after the vertical transformation in LR?

Dave
 

dchew

Well-known member
Yes that’s right, focus near tilt far. Then back and forth a few times. I usually cheat: focus close, tilt far until it almost comes into focus but not quite. Then go back close and usually you will rack focus out a bit to get the foreground sharp again with the tilt you now have dialed in. Then the far point usually comes in almost perfect.

Dave
 

Frankly

New member
I'm only a film photographer but have lots of experience with movements. Outside of studio product shot or direct architectural assignments (i.e. shoot the building like a product shot) it always struck me that there were few interesting shots that cried out for swings or tilts at all. Because unless you were photographing completely bland horizon line landscapes with nothing but pebbles in the foreground, any tilt would adversely affect focus of any near foreground object not in the plane. Likewise for swings if you dare show any foreground on the opposite side of the image.

If you look at a student's work with tilt and see a crisp sharp foreground and a nice sharp horizon... look up at the blurry clouds in the sky! hahaha No free lunch!

What is invaluable is rise/fall and shift vertical and horizontal movements. No drawbacks until the lens vignettes or softens.

Later on in my career, free from assignments or impressing gullible art directors, I used a simplified camera with limited movements and never missed a beat.

If you read between the lines in Ansel Adams, "The Camera" you can tell that he set out to find subjects (at great pain) to use as camera demonstration examples, not art pieces. I bet if he were left to his own devices he probably rarely used any tilt or swing with his landscapes. (They didn't call themselves the f/64 Group for nothing.)

The other point, in case you're new, is that the wider the lens, the more you range you'll need of shift and rise/fall. With a longer lens a little smidge goes a long way (or just cheat).
 
Last edited:

Frankly

New member
With an on axis tilt mechanism such as the Arca tech cameras, is it possible to use tilt without the back and forth focusing that I'm used to, without the use of good live view or a ground glass/sliding back? I suppose just like calibrating infinity/hyperfocal, you can do some calibration at certain apertures/tilt amounts so you "know" where focus lies, even with tilt applied, although I suppose rise/fall could affect this.
If the thing you want to focus on happens to also be in the center of the frame then a center tilt shouldn't change the focus in the middle of the frame. You still have to check focus in the foreground to see how much to tilt. I wouldn't "guess".

Also the presence of a detent or any kind of mechanical slop (and we need some in order for things to move) could change that center focus point between being loose and locked down.
 

ndwgolf

Active member
Yes that’s right, focus near tilt far. Then back and forth a few times. I usually cheat: focus close, tilt far until it almost comes into focus but not quite. Then go back close and usually you will rack focus out a bit to get the foreground sharp again with the tilt you now have dialed in. Then the far point usually comes in almost perfect.

Dave
Thanks Dave........I will try that.

To be honest in the past I have tried to do this after watching youtube videos but to my eye I have found it very difficult to get it right especially when photographing something up close like a flower using my 360mm lens where you want both the front petals sharp and also the rear petals sharp.....in the end I have given up and just got the middle sharp and then shot at f64

Maybe for a landscape it is not quite so difficult

Neil
 
Top