Guy Mancuso
Administrator, Instructor
Hello everyone wanted to update everyone on a new lens that I just got the other day for my Sony A7RII. This is in a Canon mount with a Metabones IV T adapter running firmware version .44. After some help from members I have the proper firmware that works with this lens. Version .45 did not work as Metabones latest version as when you turn the camera off and restart camera the lens aperture would not reopen to full aperture so you either have to wait 30 seconds or release lens twist a little off and watch the lens reopen. So going back to Version .44 you do not run into that issue. Also pointing out as Metabones does on there website you are a little limited in functionality running Cannon lenses on Sony bodies. No Eye AF, No Expanded Flexible Spot, No Zone area nor Lock on AF. As time goes on we hope to see some of these functions available. But we can use both AF-S and AF-C shooting modes. So that is where we stand with the Adapters from Metabones at this time.
Lets talk a little about the lens itself. Immediately the lens is of high build quality, carries a 67mm Filter thread and has the traditional manual focusing. Tamron apparently came out with this new line called SP Special Edition to compete with Sigma Art series. And with build quality and lens construction they did a super job of doing that. Manual focusing the lens is a dream and very easy on our A7 series cams. AF is very nice with the Metabones adapter, Its very accurate but its not the fastest AF we have seen in native glass. I would like to say it is deliberate than fast. It gets you there and in low light works very nice. But do not expect lightning focusing as you would get with like our Batis line or Native 55mm 1.8. Im sure if I put this lens on a Canon body it might just be faster.
It does have both a AF/Manual switch on the lens and to go between them you use the switch on the lens and not the body to get to either mode. So if your shooting AF-S and you want manual use the lens switch.
It also has VC on/off switch. Now as i understand this the Steady shot in camera is on like normal ( switch is greyed out) and you control on the lens with VC on it goes to lens stabilization . I suggest you do not do that as it does eat batteries faster than you can run water but go with in camera stabilization as its much better system anyway and does not eat batteries as fast. So turn that switch OFF on the lens.
I will talk more of the lens as we go along .
But I did want to talk about 35mm lenses for Sonys in native mount. We have three the Sony 35mm 2.8, Sony 35mm 1.4 and Loxia 35mm F2. All nice lenses in there own way. I never had good luck with the 35mm 2.8, the Loxia 35mm F2 is manual focus only although very nice lens. The Sony 35mm 1.4 is a lovely lens but big and heavy. Im after a lens more like my Batis 25mm F2 so I am hoping either Sony or Zeiss makes that but in the meantime I may keep this lens as it looks very good from these test. Actually for a 600 dollar lens it outperforms its price tag IMHO.
So lets get going on the lens test. One issue I had was Tripod , I let my daughter take my car overnight with my RRS tripod in it. Well that was not fun, I used a tripod that you would buy at Walmart for 60 bucks. Cheap cheap cheap did I say cheap. Anyway to compensate for it i bumped my shutter delay to 5 seconds so i made sure the camera got to rest before firing. PITA to work with. LOL
So this is my normal place and procedure to running lens test. Folks I'm not shooting ART here. Boring images no question. LOL
I use this area for every lens test I have done for several years. Why its perfect and I know what to look for every time and I have a great memory of the lenses I shot here so a great mental comparison for me.
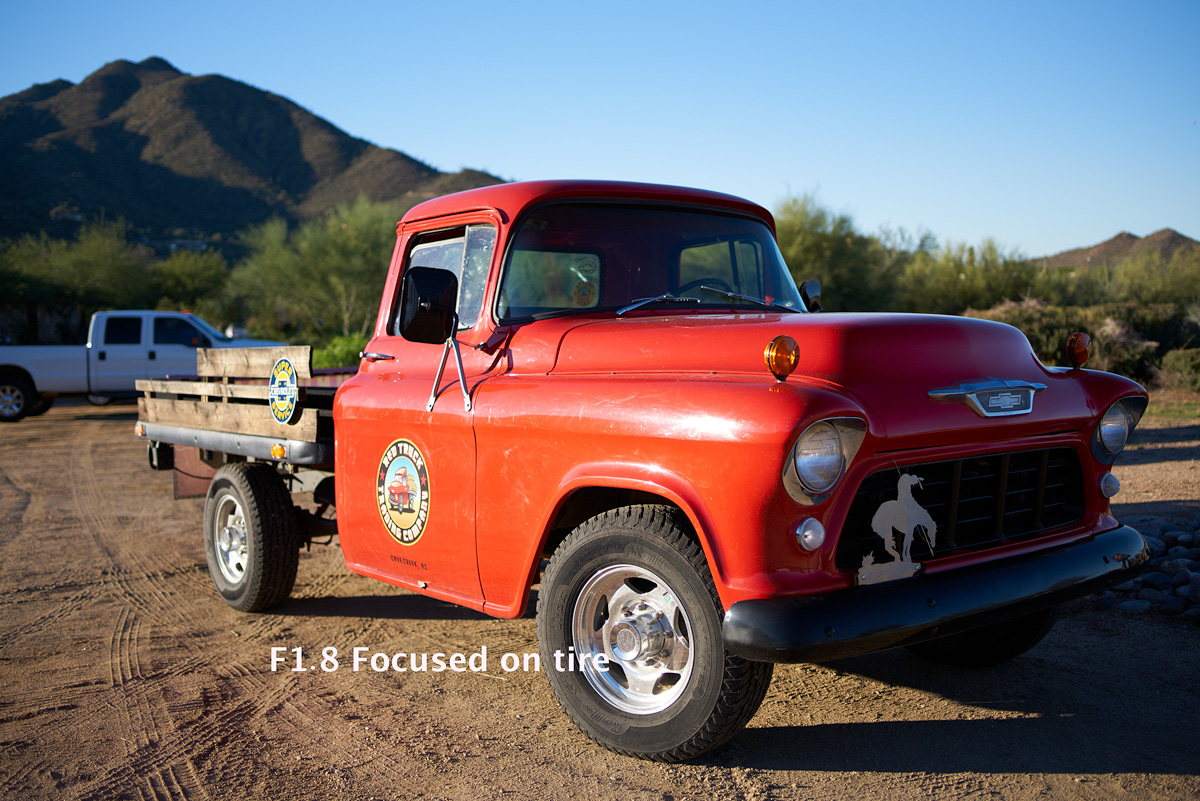
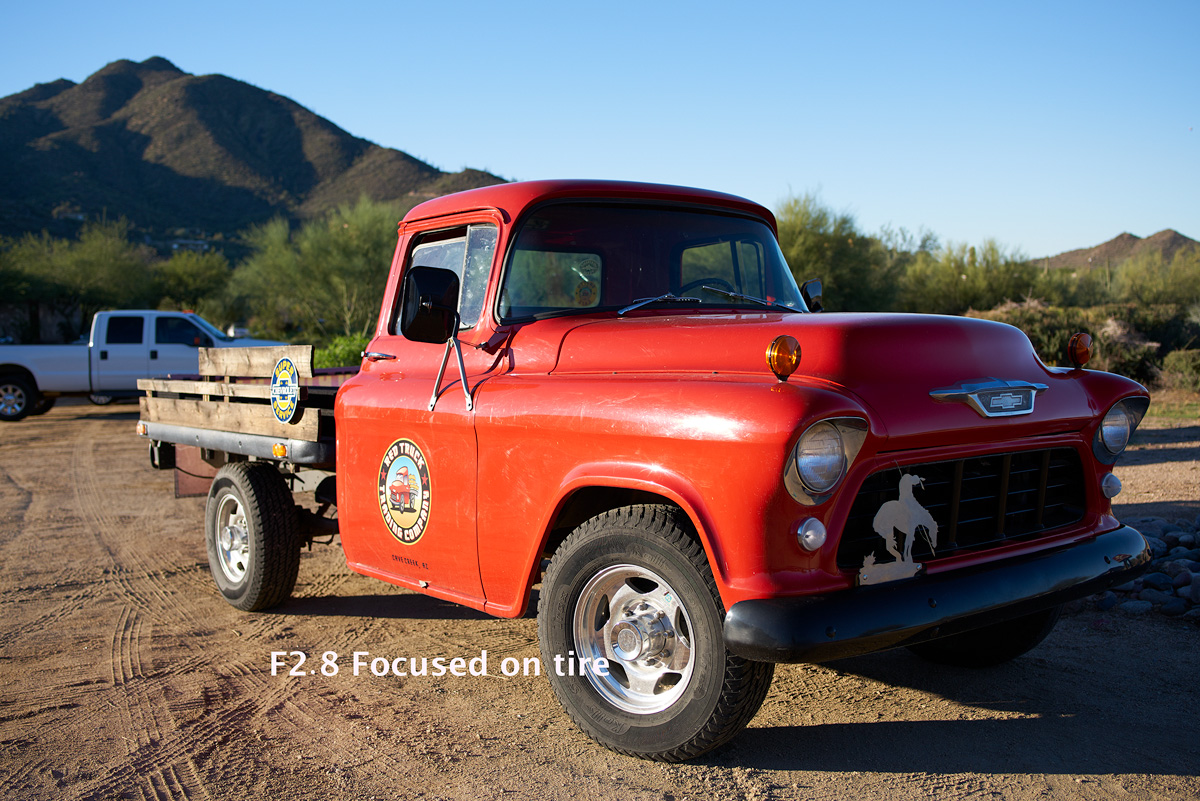
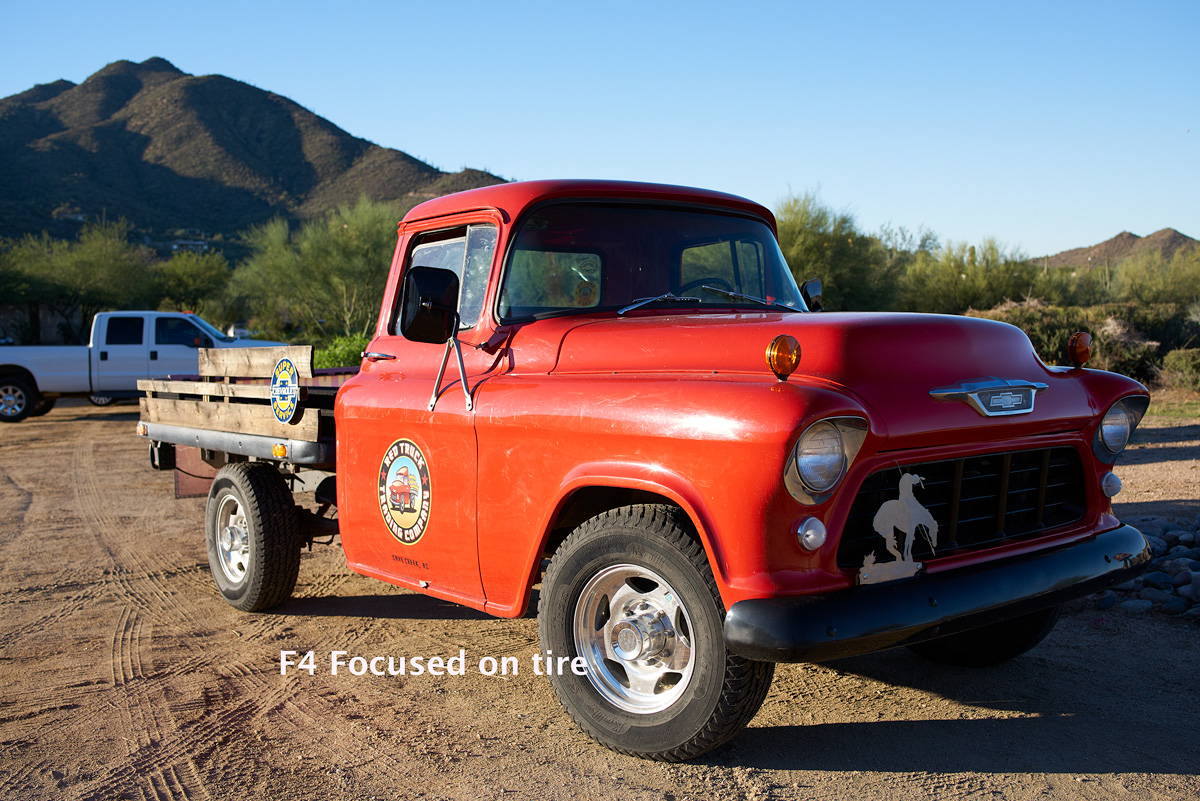
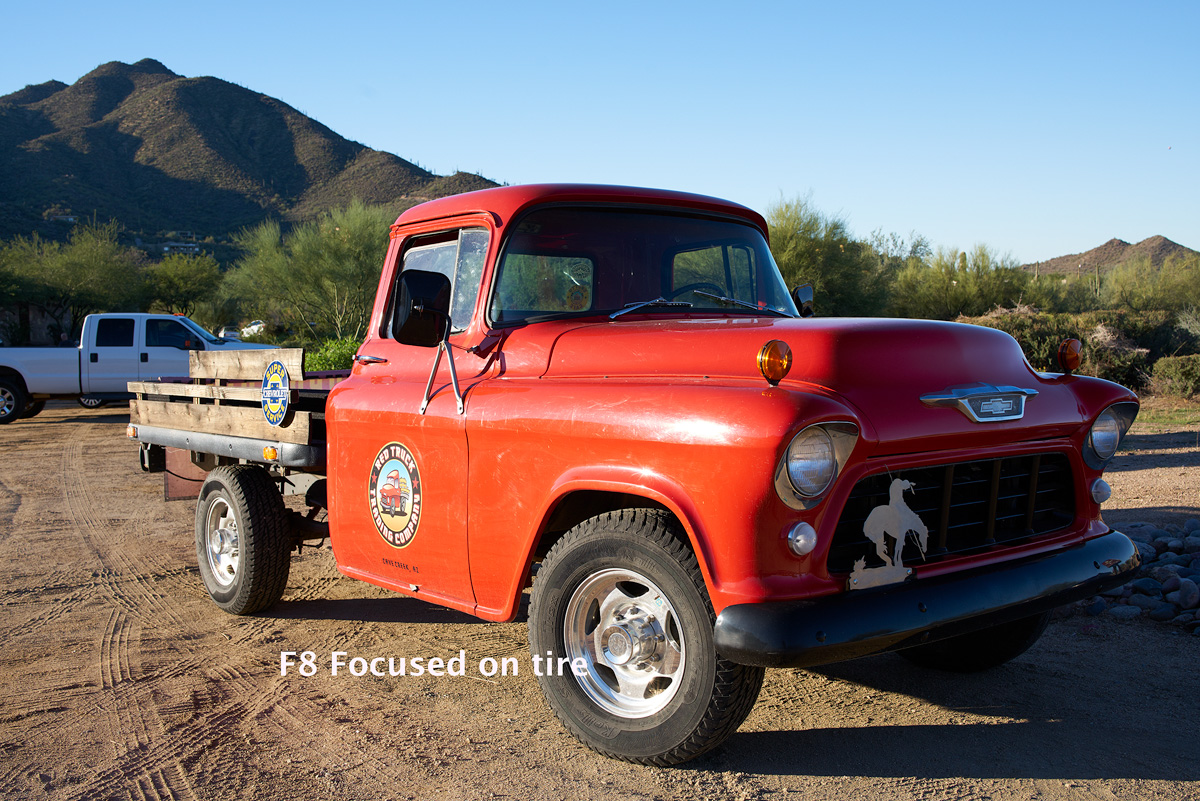
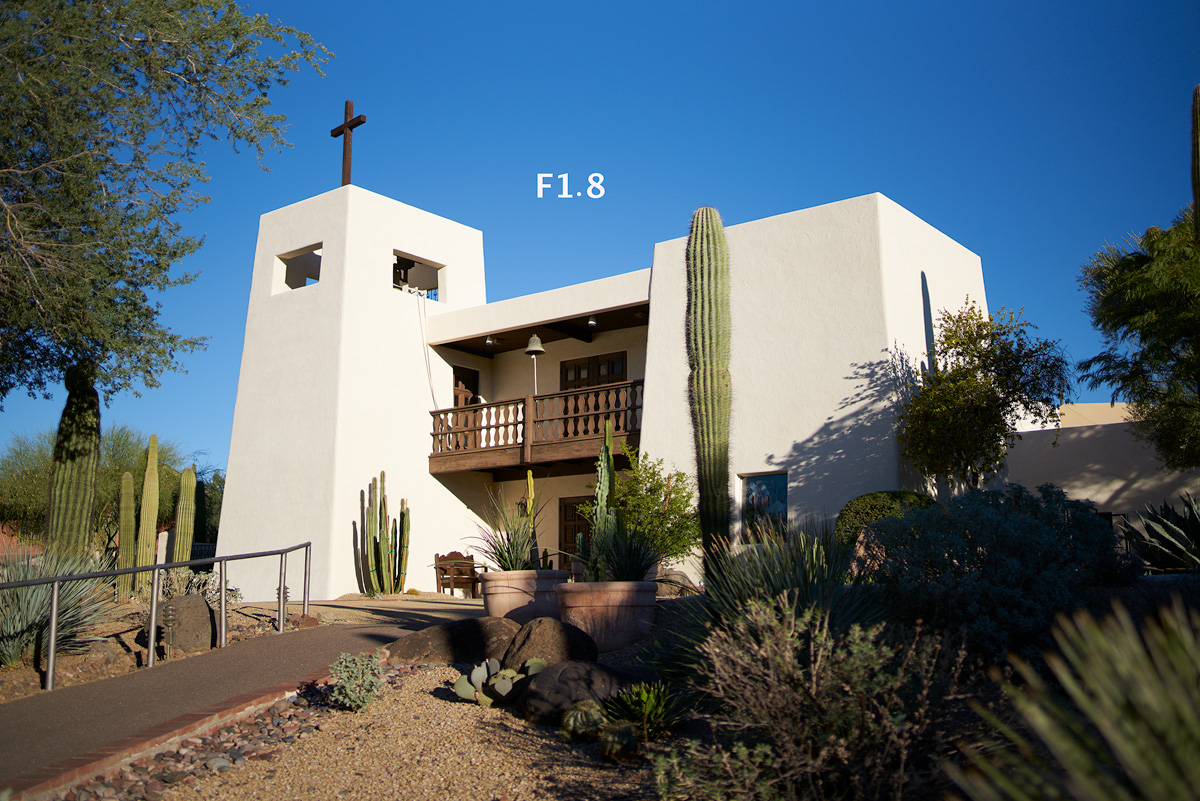
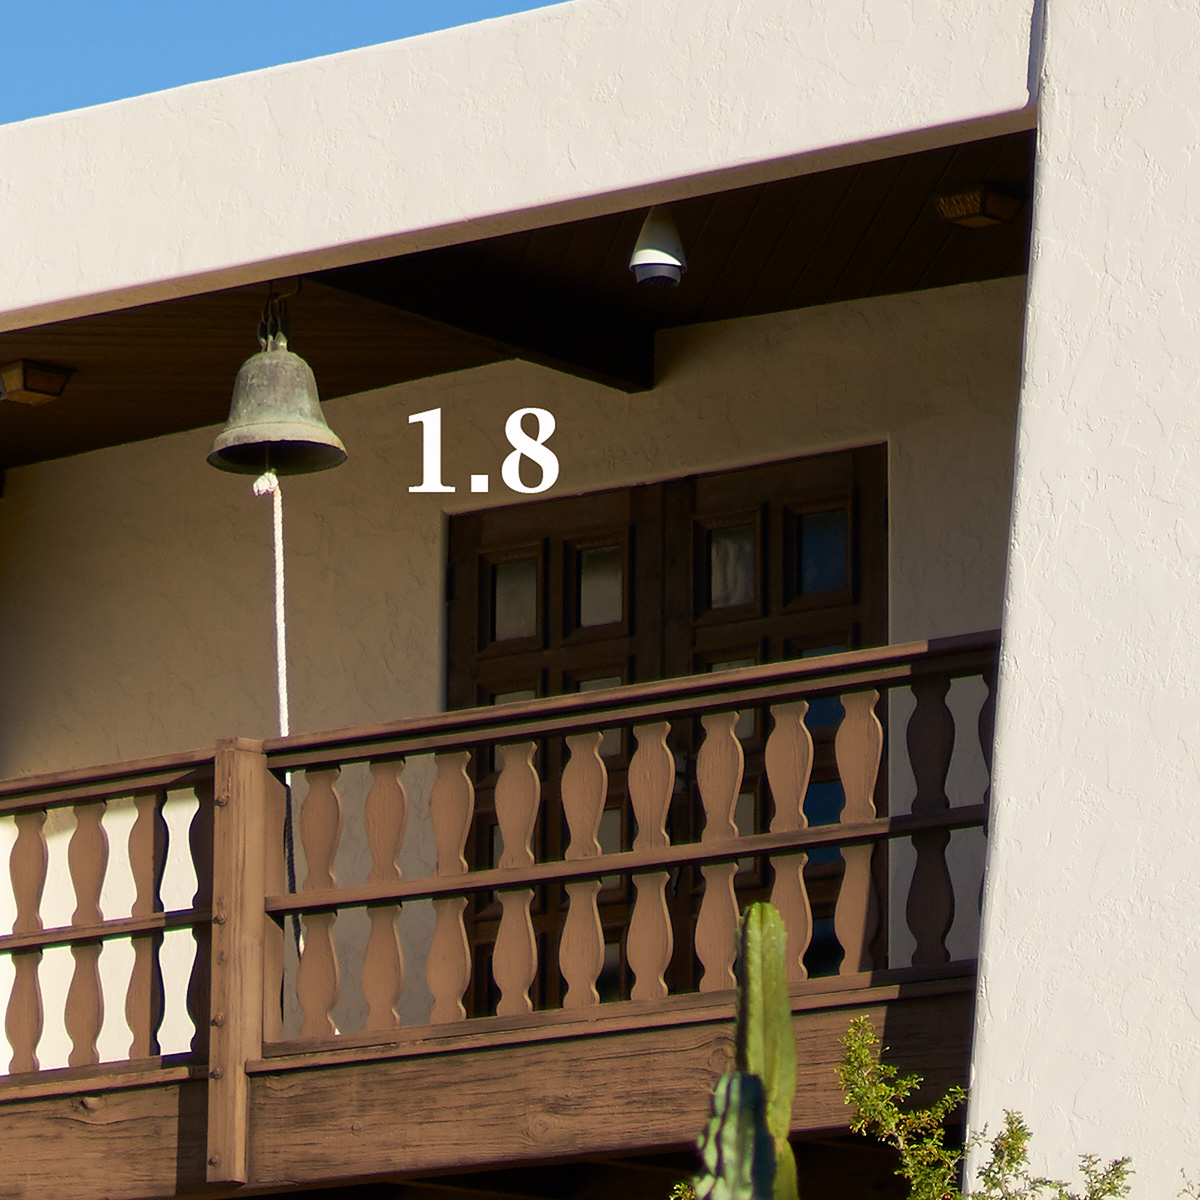
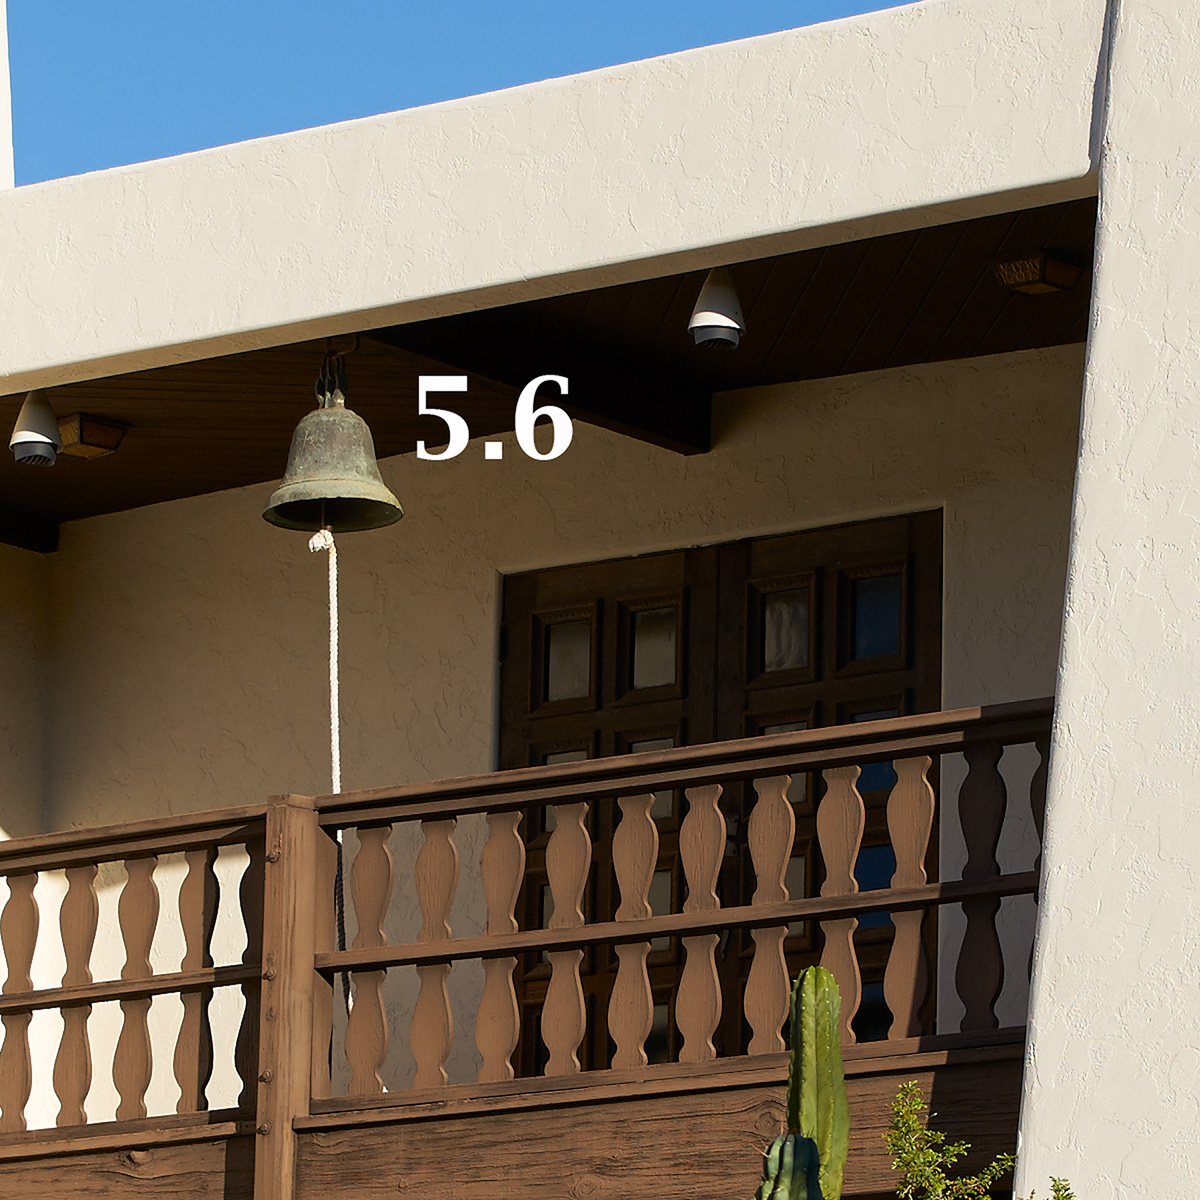
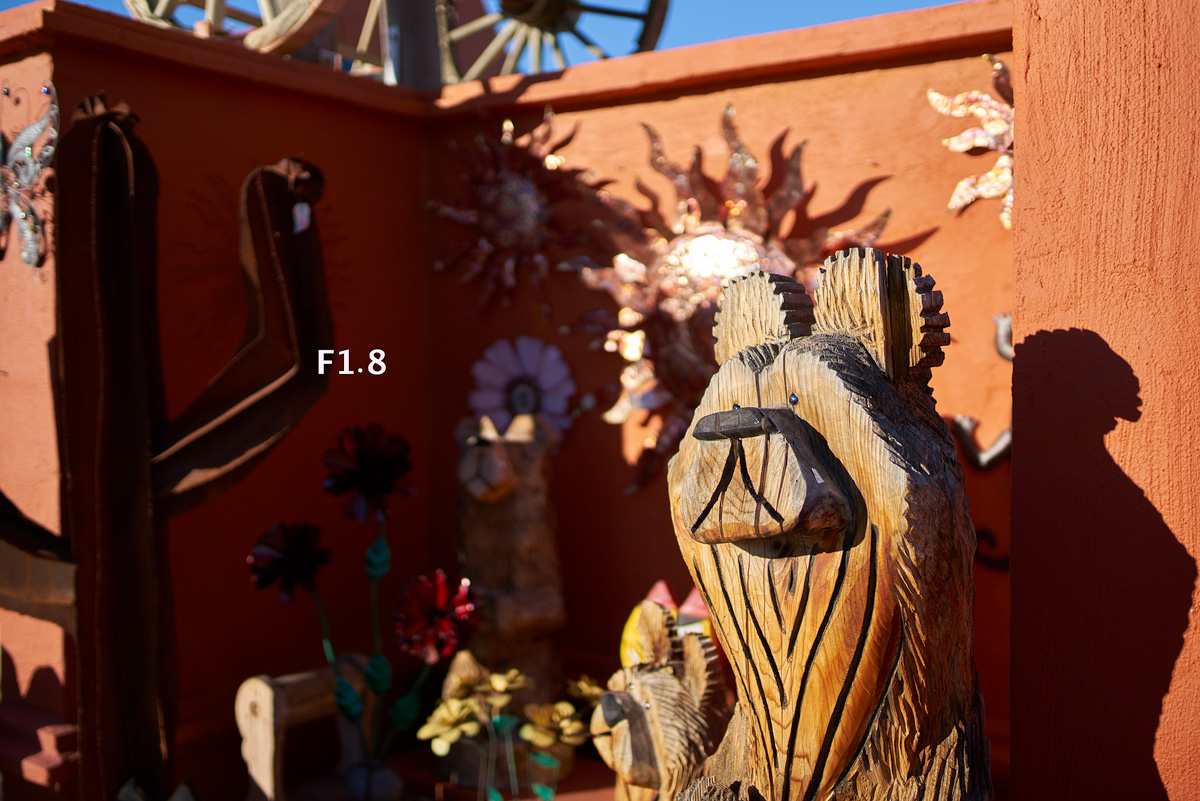
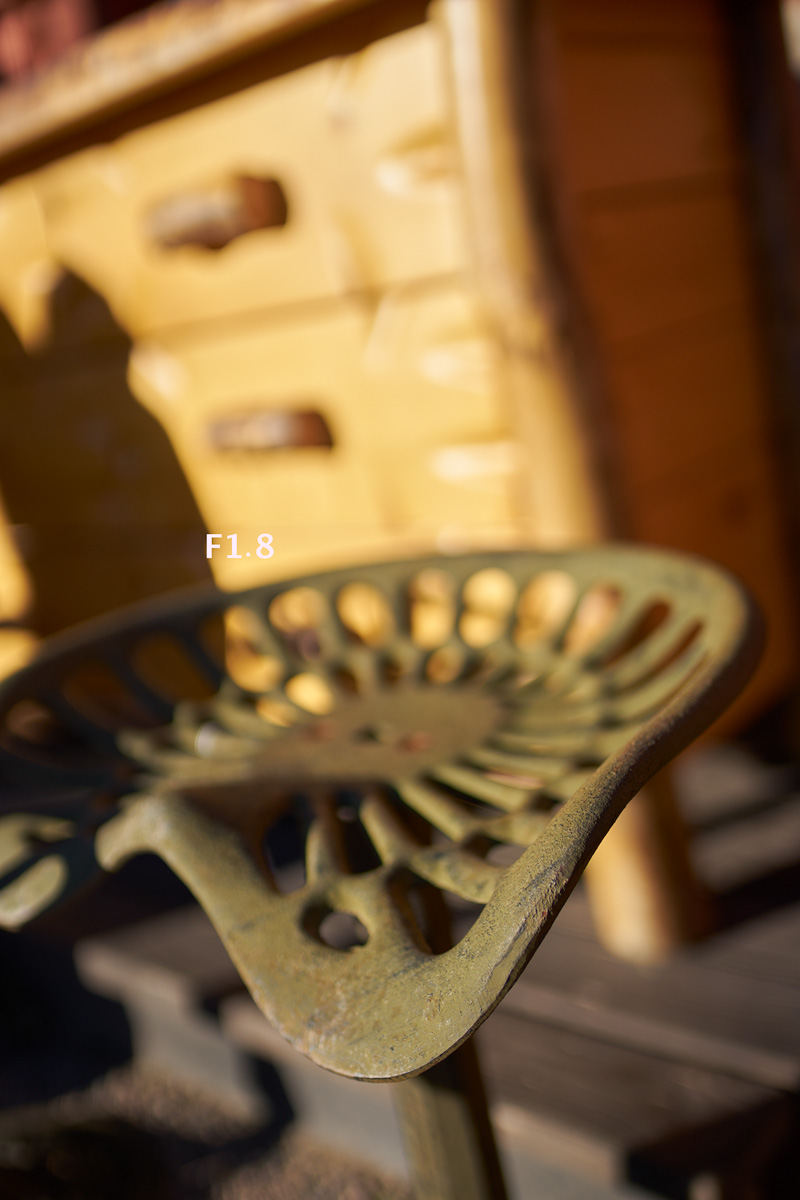
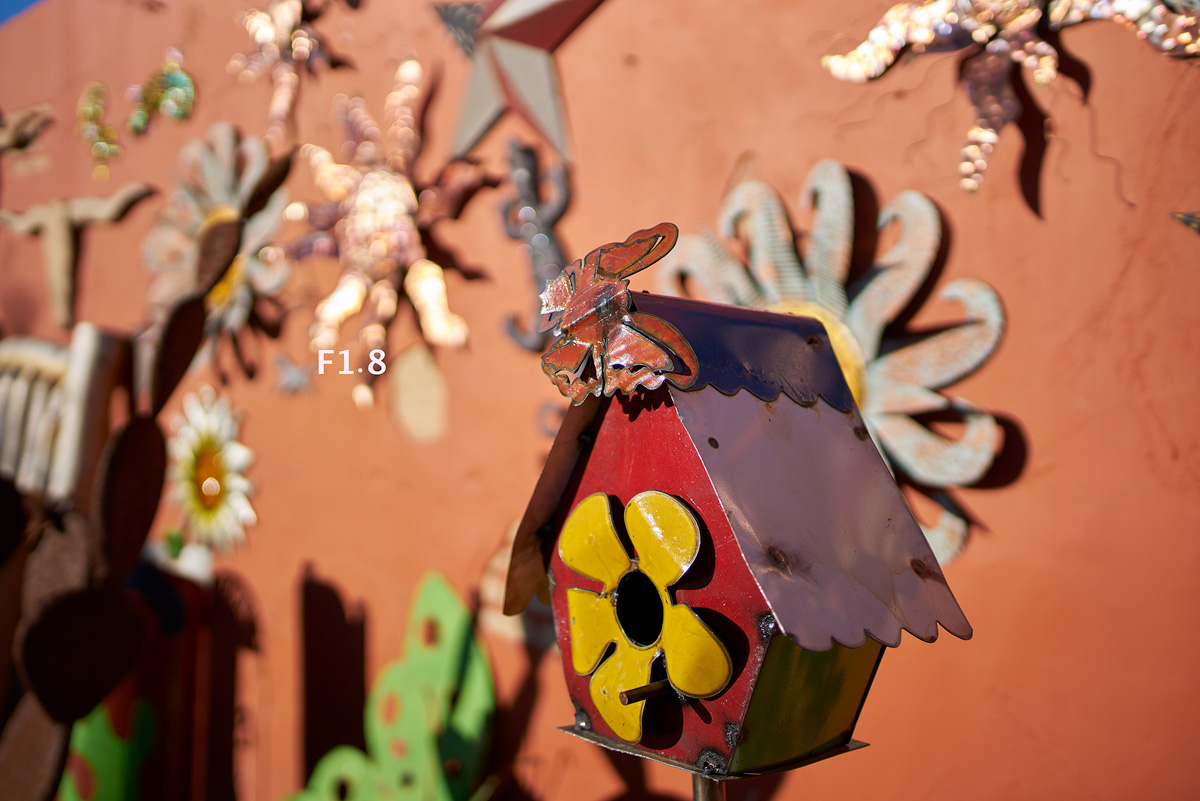
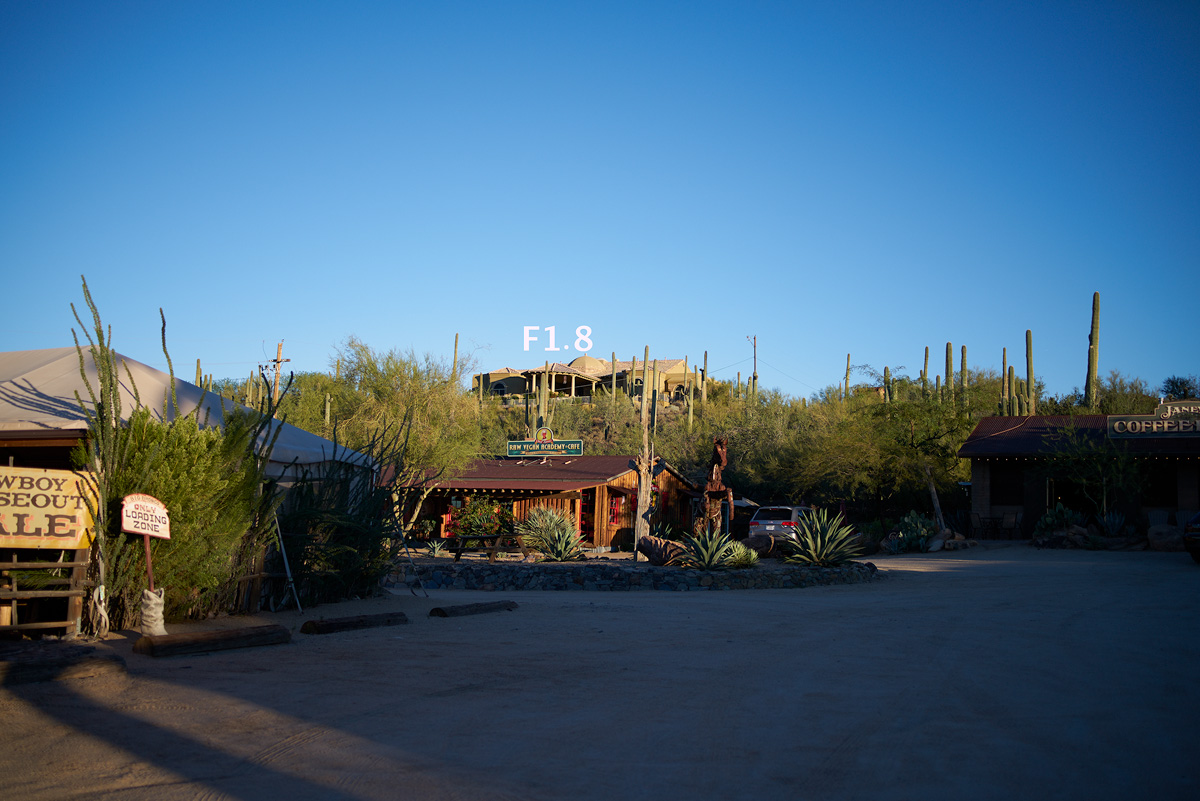
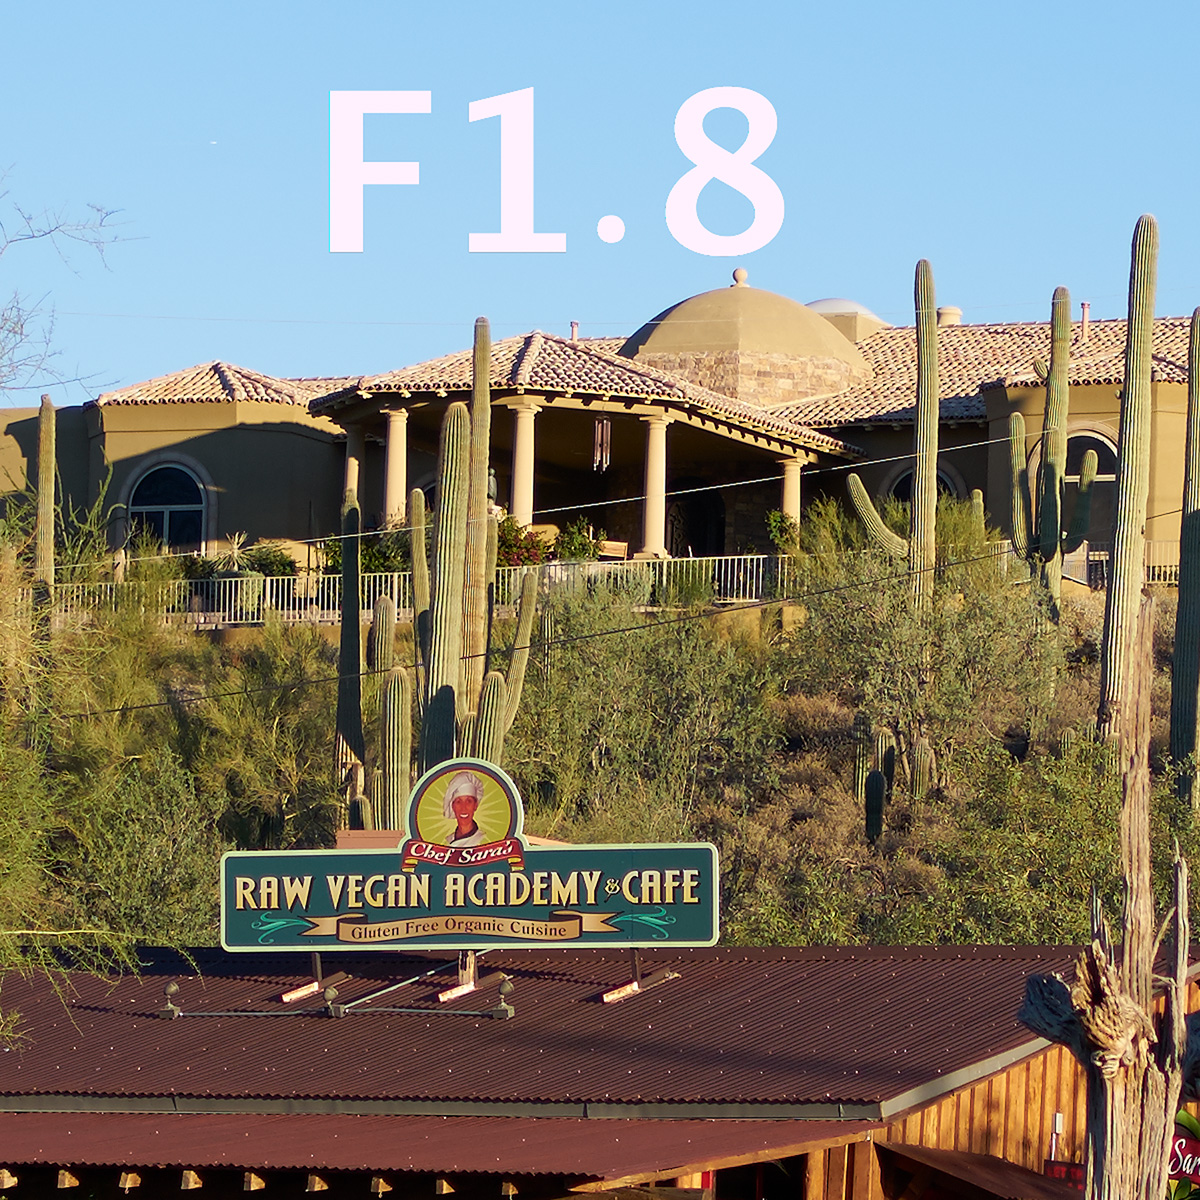
Lets start with central sharpness. This test is the first of the day as the sun came up , yes it has that morning glow and color. I do not WB any of this and really the only thing I do in Capture One is add a base sharpening to the whole lot . My settings are 290,.5,.5 and I will go in and adjust exposure as needed.
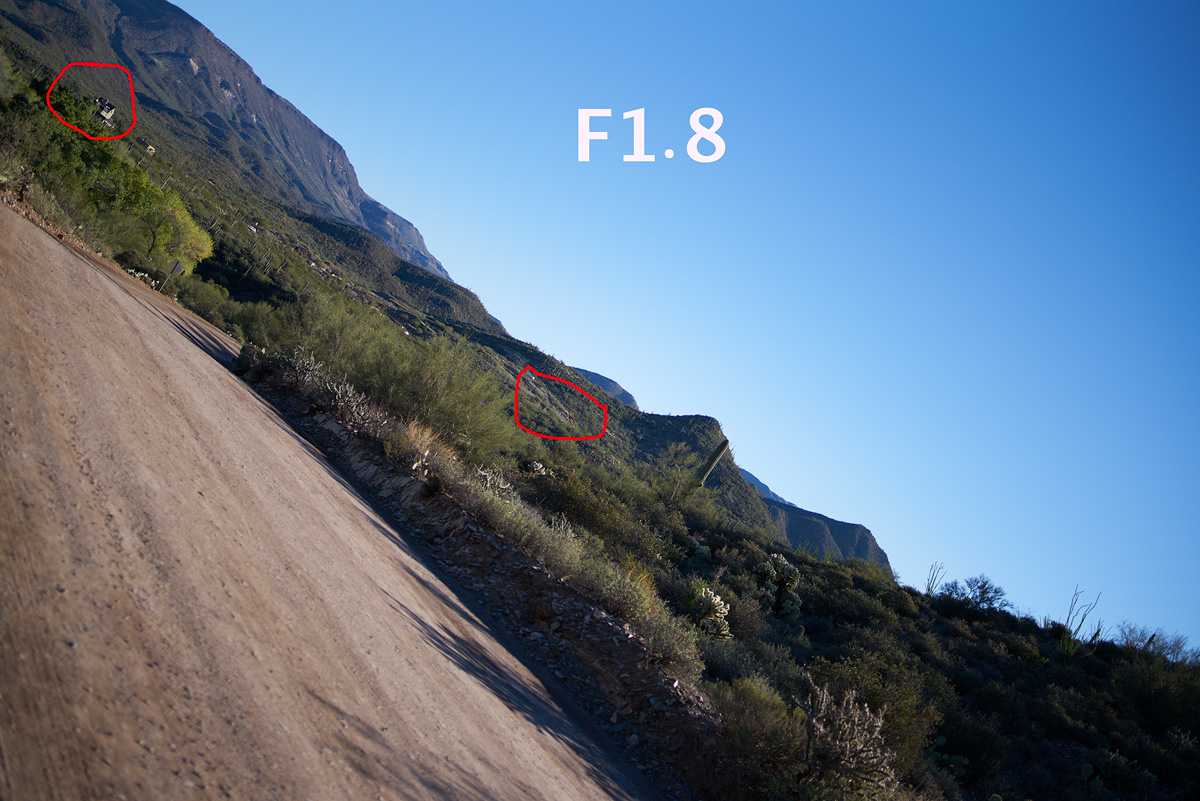
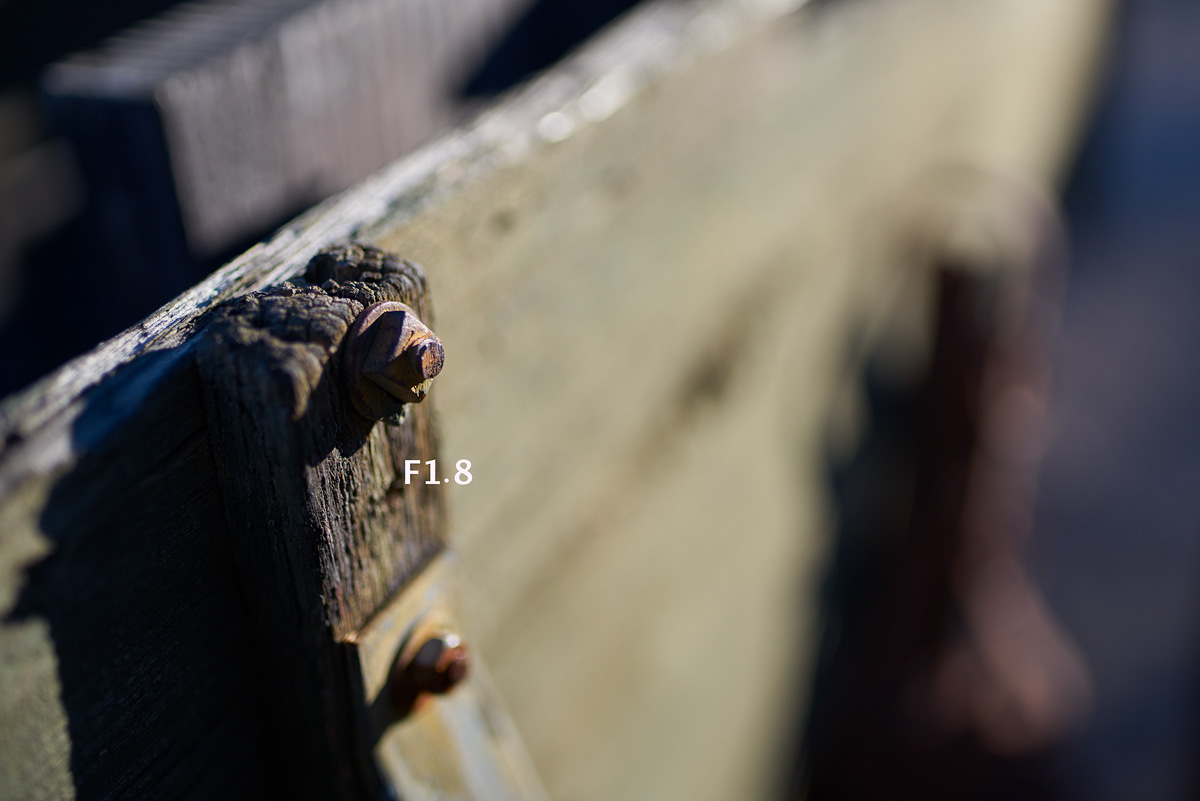
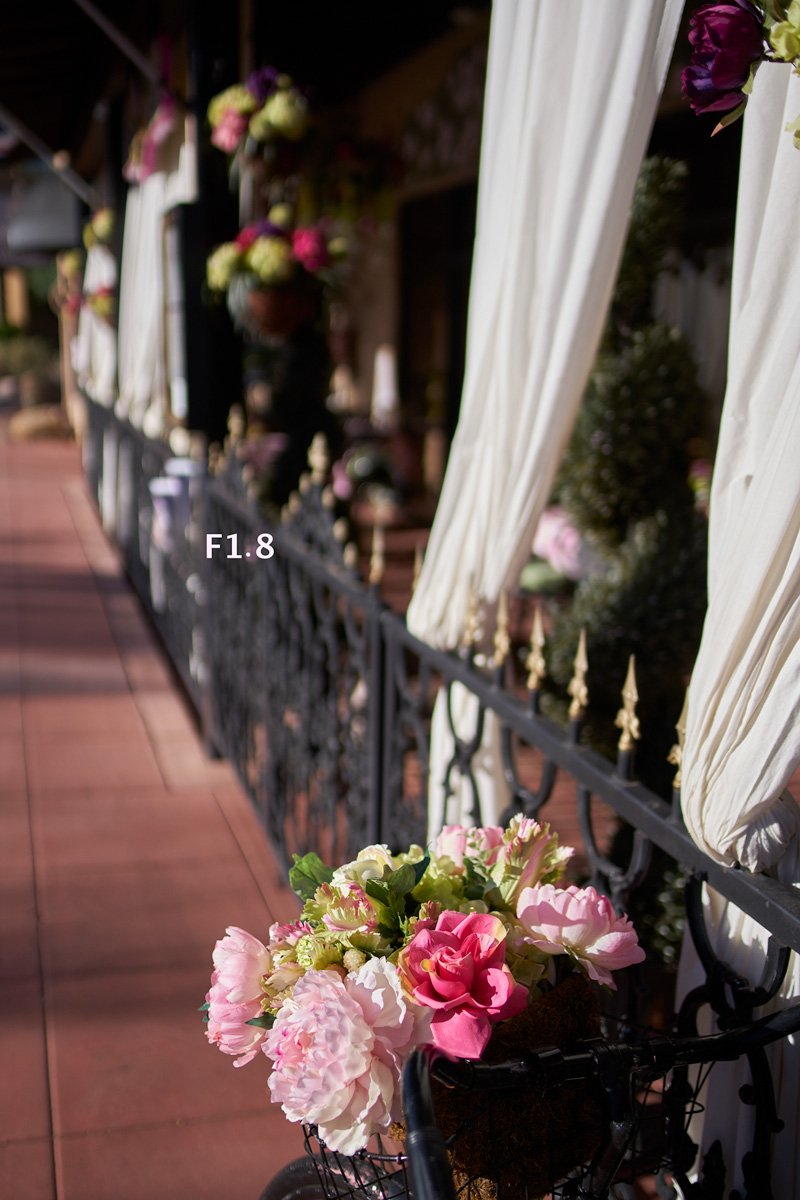
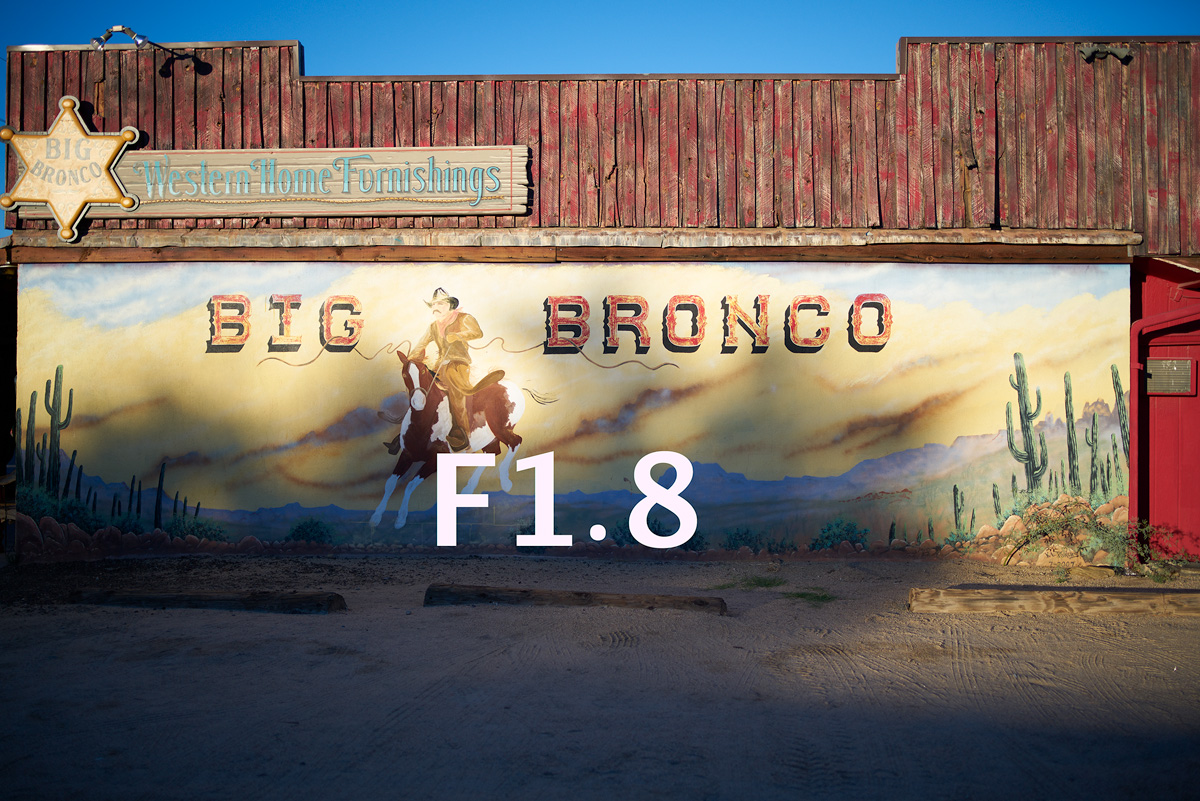
Okay here the full image area at 1.8 and just FYI the lens vignettes very little wide open. Some of the best I have seen for a wide lens this fast

Crops at 100 percent


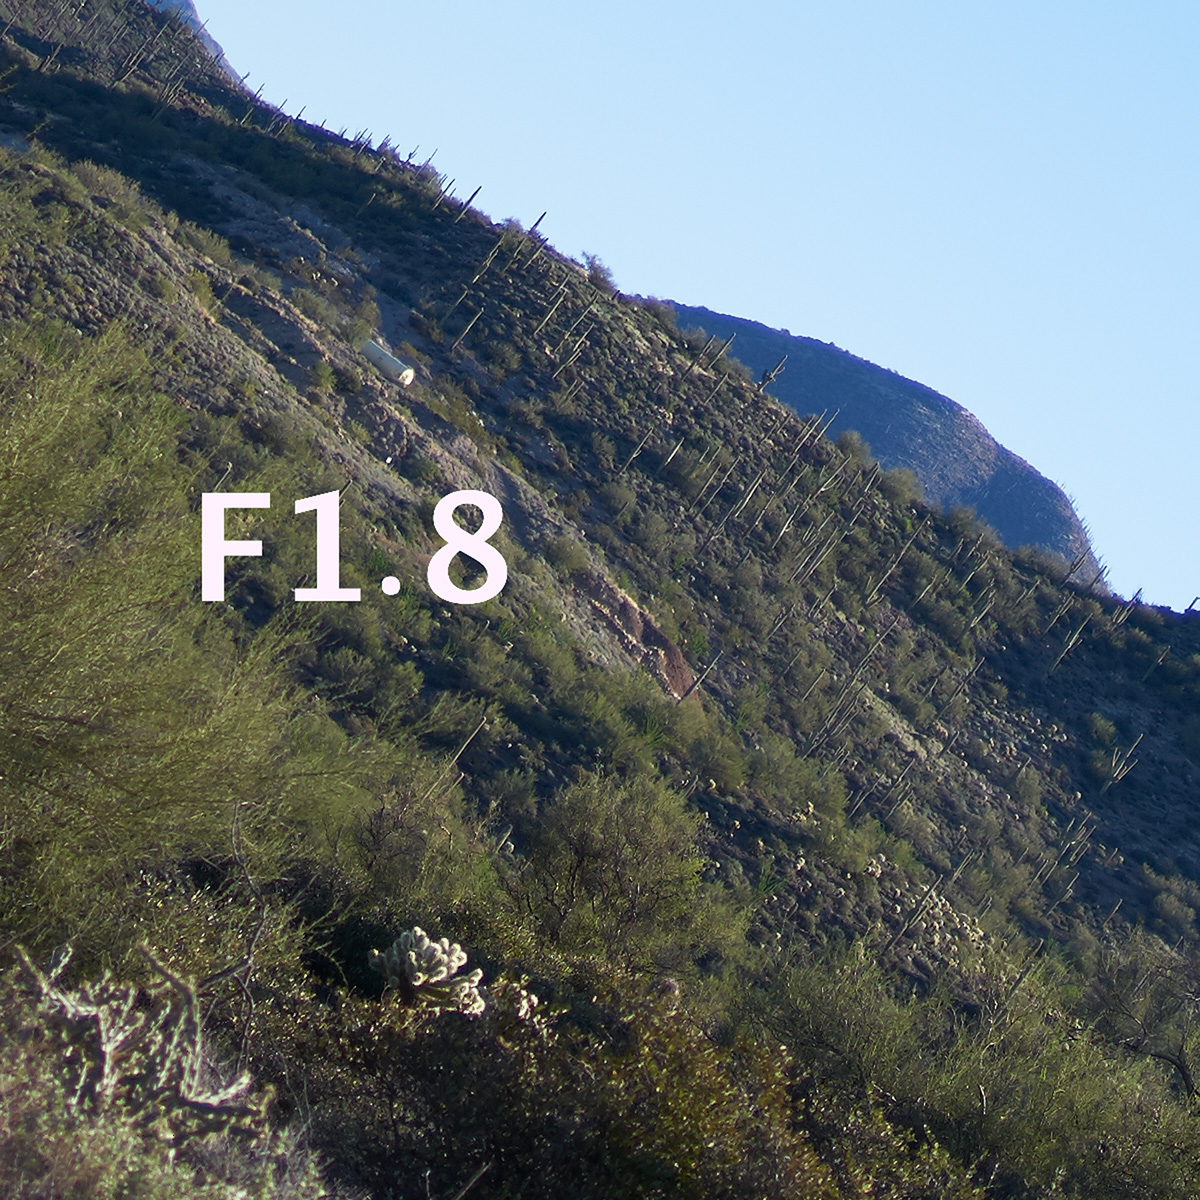
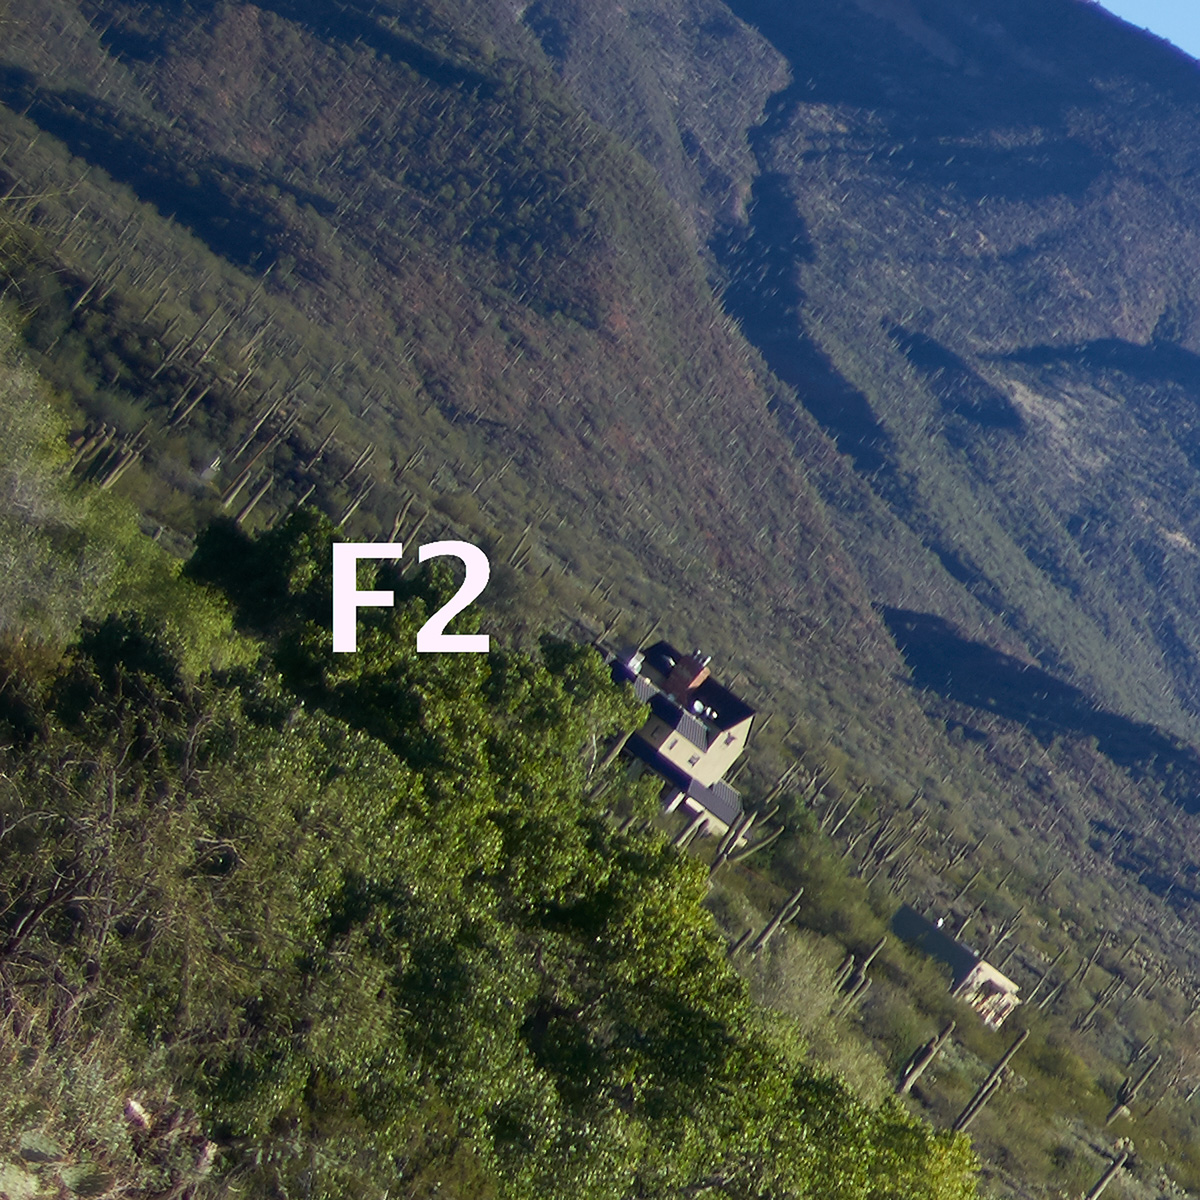
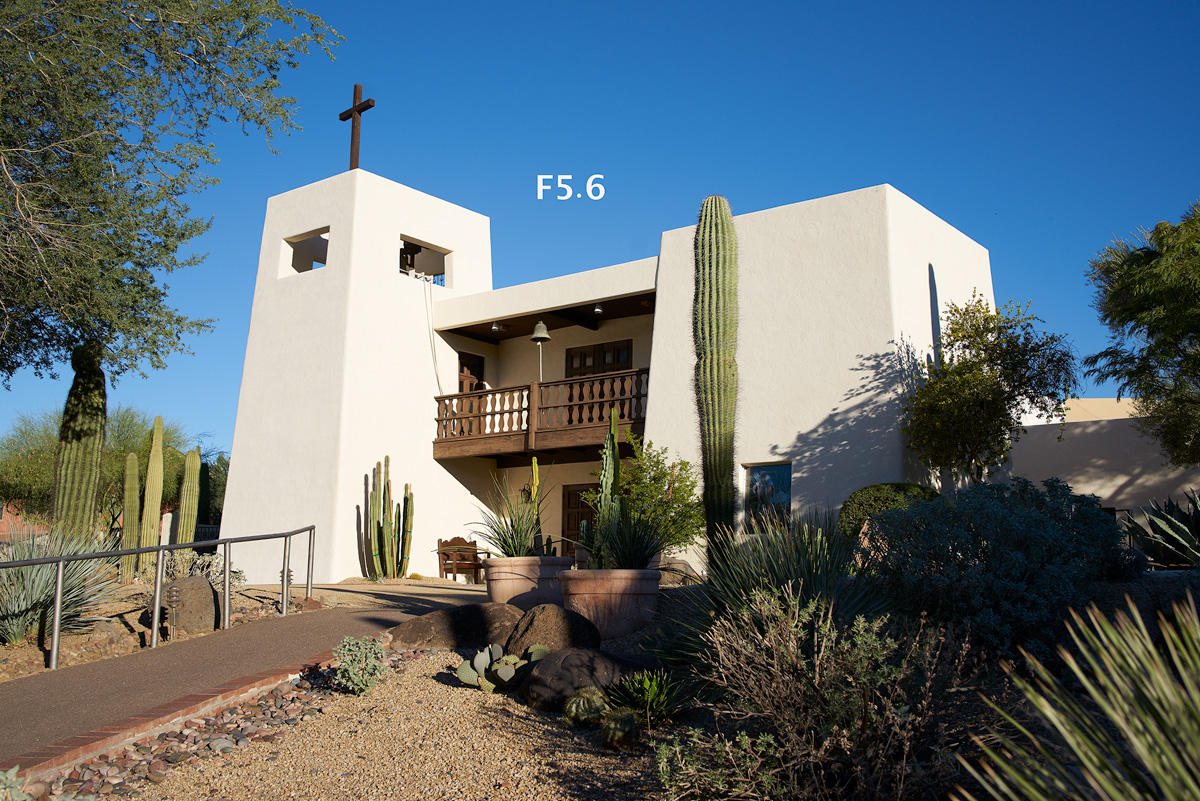
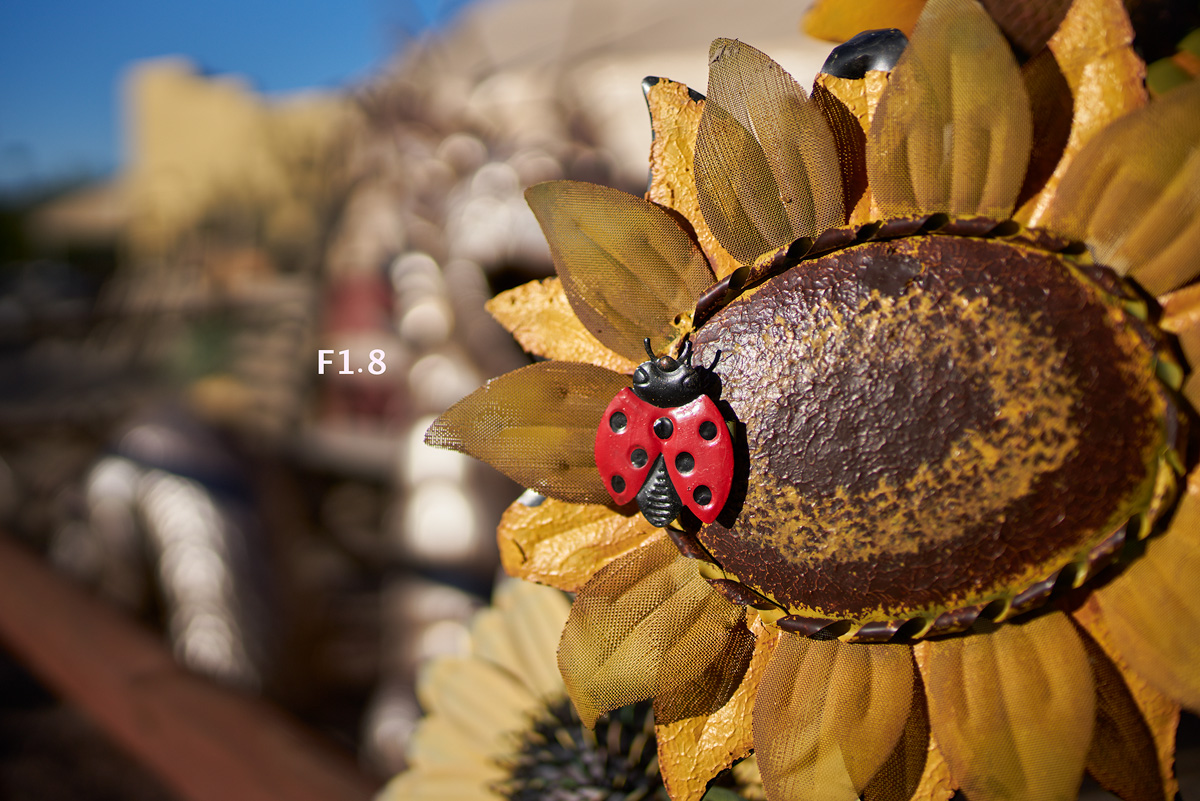
Im going to stop at 5.6 because as you can see centrally this thing is a laser. Very little difference from wide to say F2.8. Very impressive centrally as you will see throughout this test and next will be corner sharpness and I did tests in the mid range and infinity and the same answer is at 2.8 the corners are getting outstanding
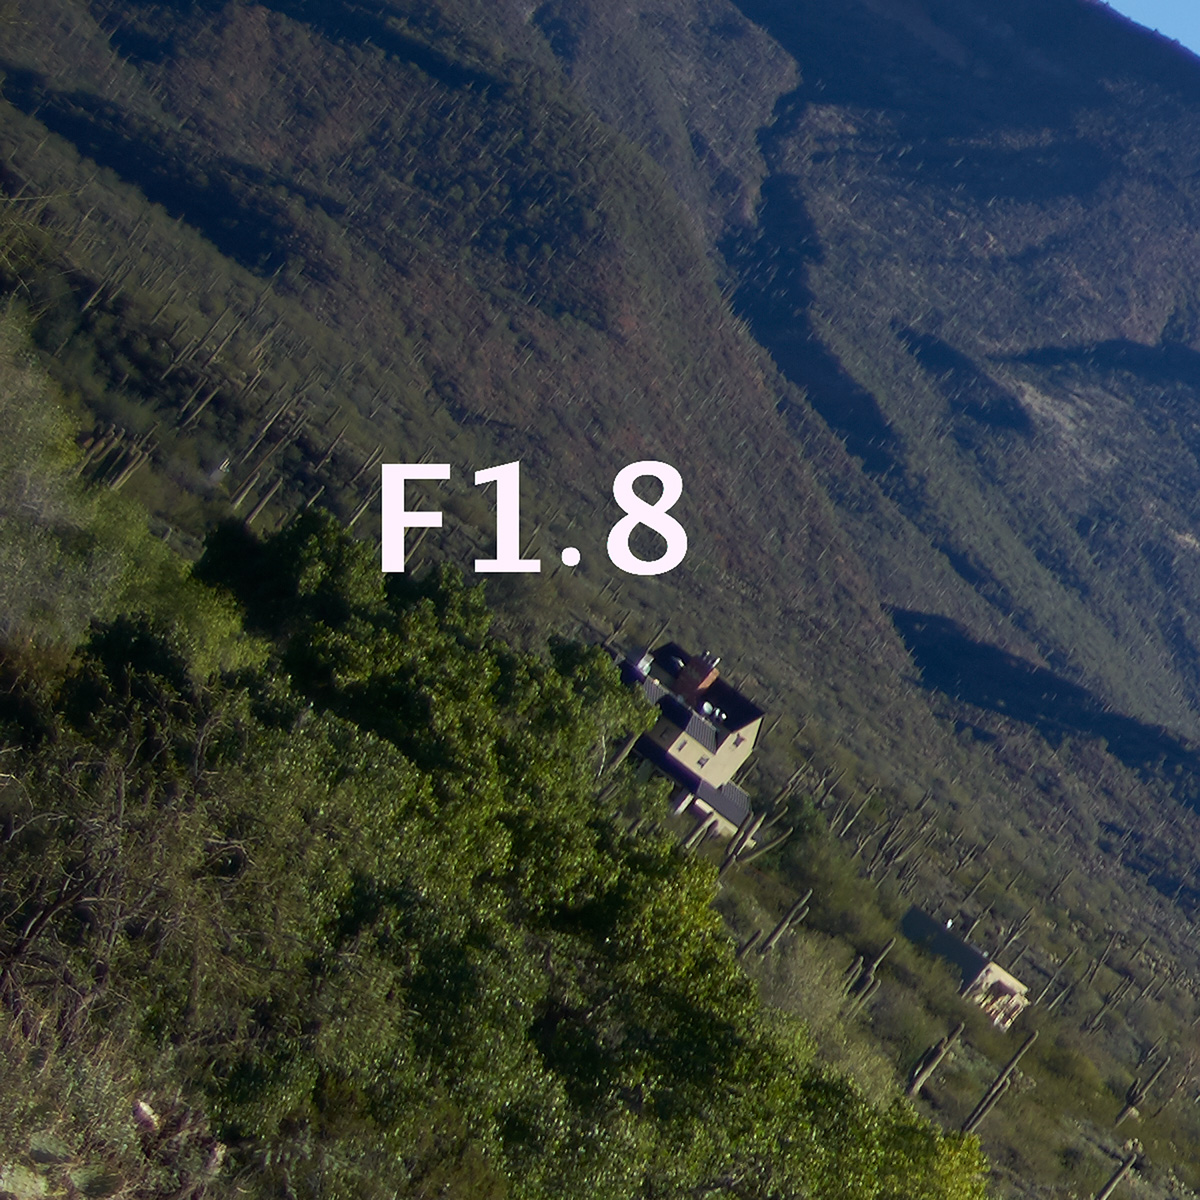
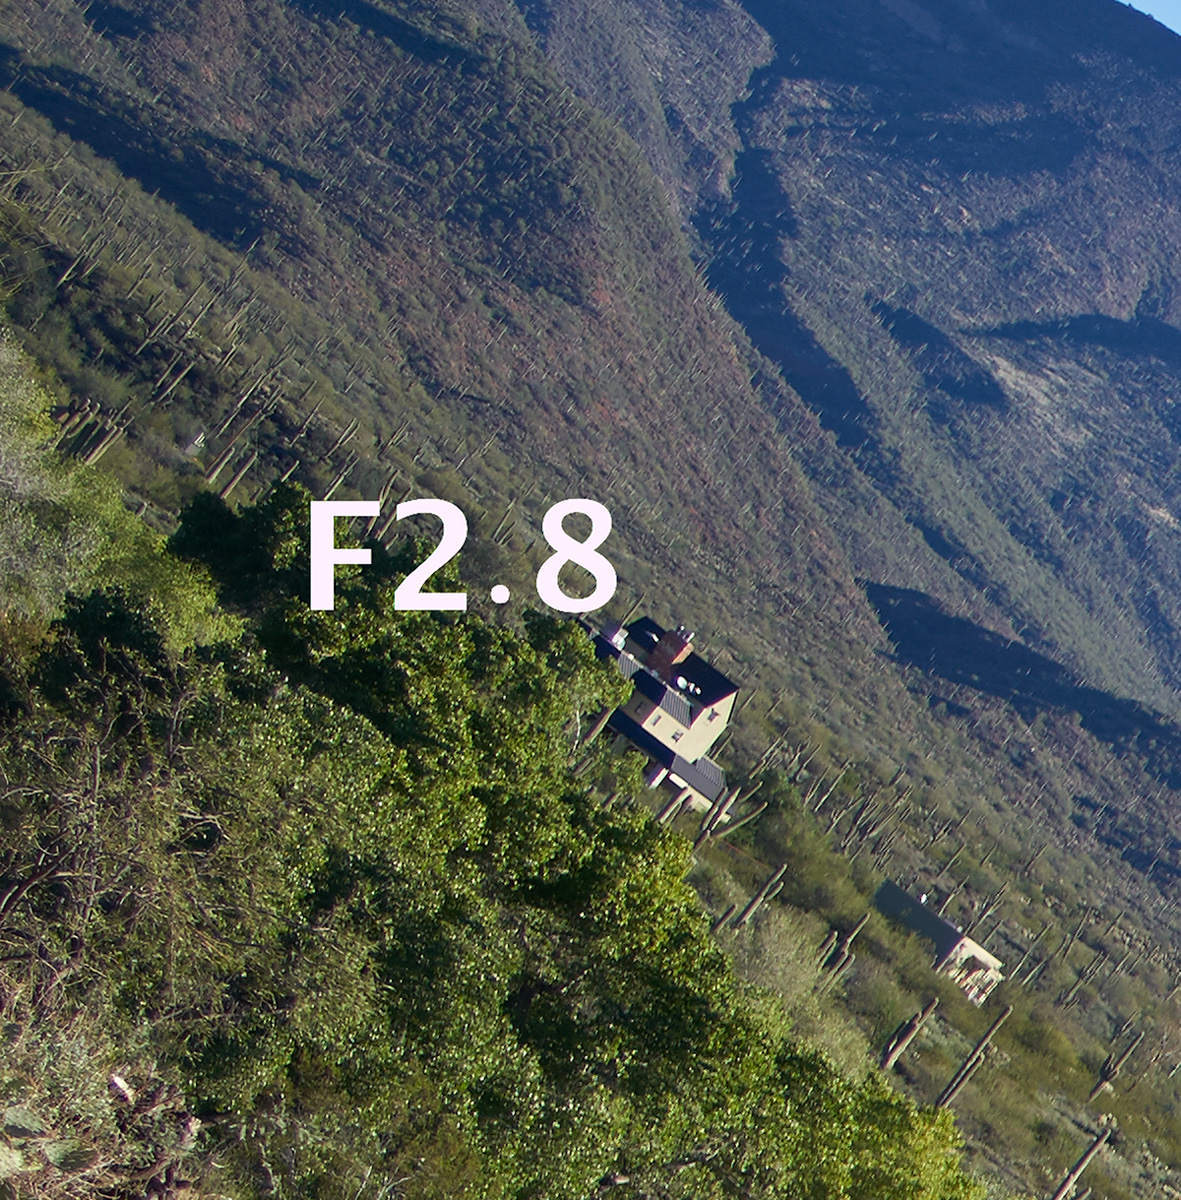
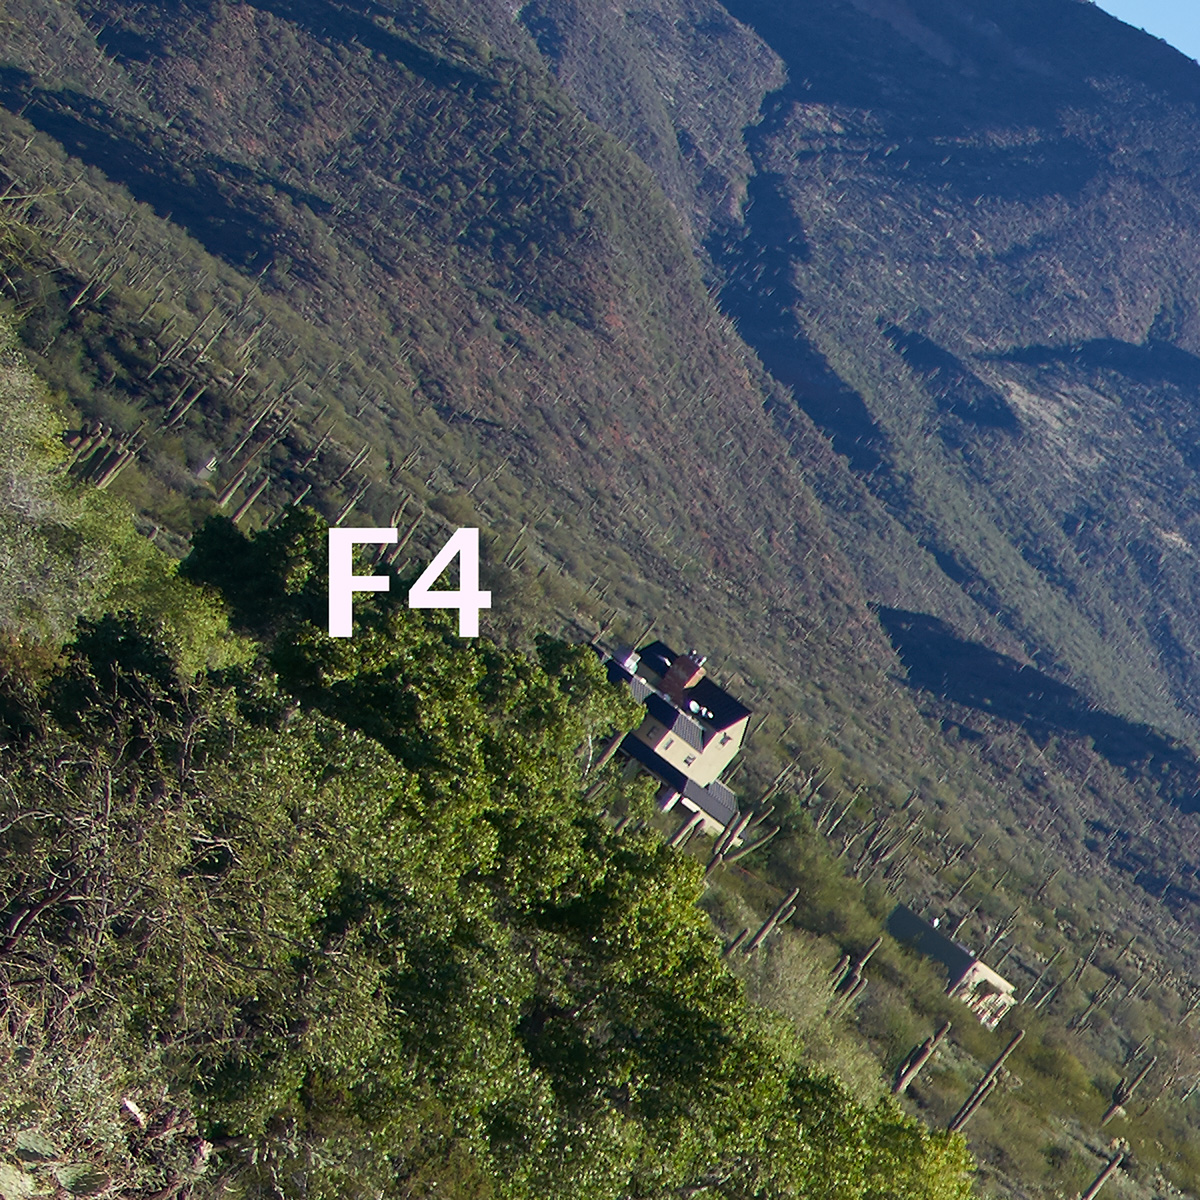
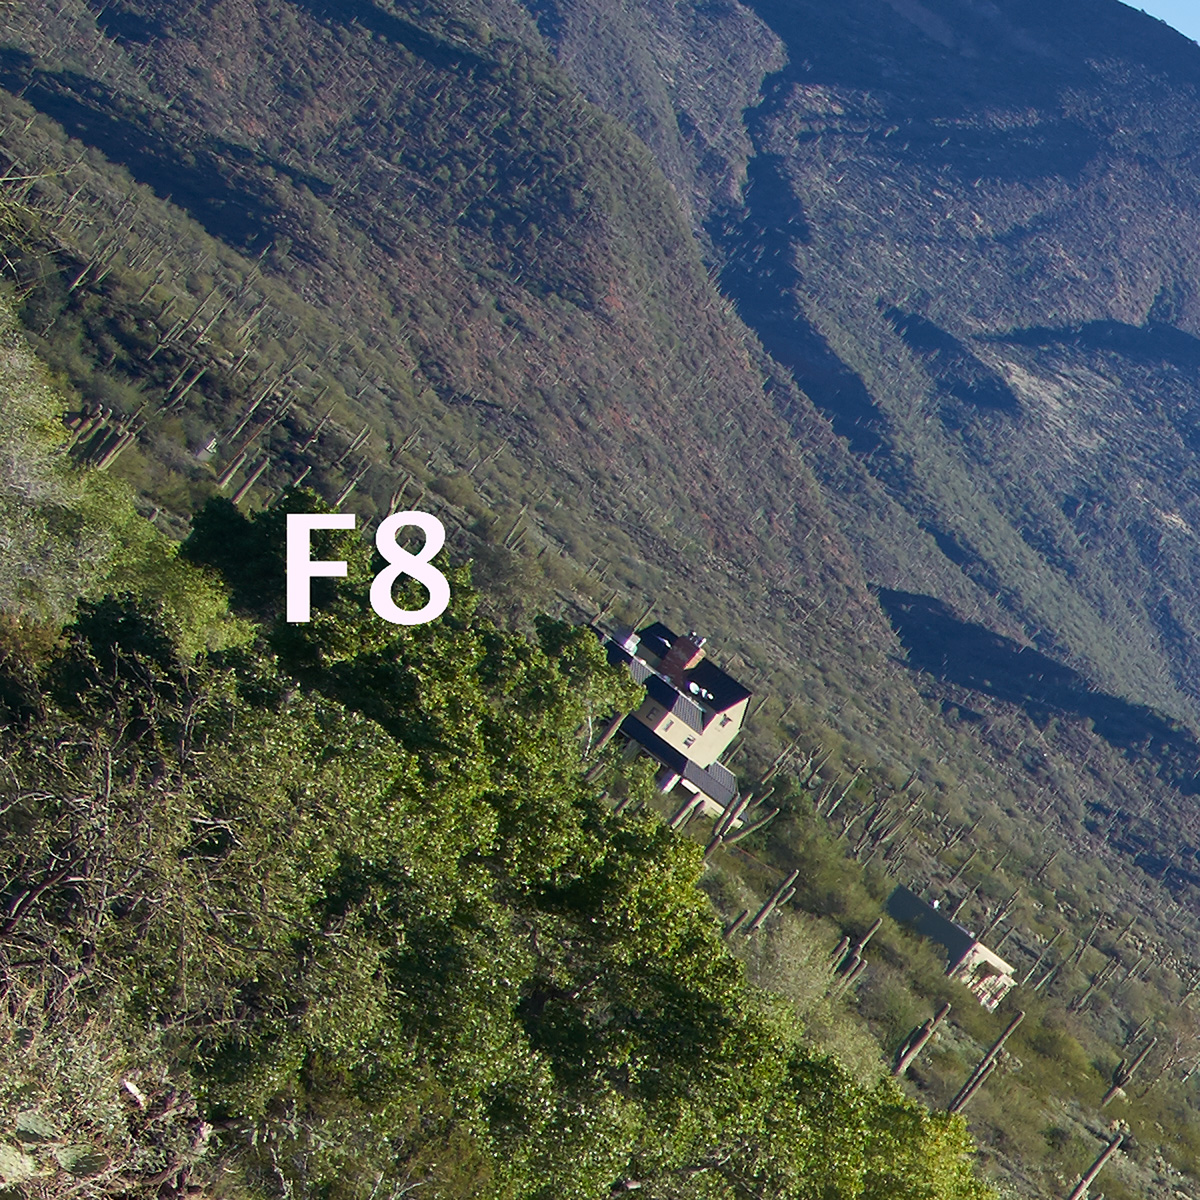
Let me add these real quick. I focused on the house towards the top

I did a whole series from 1.8 to f8 and honestly even going past 5.6 there is nothing to be gained . Almost was to say 2.8 but Ill show you more. Ill have Raws in each section to download as well. There uncompressed raws so there big
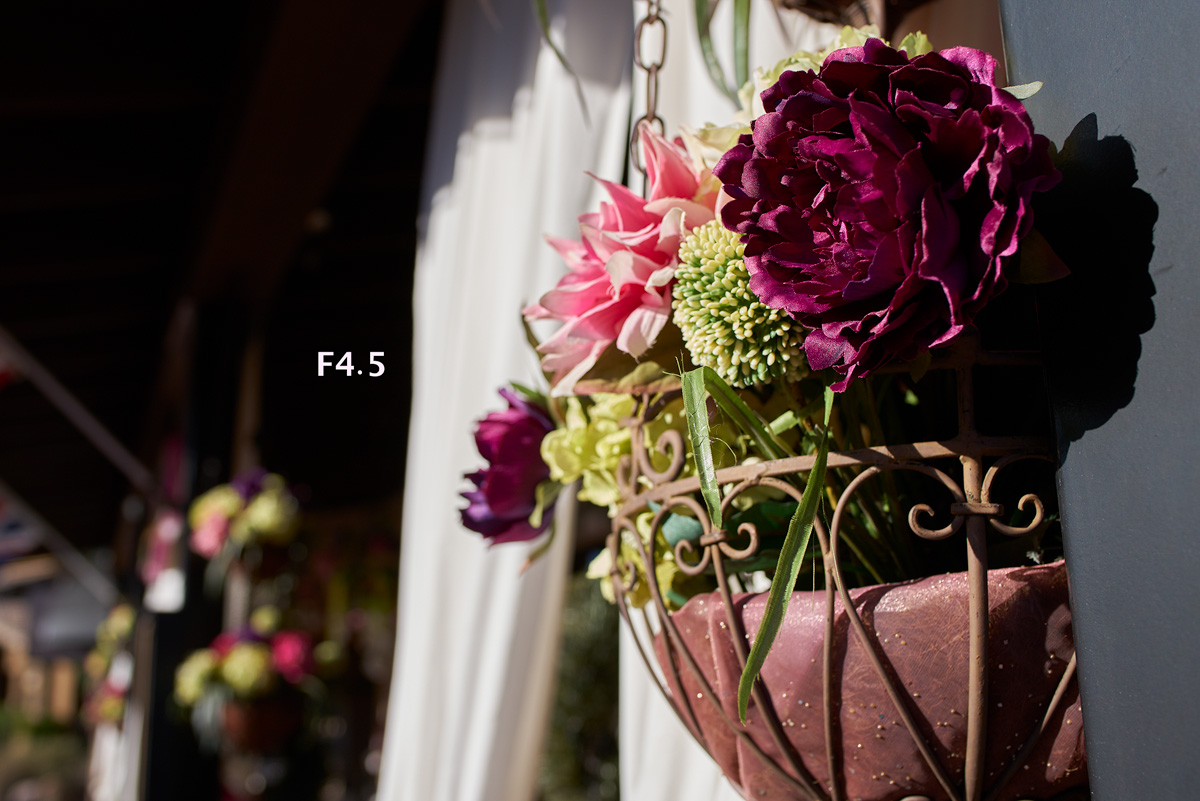
Let me add a midrange to complete the central sharpness test. So you get close, mid and long range here.


I have infinity later
Here are the RAWS from everything above
https://www.hightail.com/dl?phi_act...983944&email=2556274ae4a62d758effc1fa444cb0c2
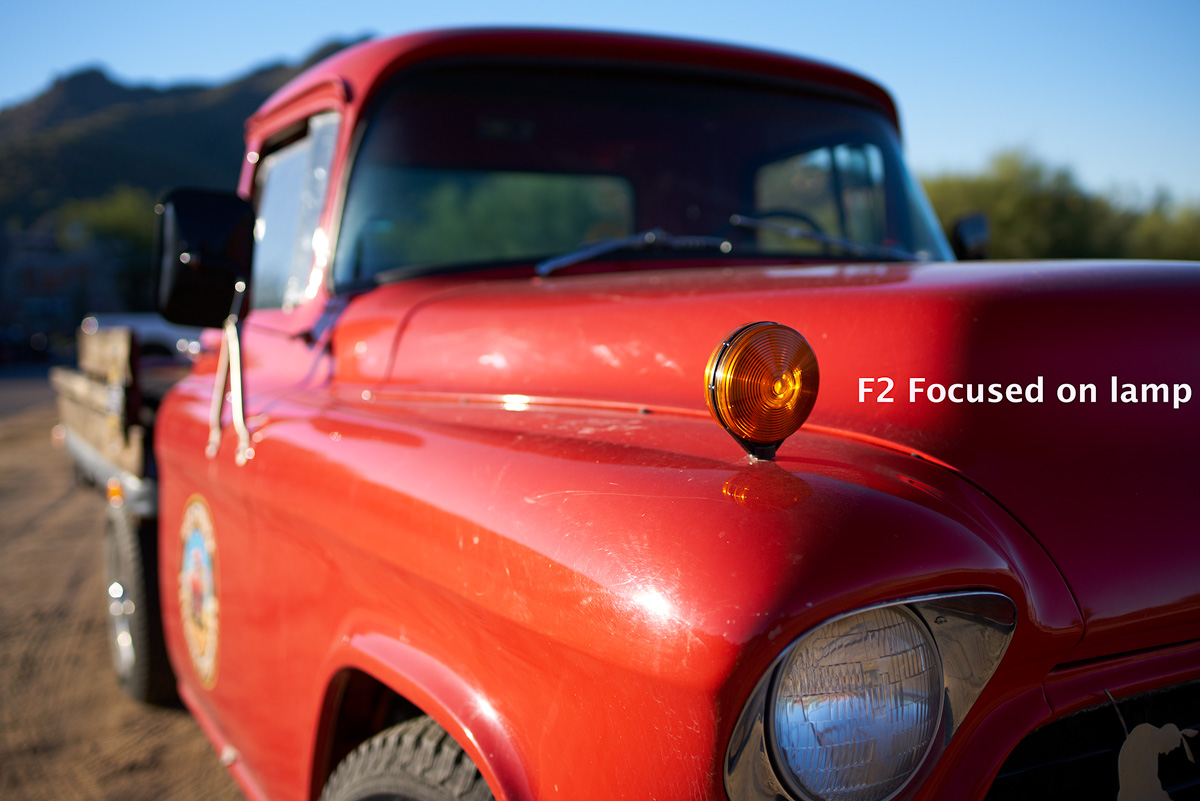
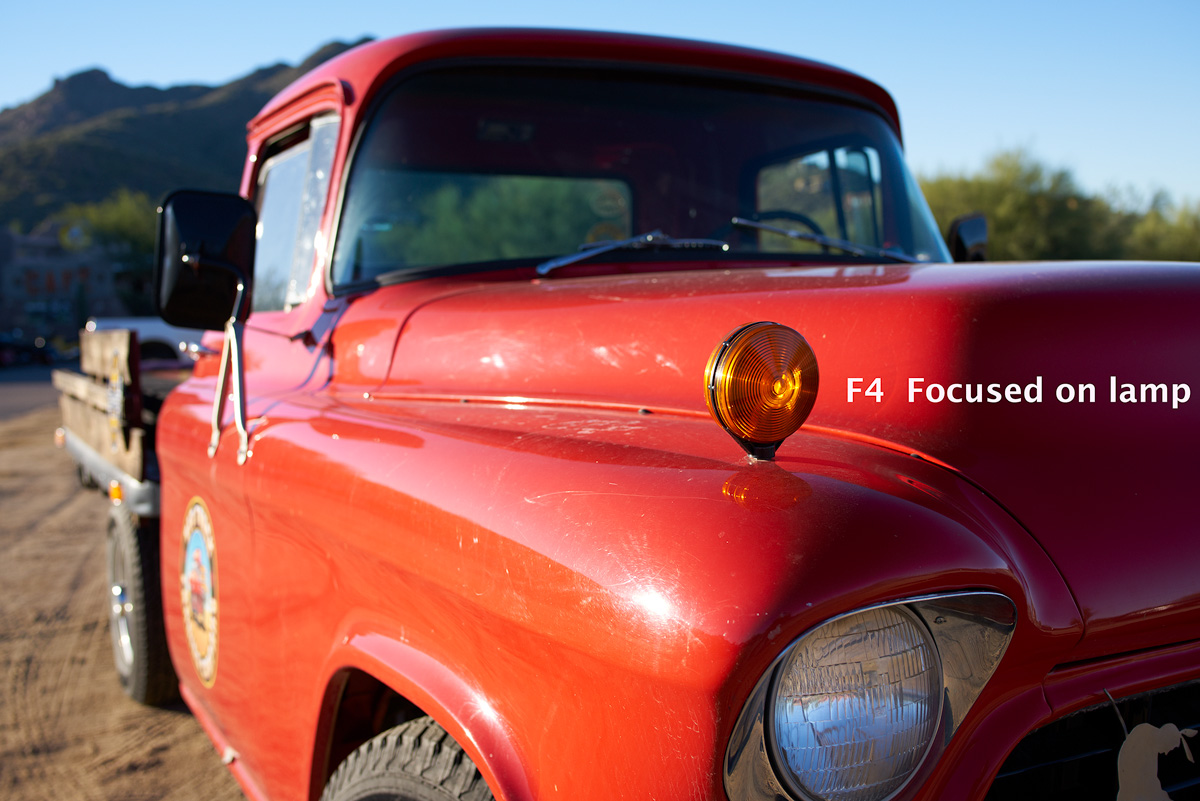
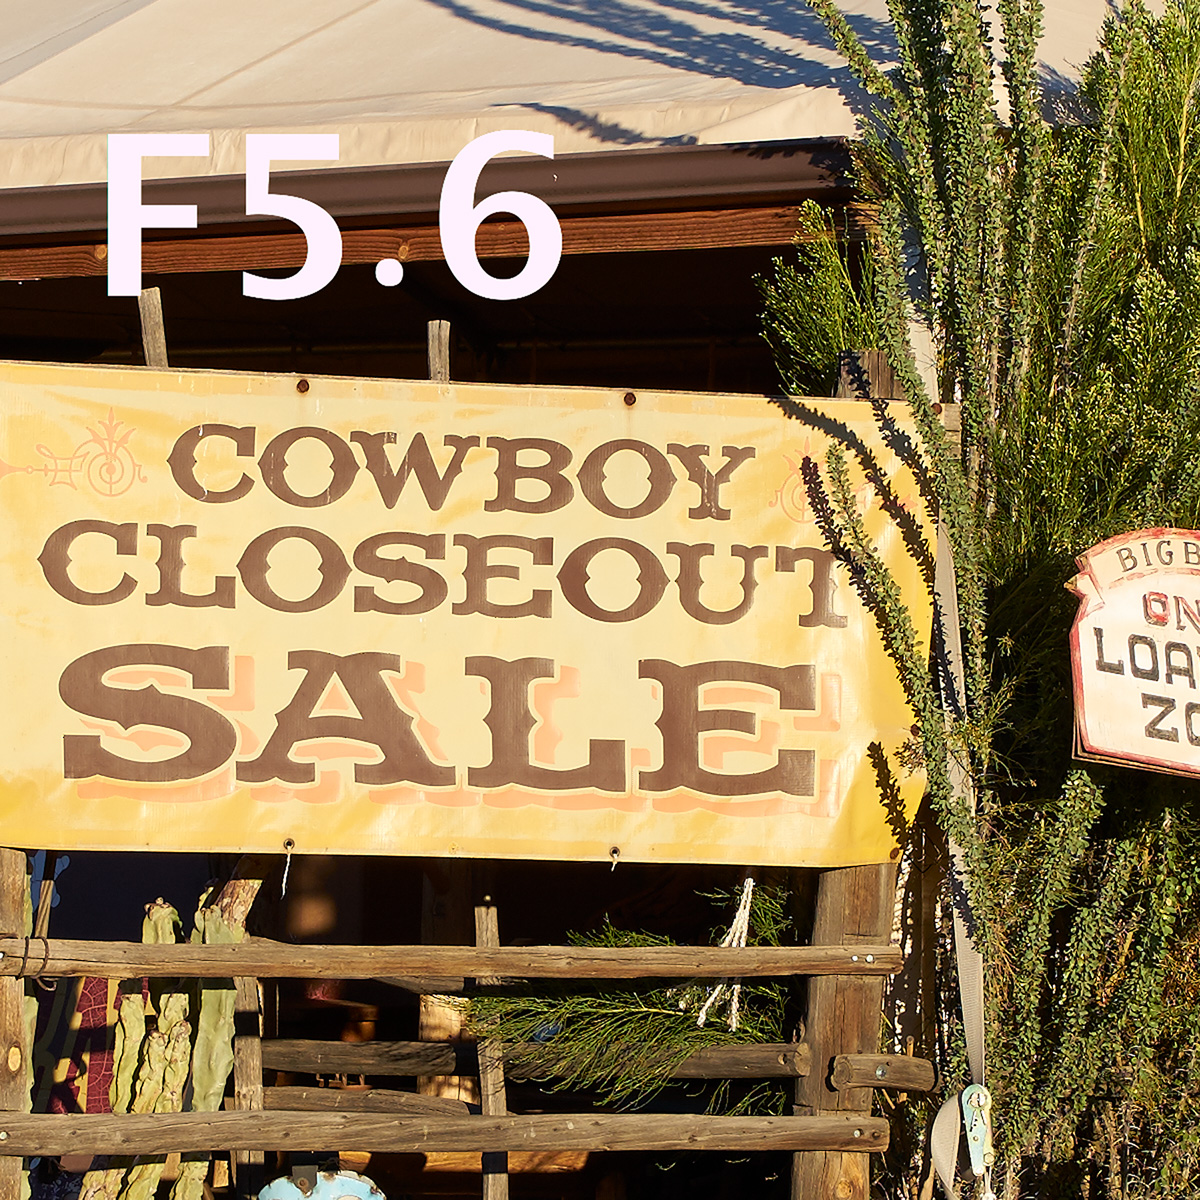
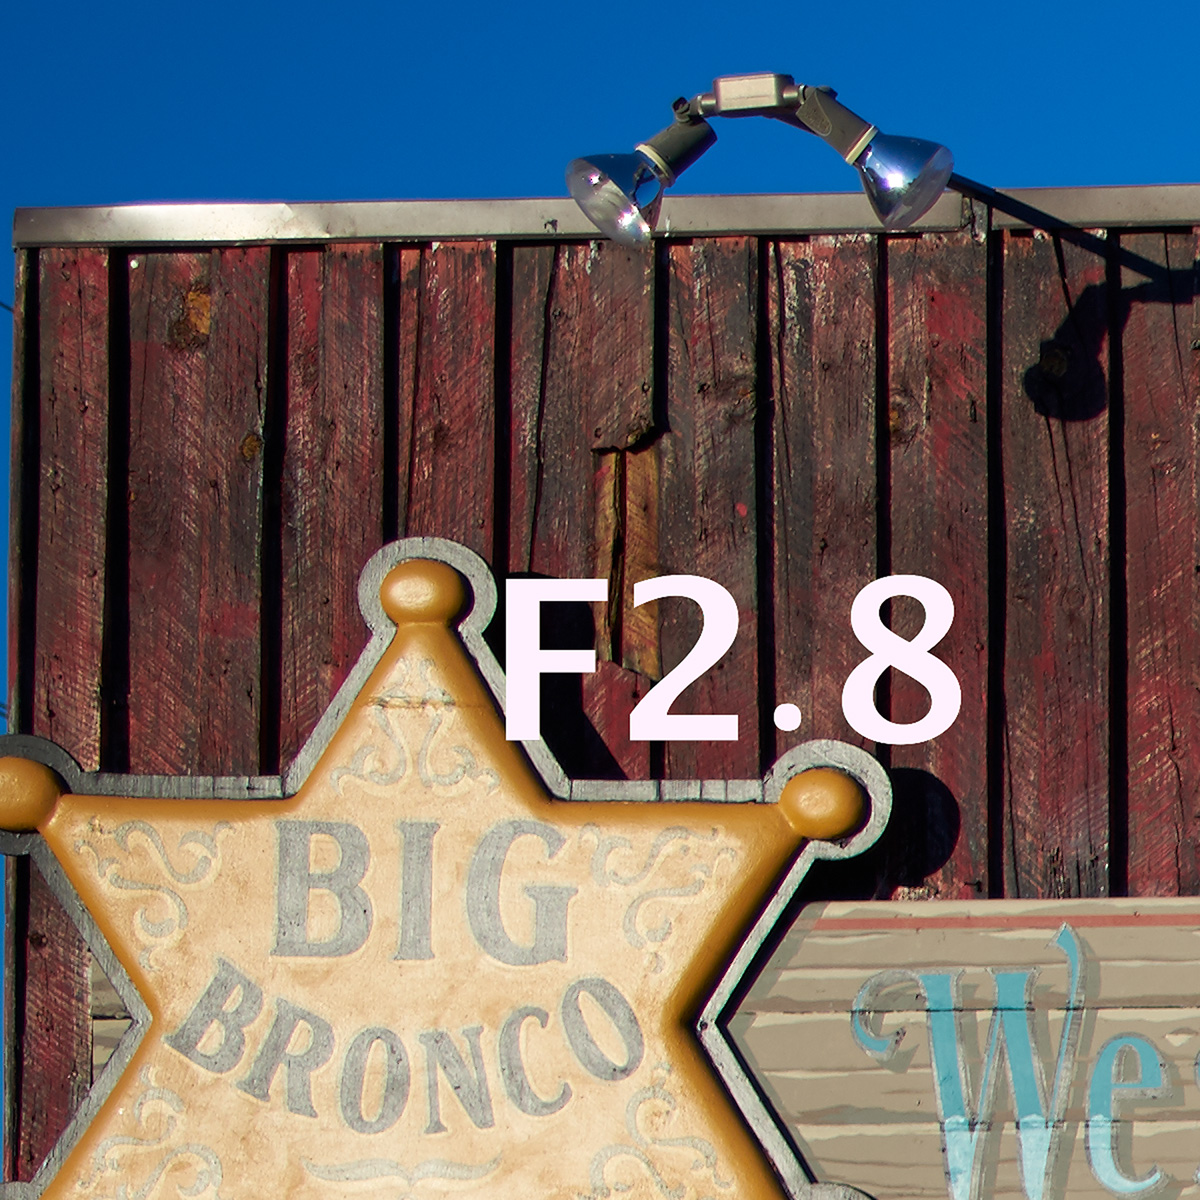
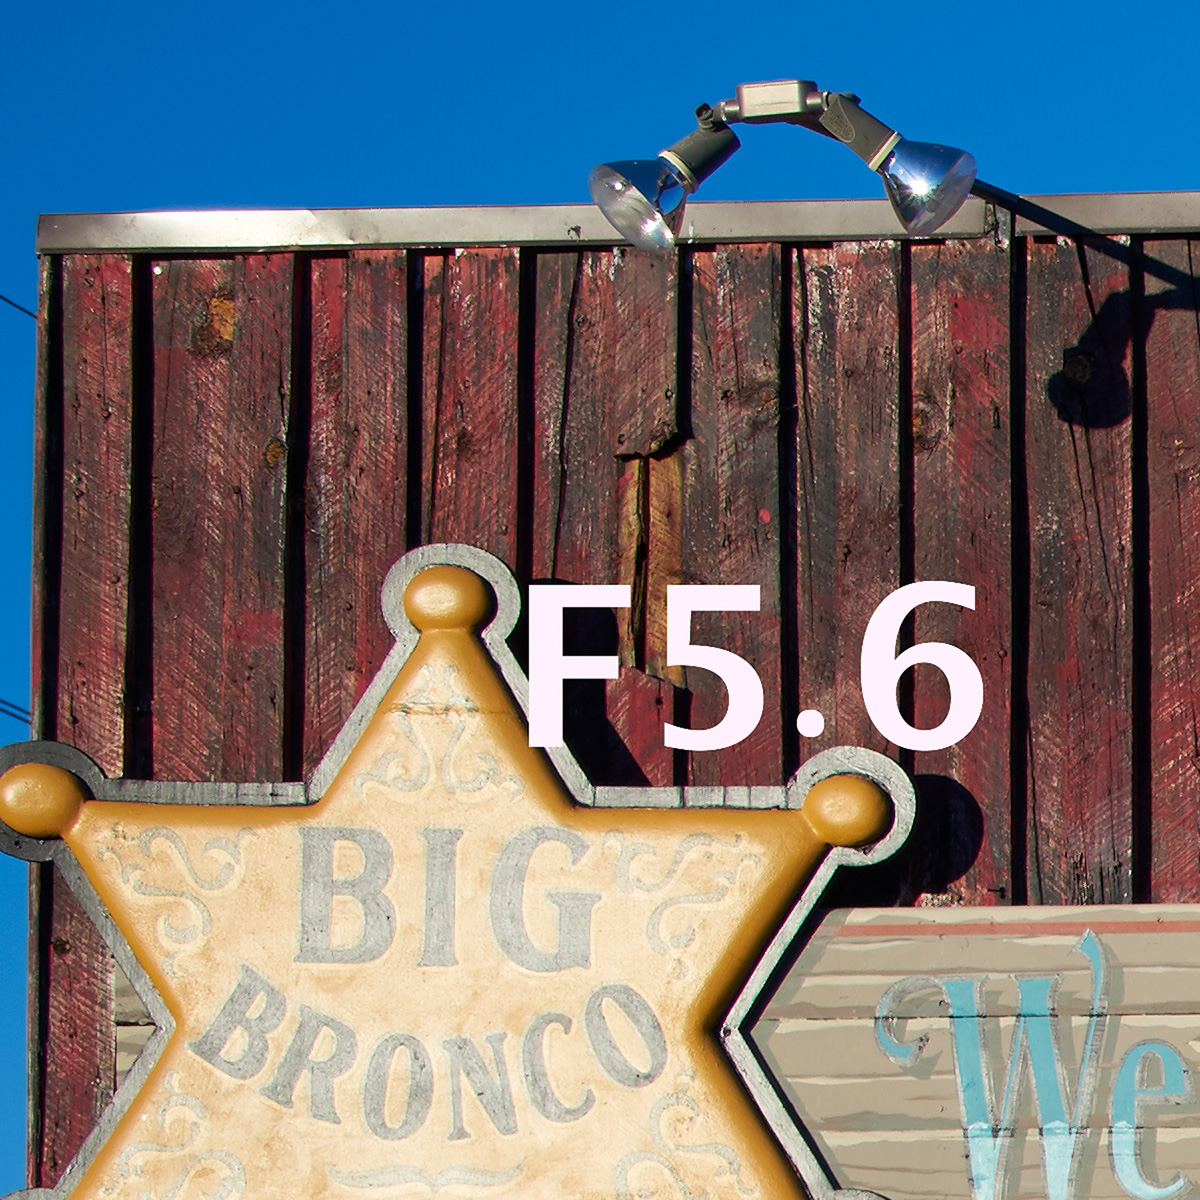
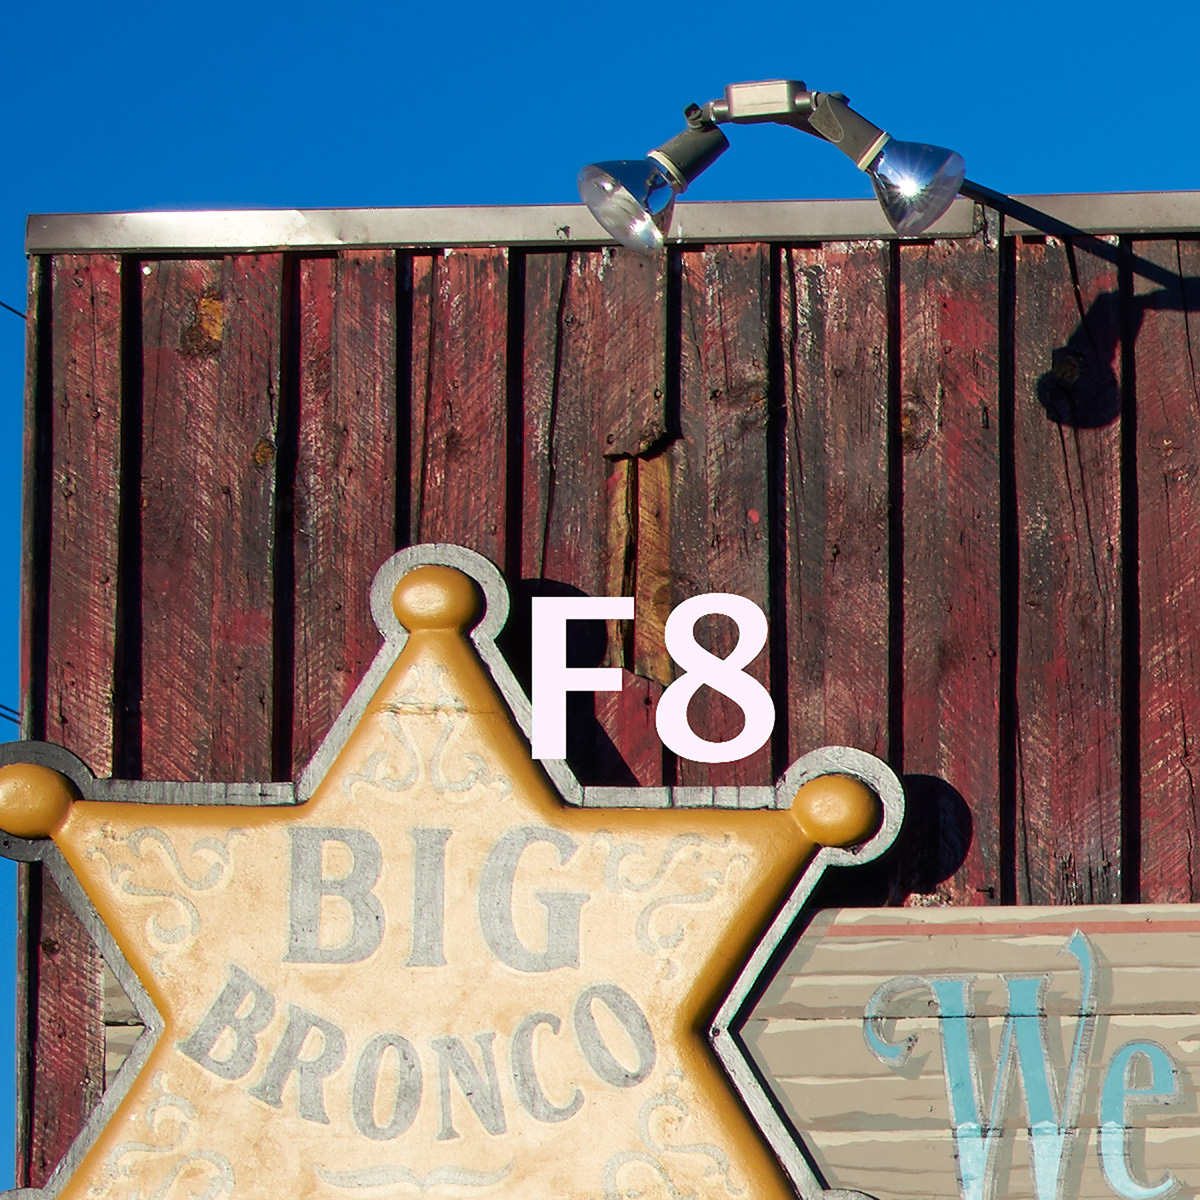
Okay lets get into those corners. I did something a little different since by now the sun is fully up and i always had a issue here in the brightest part of the planet with overexposing at 1.8 , 2, 2.8 I just can't get the shutter faster than 1/8000 so I always had to drop the exposure quite a bit. Never liked doing that as I think it throws the visuals off for CA, Coma and such.
So I used a 6 stop ND filter from Breakthrough photography. These are not cheap filters my 67mm 6 stop was 140 dollars . But not going to do it here but I checked the sharpness between on and off on this test and there is zero difference in sharpness, slight color cast towards a cooler look. I did not change color . But I am EXTREMELY impressed by this filter.
What this is did was knock that 1.8 exposure down to 1/30 so i have no blowout to deal with. Now this is a great test because i did get a good reflection off a piece of metal because now I can see the CA and the Coma it looks like. Look at the lamps for CA and the reflection for coma which I think this is. By 2.8 it is starting to go away. These are extreme because that reflection is very big. Its like a mirror
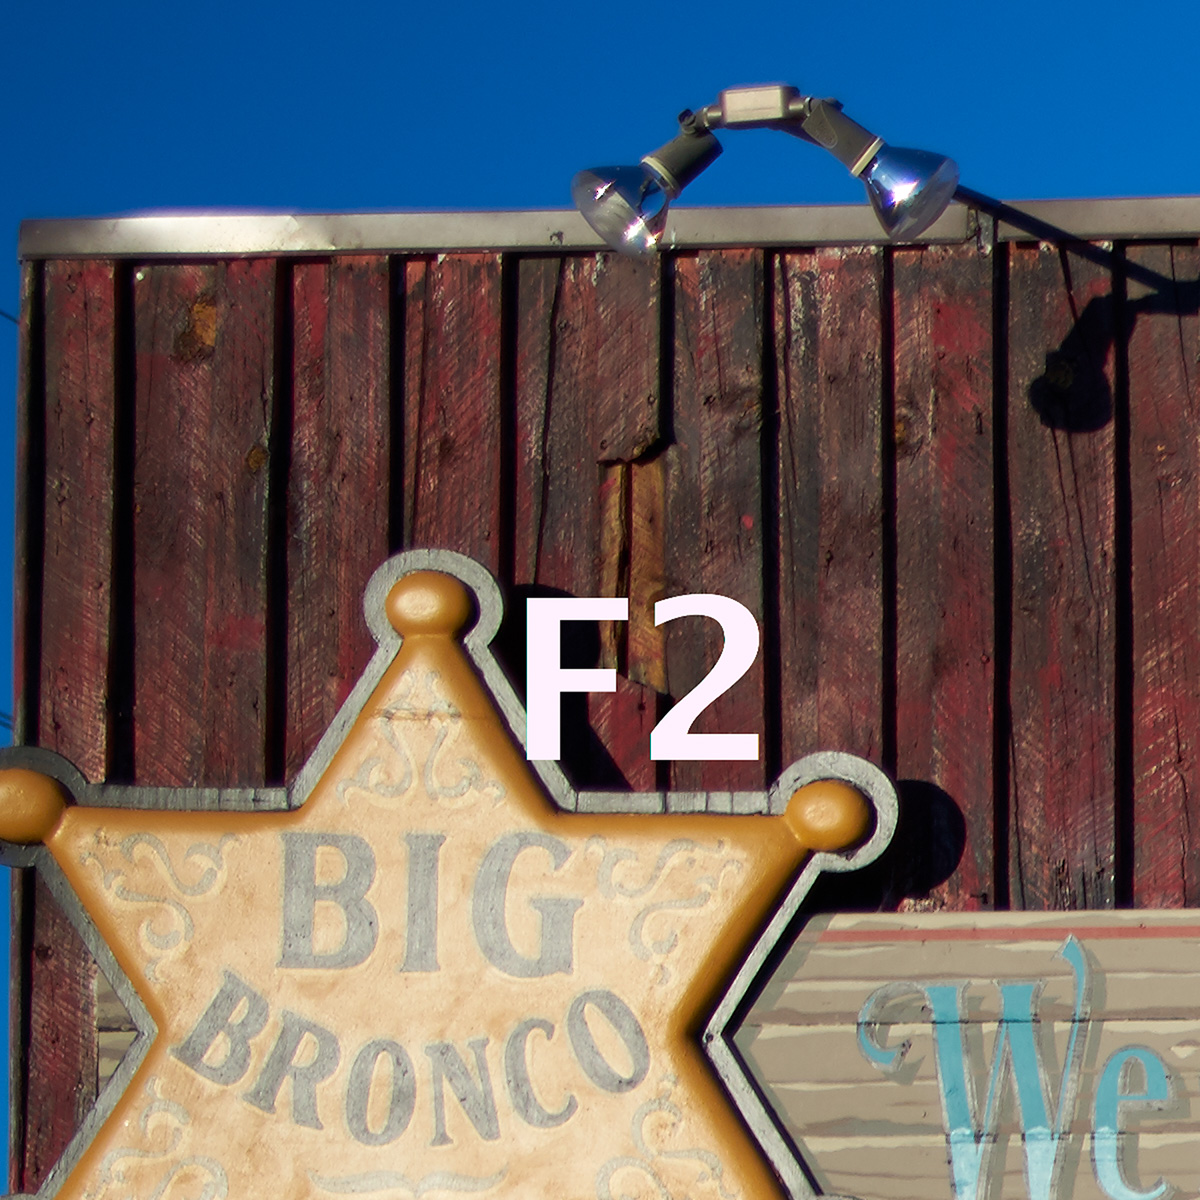
I also added the Upper right side on the 1.8 to show that the lens looks to be very symmetrical with no asymmetrical issues. Bottom line perfect on all corners. Gotta love that, Sony take note here. LOL


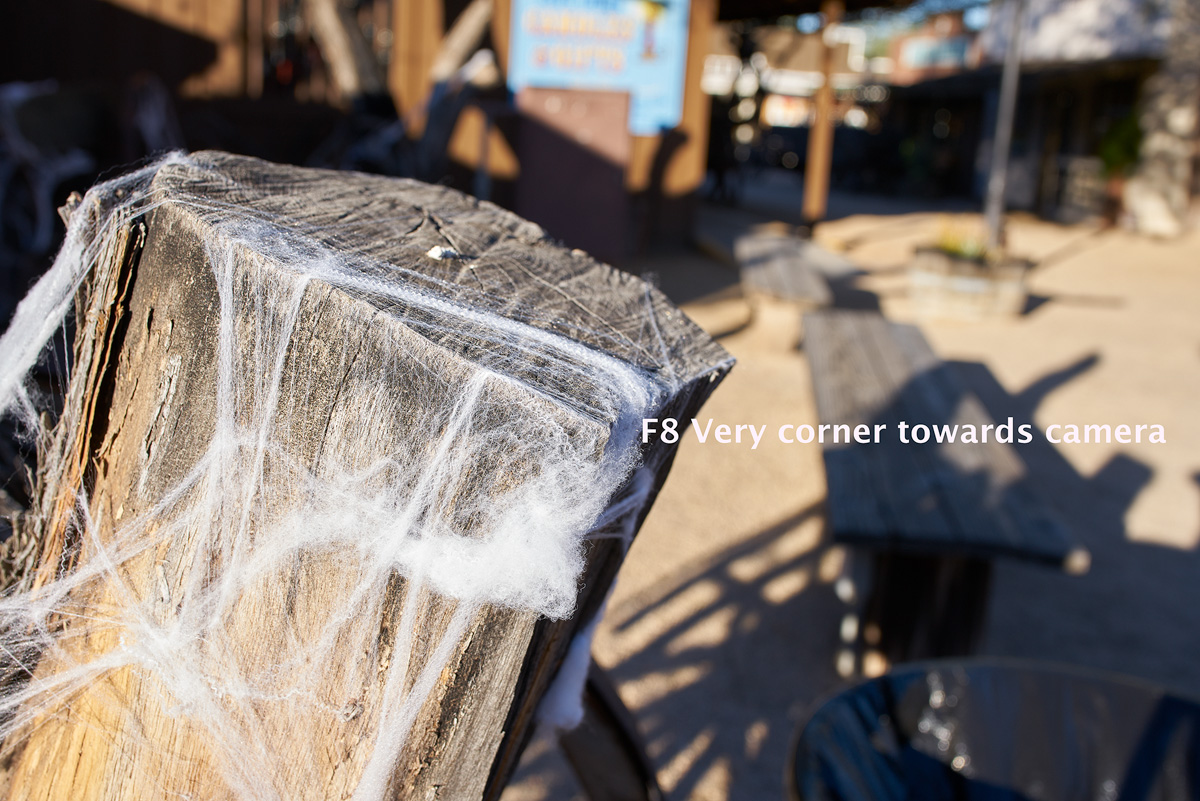
So now that was mid range corners lets get to those infinity corners. This gets interesting. I want the upper left so I turned camera at 45 degree angle or whatever it took to get there. Im just going to show one central image at 1.8 just to show where that is and obviously it gets better as i stopped down. But Im very impressed but the corners here. Ill put all the Raws from the corner test up after this
Lets talk a little about the lens itself. Immediately the lens is of high build quality, carries a 67mm Filter thread and has the traditional manual focusing. Tamron apparently came out with this new line called SP Special Edition to compete with Sigma Art series. And with build quality and lens construction they did a super job of doing that. Manual focusing the lens is a dream and very easy on our A7 series cams. AF is very nice with the Metabones adapter, Its very accurate but its not the fastest AF we have seen in native glass. I would like to say it is deliberate than fast. It gets you there and in low light works very nice. But do not expect lightning focusing as you would get with like our Batis line or Native 55mm 1.8. Im sure if I put this lens on a Canon body it might just be faster.
It does have both a AF/Manual switch on the lens and to go between them you use the switch on the lens and not the body to get to either mode. So if your shooting AF-S and you want manual use the lens switch.
It also has VC on/off switch. Now as i understand this the Steady shot in camera is on like normal ( switch is greyed out) and you control on the lens with VC on it goes to lens stabilization . I suggest you do not do that as it does eat batteries faster than you can run water but go with in camera stabilization as its much better system anyway and does not eat batteries as fast. So turn that switch OFF on the lens.
I will talk more of the lens as we go along .
But I did want to talk about 35mm lenses for Sonys in native mount. We have three the Sony 35mm 2.8, Sony 35mm 1.4 and Loxia 35mm F2. All nice lenses in there own way. I never had good luck with the 35mm 2.8, the Loxia 35mm F2 is manual focus only although very nice lens. The Sony 35mm 1.4 is a lovely lens but big and heavy. Im after a lens more like my Batis 25mm F2 so I am hoping either Sony or Zeiss makes that but in the meantime I may keep this lens as it looks very good from these test. Actually for a 600 dollar lens it outperforms its price tag IMHO.
So lets get going on the lens test. One issue I had was Tripod , I let my daughter take my car overnight with my RRS tripod in it. Well that was not fun, I used a tripod that you would buy at Walmart for 60 bucks. Cheap cheap cheap did I say cheap. Anyway to compensate for it i bumped my shutter delay to 5 seconds so i made sure the camera got to rest before firing. PITA to work with. LOL
So this is my normal place and procedure to running lens test. Folks I'm not shooting ART here. Boring images no question. LOL
I use this area for every lens test I have done for several years. Why its perfect and I know what to look for every time and I have a great memory of the lenses I shot here so a great mental comparison for me.
Lets start with central sharpness. This test is the first of the day as the sun came up , yes it has that morning glow and color. I do not WB any of this and really the only thing I do in Capture One is add a base sharpening to the whole lot . My settings are 290,.5,.5 and I will go in and adjust exposure as needed.
Okay here the full image area at 1.8 and just FYI the lens vignettes very little wide open. Some of the best I have seen for a wide lens this fast
Crops at 100 percent
Im going to stop at 5.6 because as you can see centrally this thing is a laser. Very little difference from wide to say F2.8. Very impressive centrally as you will see throughout this test and next will be corner sharpness and I did tests in the mid range and infinity and the same answer is at 2.8 the corners are getting outstanding
Let me add these real quick. I focused on the house towards the top
I did a whole series from 1.8 to f8 and honestly even going past 5.6 there is nothing to be gained . Almost was to say 2.8 but Ill show you more. Ill have Raws in each section to download as well. There uncompressed raws so there big
Let me add a midrange to complete the central sharpness test. So you get close, mid and long range here.
I have infinity later
Here are the RAWS from everything above
https://www.hightail.com/dl?phi_act...983944&email=2556274ae4a62d758effc1fa444cb0c2
Okay lets get into those corners. I did something a little different since by now the sun is fully up and i always had a issue here in the brightest part of the planet with overexposing at 1.8 , 2, 2.8 I just can't get the shutter faster than 1/8000 so I always had to drop the exposure quite a bit. Never liked doing that as I think it throws the visuals off for CA, Coma and such.
So I used a 6 stop ND filter from Breakthrough photography. These are not cheap filters my 67mm 6 stop was 140 dollars . But not going to do it here but I checked the sharpness between on and off on this test and there is zero difference in sharpness, slight color cast towards a cooler look. I did not change color . But I am EXTREMELY impressed by this filter.
What this is did was knock that 1.8 exposure down to 1/30 so i have no blowout to deal with. Now this is a great test because i did get a good reflection off a piece of metal because now I can see the CA and the Coma it looks like. Look at the lamps for CA and the reflection for coma which I think this is. By 2.8 it is starting to go away. These are extreme because that reflection is very big. Its like a mirror
I also added the Upper right side on the 1.8 to show that the lens looks to be very symmetrical with no asymmetrical issues. Bottom line perfect on all corners. Gotta love that, Sony take note here. LOL
So now that was mid range corners lets get to those infinity corners. This gets interesting. I want the upper left so I turned camera at 45 degree angle or whatever it took to get there. Im just going to show one central image at 1.8 just to show where that is and obviously it gets better as i stopped down. But Im very impressed but the corners here. Ill put all the Raws from the corner test up after this
Last edited: