Jonas's post doesn't explicitly plug
PTGui, but it is the best.
my suggestion is manual exposure (to prevent any exposure drifts) and pick either a specific white balance or do your own custom or shoot in RAW and convert to whatever you want.
(img)
4 images taken with FD50mm @ 5.6
pellicle, I think I miss some nice flowing water in that pano?! It's an exciting image making me curious about what more to see at the same place.
Thank you, I just downloaded the trail version. I should also avoid refocussing right?
See below
I would add using manual focus at one preset distance to Pellicle's suggestions.
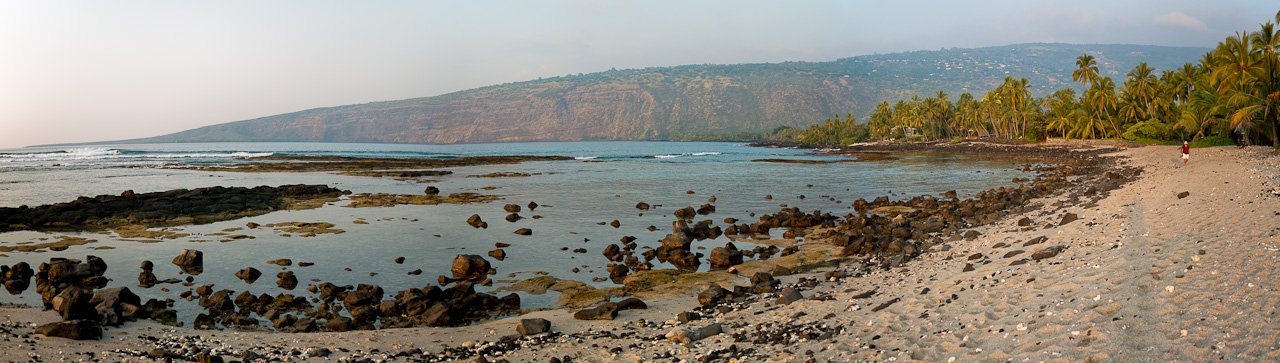
(img)
The horizontal FOV is approx 220 degrees.
220 degrees is pretty wide Santo, no?!
Hi, Jonas. I should add that I set my white balance manually also, so I think that helped keep the exposure levels true across the entire scene. The only 'automatic' feature I had enabled was the focus. Area focus seemed to work OK, but I'll have to look at the details in the photos to see how they came out at that level.
I haven't tried other projection methods for stitching yet. The tutorial I was reading suggested starting out with the default projection in PS4, so that's what I used. I'll play with other projection methods as well. I did look at trying PTGui, and I'll download the trial to see how the end result would be different for the shots I took.
BTW, your pano of that building is awesome! Looks like it was shot using a LF view camera. Very nice!
I always set everything to manual. As I shoot raw the white balance doesn't matter really. More on that later.
Manual exposure helps to get the seems invisible. Manual and locked focusing helps to avoid any unwanted affects from the lens changing focal length during the series of images, and possibly from other odd artifacts as well.
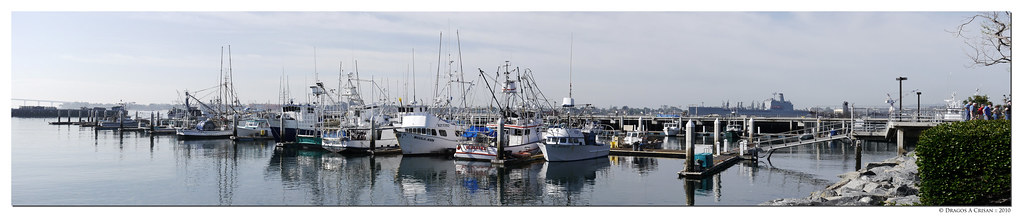
Here's another pano from San Diego harbor.
(img)
I like that one better than the first. It's something with the projection in the first making it look too much distorted to my eyes.
Hi
well, it depends ... as Jonas suggested above he got some sort of "tilt" focus effect by having the focal plane essentially altered as his images "panned" down and also used differing exposures (probably not by much).
I suggest that the only 'rules' are ones you see don't look right ... experiment experiment experiment
of course with wider angles focus is a lesser influence.
An old acquaintance of mine from nearly a decade ago has a nice although perhaps decreasingly well known site. From one page of
that:
he essentially shifts focus in rows as he covers the rows further back
it can work nicely (I might add that I don't 100% agree with everything he writes despite his credentials and we have had dialog over this over the years)
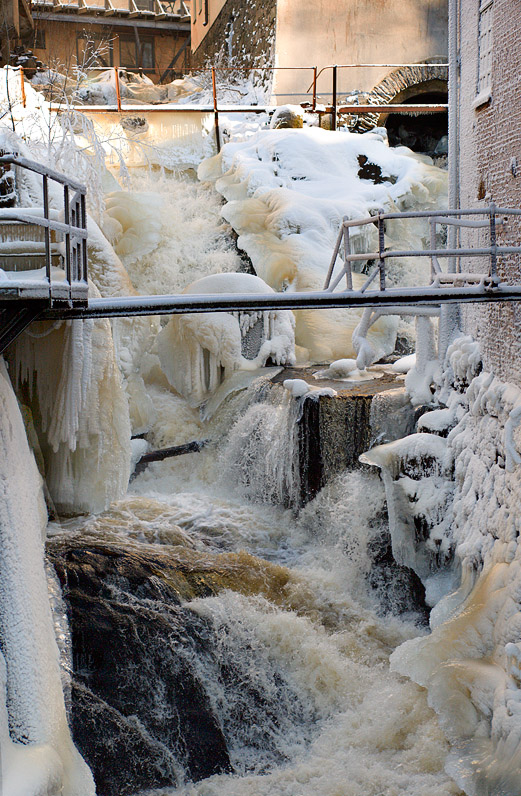
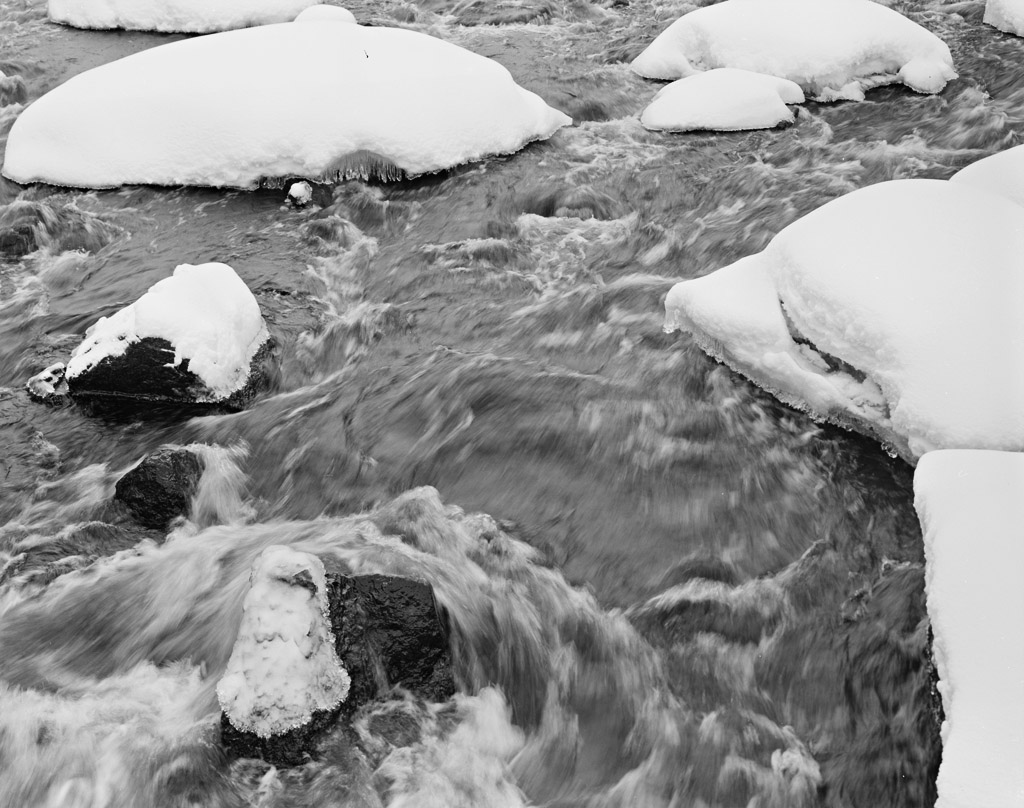
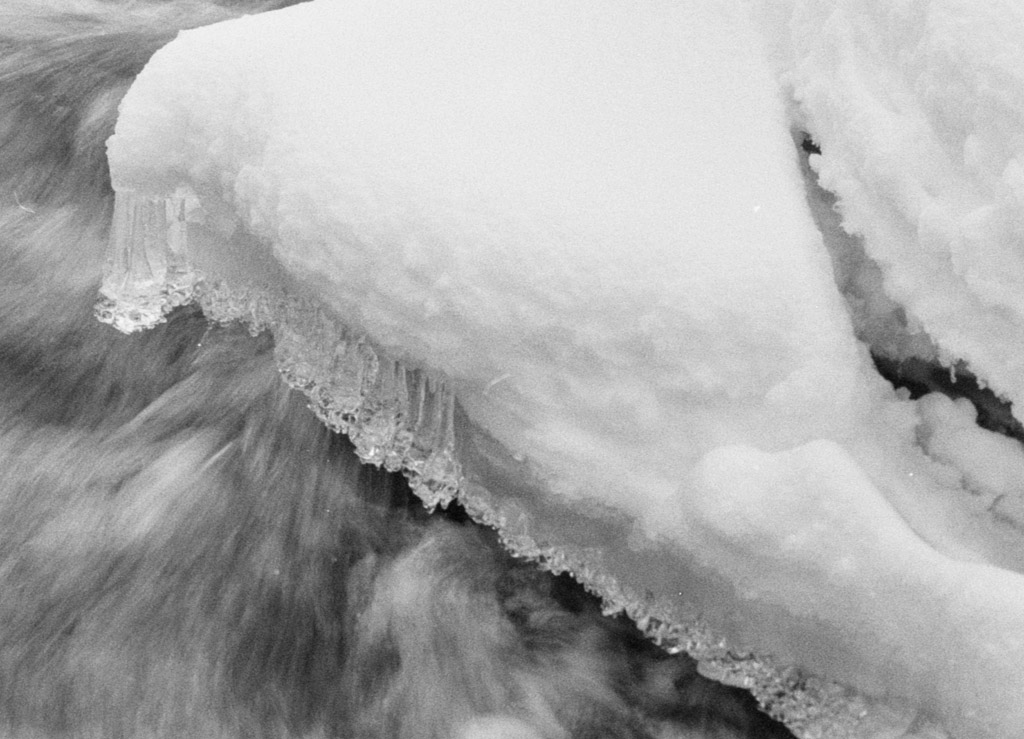
I didn't suggest anything like that pellicle... I "always" have the focusing fixed and untouched during the shooting. I also didn't change the exposure, it's in the image of the flowing but frozen water I used a shorter exposure time for the top part. That was only to handle the dynamic range inthe image.
I think I use two methods for taking panos/mosaics, then mixed with a third one.
Manual exposure, manual focusing, manual WB and a choice of aperture making the whole subject within the DOF all helps.There are exceptions though.
1) Tripod and pano head. This is very good for tricky panos with a lot of background details. Everything manual as above.
2) Handheld. With some exercise one can get good results also in semi tricky conditions. One trick is to check a nearby detail against a far away detail at the right side of the viewfinder (provided you are taking images from the left to the right) and check they align approx the same when having turned the camera.
x) Automatic settings. When the DR is very wide I have experimented with having the exposure set to Auto (aperture priority!). PTGui handles this pretty well but the image does of course need some extra help during post.
x) focus shift. The top image in my first post is an example; I changed the focus slightly between the two exposures to get an impression of wider DOF. The OM50/2 handles this OK. Some experimenting with the favourite lenses are at place.
On white balance:
Most panos cover a wide area and the dynamic range we want to capture often exceeds what the camera can handle. We are somewhat helped by the size of the resulting image where we can lift the shadows more than usual and still not get a lot of noise. Exposing to the right is very good. So, I set the camera to one of my custom white balance slots, the one I have set to UniWB. Then I take some test exposures checking the resulting histogram and placing it as far to the right as possible.
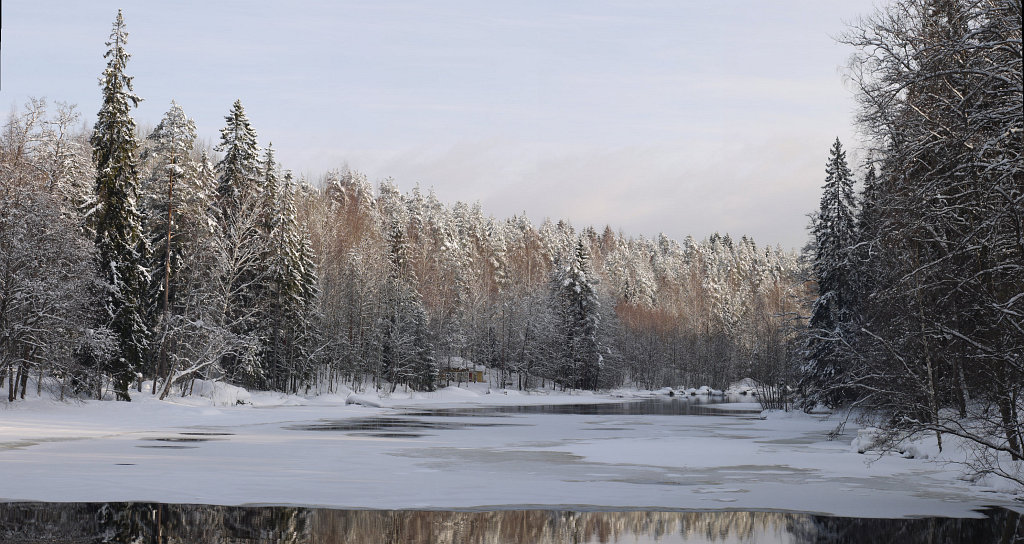
Here is a pano, or mosaic, taken with this method, a sloppyweb version quickly developed right now:
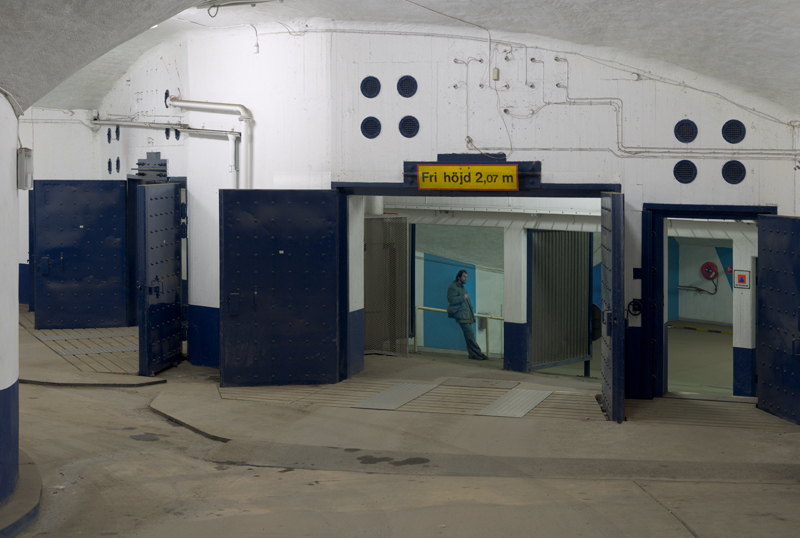
Above: using UniWB for the exposure saved the dark garage doors by allowing for exact exposure with the white wall on the limit to get burned out. Here a tripod was necessary for the exposure time, and a pano head for the alignment.
Above: Mainly for fun, a 100% crop giving us an idea about what size the panos can be printed to.
But as mentioned by pellicle above; there are no rules. Experiment and have fun! To me panos and stitching is the second best feature with digital photography, something that couldn't be done in the darkroom and at the same time increases the image quality.
regards,
/Jonas


")