The GetDPI Photography Forum

Great to see you here. Join our insightful photographic forum today and start tapping into a huge wealth of photographic knowledge. Completing our simple registration process will allow you to gain access to exclusive content, add your own topics and posts, share your work and connect with other members through your own private inbox! And don’t forget to say hi!

Scanning MF Film with MF Digital System

Mexecutioner

Well-known member
Not sure I understand the complete lack of "transparency" (pun intended and offered) regarding pricing. Starting to feel like airline and scalped concert tickets where everyone may pay a different price and we don't want to offend anyone. Sure with the P1 gear there is MSRP. With the DT proprietary gear, you make and sell it, so you control the market price 100%...so secrecy gains what?

RB
I don’t see any secrecy here, Ken asked for a range of prices and that’s what Doug provided. I’m actually surprised Doug has as much patience as he does in this forum. I’m also sure someone really interested (or really curious) could reach out to DT and get an actual quote for whatever they’d like to buy. Not everyone will pay the same I’m sure, but the same happens with cars and the sun will rise again tomorrow
 

Abstraction

Well-known member
I don’t see any secrecy here, Ken asked for a range of prices and that’s what Doug provided. I’m actually surprised Doug has as much patience as he does in this forum. I’m also sure someone really interested (or really curious) could reach out to DT and get an actual quote for whatever they’d like to buy. Not everyone will pay the same I’m sure, but the same happens with cars and the sun will rise again tomorrow
Well, now that we've put Doug on the same plane as a car salesman, the sun will rise again tomorrow. :p
 

RLB

Member
Well, now that we've put Doug on the same plane as a car salesman, the sun will rise again tomorrow. :p
Asking the retail price of something your company sells is not putting anyone on the spot. Relax, Doug's a full grown man, he can handle the tough questions.


RB
 

RLB

Member
I don’t see any secrecy here, Ken asked for a range of prices and that’s what Doug provided. I’m actually surprised Doug has as much patience as he does in this forum. I’m also sure someone really interested (or really curious) could reach out to DT and get an actual quote for whatever they’d like to buy. Not everyone will pay the same I’m sure, but the same happens with cars and the sun will rise again tomorrow
We ask for the price of the components and the answer returned as ball park quotes. Is it really that divulging to say our Atom Stand cost $xxx, the Lights are $xxx per set, film holder is $xxx ? One must call for a price and be screened by a salesman? Let's face it their market is to museums with deep pockets, not individual photographers, although there are a few by Doug's admission. DT's CH equipment is well designed and fits a niche for its use nicely. But the secrecy is mystifying. Example: I signed up for one of their Round Table events to see their new book cradle we were contemplating purchasing. Two days prior to the event I got an email from them telling me they took me off the attendee list because in so many words I was a spy. I called them. They said who the fxxck are you? If that's not secrecy and paranoia, what is? I mean I'm flattered that they think so highly of my espionage skills. I was planing on shooting the entire thing on my Tie Tack video camera. Now the price secrecy. They have a fine product but their response to customers, any who are not major museums or archives is not very friendly. My suggestion if they really want to keep all undercover is to stop talking about it and promoting to the general public and have required keys to log in to their site.

RB
 
Last edited:
We ask for the price of the components and the answer returned as ball park quotes. Is it really that divulging to say our Atom Stand cost $xxx, the Lights are $xxx per set, film holder is $xxx ? One must call for a price and be screened by a salesman? Let's face it their market is to museums with deep pockets, not individual photographers, although there are a few by Doug's admission. DT's CH equipment is well designed and fits a niche for its use nicely. But the secrecy is mystifying. Example: I signed up for one of their Round Table events to see their new book cradle we were contemplating purchasing. Two days prior to the event I got an email from them telling me they took me off the attendee list because in so many words I was a spy. I called them. They said who the fxxck are you? If that's not secrecy and paranoia, what is? I mean I'm flattered that they think so highly of my espionage skills. I was planing on shooting the entire thing on my Tie Tack video camera. Now the price secrecy. They have a fine product but their response to customers, any who are not major museums or archives is not very friendly. My suggestion if they really want to keep all undercover is to stop talking about it and promoting to the general public and have required keys to log in to their site.

RB
There is also the risk that people who have experience with camera scanning will point out that their solution is suboptimal and that better results can be achieved with different components. Though it is tough to break through the "most expensive = best" bias.
 
Another thing I like about designing your own camera scanning system is the flexibility it gives you when it comes to resolution. In this case I wanted to see what a really high res scan of 6x6 E100 looked like, so I did 2x pixel shift scans and stitched them. It sort of feels more like you're working with an enlarger in the darkroom in reverse, so the process at least to me is a little more satisfying than using a dedicated scanner. I shot this at an abandoned house near by with my Hy6 Mod 2 and the Schneider 80/2.8 AFD Xenotar. The new Ektachrome is a fantastic film, and fantastic for scanning because it's perfectly flat when dry.

In this case I was able to make a 1.5gb file that would print to about 54.5x54.5 at 300dpi. A little less as 360. 267 megapixels.


_ANA4871-Pano-facebook.jpg_ANA4871-Pano-facebook-2.jpgScreen Shot 2020-04-23 at 4.03.24 PM.jpg
 

dougpeterson

Workshop Member
Another thing I like about designing your own camera scanning system is the flexibility it gives you when it comes to resolution. In this case I wanted to see what a really high res scan of 6x6 E100 looked like, so I did 2x pixel shift scans and stitched them. It sort of feels more like you're working with an enlarger in the darkroom in reverse, so the process at least to me is a little more satisfying than using a dedicated scanner. I shot this at an abandoned house near by with my Hy6 Mod 2 and the Schneider 80/2.8 AFD Xenotar. The new Ektachrome is a fantastic film, and fantastic for scanning because it's perfectly flat when dry.

In this case I was able to make a 1.5gb file that would print to about 54.5x54.5 at 300dpi. A little less as 360. 267 megapixels.


View attachment 149054View attachment 149055View attachment 149056
That is not a technique limited to DIY systems. Our system was specifically designed with the tolerances, carriers, and workflow for 1.5 axis stitch workflows. When doing this for higher volume work, we also make software for batch stitching them into their composites, which is typically done overnight handling all the film captures during a day of scanning.

For a 6x6 piece of film that would allow a maximum of 28000x28000px resolution (784 megapixel, 93”x93” at 300ppi). Though this will exceed the resolution of the film in nearly all cases. This technique is far more common and far more useful for 4x5 and larger or for formats like 6x17.

If you need more than 1.5 axis stitching then we do have a dedicated system called the DTXY that includes an advanced user swappable detent system that allows for any arbitrary resolution for any arbitrary film size up to 11x14. But thats a specialized/niche system even by our already-specialized-and-niche standards.

For anyone doing stitching DIY I encourage you to stick with 1-axis stitching (eg turning your camera to use the cameras long edge on the films short edge, and doing a 2x1 or 3x1 stitch). The reason being that it’s much easier to sufficiently control the degrees of freedom with one axis of movement than two. Also, be especially (even more so than usual) careful about leveling and paralleling your camera and work deck since any misalignment can lead to stitching errors or visual artifacts when stitching the results together.
 

Craig Stocks

Well-known member
A high resolution “scan” doesn’t really tell me anything about the overall quality of the process. If the goal is to exactly match the tones and colors of the original then how do you know it matches? If that’s your goal then it doesn’t matter if the digital version looks good, it only matters that it looks just like the original. It’s a technical process and requires some form of objective validation of the results.

If your goal is a good looking digital image based on the original then the exact match doesn’t matter since that’s not one of your criteria. In this case it’s an artistic endeavor and as long as the artist is happy then it’s successful.

Either way they are two entirely different goals.
I would say Doug is selling a system based on the complete accuracy of reproduction. Where as I am describing the kind of system a normal photographer would want which is more like printing. I'm both trying to reproduce a chrome accurately within good aesthetic reason, and enhancing the image subtly when needed. So I had no qualms about putting a slight vignette on the 5x7 Portra 160 image you see above.

But you have a few tools in ACR to focus on accuracy. First the lenses have profiles to correct them, though the Sigma 70 needs almost no correction especially at 5.6. Then you can establish your white balance manually or based on the specs of the light table. I tend to do this manually. However, it's a raw file that is generated so there is some flexibility there post capture. If you want to go a step further you can use the flat-field tool which is new to LR but I think C1 has had for some time now.

The biggest difference you see in the E100 image I posted from the real chrome on the light table is that the original reveals much less shadow detail to the naked eye. I saved the highlights on the news print at the expense of shadow info in the exposure. When using a pixel shift method the noise floor is so suppressed that your ability to bring back shadow info is greatly increased, it's an incredible tool to have. This is one of the big differences between camera capture now and CCD based scanners like the Imacons. If you tried to bring back those shadows it would be a noisy mess with a Hasselblad scan. Drum scans probably would be able to with something like a Tango.
 

RLB

Member
There is also the risk that people who have experience with camera scanning will point out that their solution is suboptimal and that better results can be achieved with different components. Though it is tough to break through the "most expensive = best" bias.
Digitizing film with a 150mp MF back, the proper lens and great rig that addresses critical alignment once its dialed in can be a far more productive device than a traditional film scanner with quality that is absolutely on par with the X5. However, the enhanced productivity comes at a much higher buy in price. For large collections with deep pockets its a great option to get through massive amounts of content quickly.

Looks like I've been ghosted on my real questions tho:

- "C1 CH only works with our cameras"? What exactly are "your" cameras?

- Price of individual components of the DT CH system?

- Why the secrecy and allusiveness?

- Why the nastiness to others in the community who are digitizing?
 
Digitizing film with a 150mp MF back
150mp back with bayer interpolation thereby reducing the actual resolution. Not so important when photographing in the field, more important when scanning.

"Their" cameras are listed on the site. They have names that make them sound like test planes but they're taking tech camera lenses and putting them in a fixed rig probably with a shutter, though I think the backs have electronic shutters which should be used in most cases. It also looks like it has AF which is a nice touch, though it's not super clear. The addition of 10gb ethernet and all C1 control are definitely great and should speed things up a lot. The USB-C in my S1R is pretty dang fast though.

http://dtculturalheritage.com/dt-ixh-150mp-cultural-heritage-camera-by-phase-one/

I should make it clear that for museums and archives I do think it's a great solution. But again for the OP, photographers, mere mortals, my point is that you can get better image quality with a 135 camera pixel shifting and rigging up your own personal system. I could at any time integrate a GFX 100 in to my system if I wanted to, but it would have worse image quality in the end and more complications. Plus if Sony is any indication, the S2R or S1R2 or whatever they call it, will allow me to likely double my file size at an expense of only $3000 ish dollars minus the resale of the current S1R. If you scan a lot and still shoot film it's the way to go IMHO. The only reason I'm still posting is that Doug keeps claiming without evidence that their solution is 'the best'. Team spirit is one thing but I don't tell people my scans are better than Tango drum scans, which is obviously not true. (I am aware that you can't wet scan cultural heritage films).
 

RLB

Member
150mp back with bayer interpolation thereby reducing the actual resolution. Not so important when photographing in the field, more important when scanning.

"Their" cameras are listed on the site. They have names that make them sound like test planes but they're taking tech camera lenses and putting them in a fixed rig probably with a shutter, though I think the backs have electronic shutters which should be used in most cases. It also looks like it has AF which is a nice touch, though it's not super clear. The addition of 10gb ethernet and all C1 control are definitely great and should speed things up a lot. The USB-C in my S1R is pretty dang fast though.

http://dtculturalheritage.com/dt-ixh-150mp-cultural-heritage-camera-by-phase-one/

I should make it clear that for museums and archives I do think it's a great solution. But again for the OP, photographers, mere mortals, my point is that you can get better image quality with a 135 camera pixel shifting and rigging up your own personal system. I could at any time integrate a GFX 100 in to my system if I wanted to, but it would have worse image quality in the end and more complications. Plus if Sony is any indication, the S2R or S1R2 or whatever they call it, will allow me to likely double my file size at an expense of only $3000 ish dollars minus the resale of the current S1R. If you scan a lot and still shoot film it's the way to go IMHO. The only reason I'm still posting is that Doug keeps claiming without evidence that their solution is 'the best'. Team spirit is one thing but I don't tell people my scans are better than Tango drum scans, which is obviously not true. (I am aware that you can't wet scan cultural heritage films).

P1 CH is simply a version of C1 with additional tools and color profiles codeveloped by DT and P1, specifically for use in the mass digitization market and supports all P1 DBs. Its not top secret, it was not discovered in Area 51, and no there was no alien involvement contrary to what the History Channel may tell you.
 

Godfrey

Well-known member
Thanks. The perplexing question is how to accurately align the camera sensor to the negative carrier sitting on the baseboard so that the two are perfectly parallel. There are copy stands that allow microfine adjustments of the vertical height of the arm holding the camera, but how do you do microfine adjustments of the camera position on the arm itself?
I haven't read the whole thread yet, this topic may be addressed later in the thread.

I use a bubble level for aligning things.
  • Align the copy stand to ensure that it is properly vertical and that the camera mounting is orthogonal to the base, and that the base is level.
  • Fit the camera to the copy stand and use the bubble level to ensure that it is level.
  • Set up the film/print/subject fixture to ensure that it is level.

I then run the lens out to the maximum magnification and focus it on the center of the target. Once I have that, I raise the camera lens assembly such that it remains centered on the target, refocusing as I go until I get the image magnification required for the particular negative or print target.

Once I do that, I am sure that everything is square and aligned correctly. You have to have fixtures or carriers for the film and/or print originals such that you can reliably position them again after moving to the next frame, and that they are held as flat as possible.

I've done one run of captures, of 6x6 negatives, using the 907x fitted with Fotodiox Pro Leica R to Hasselblad X mount adapter and Macro-Elmarit-R 60mm lens. This was reasonably successful.


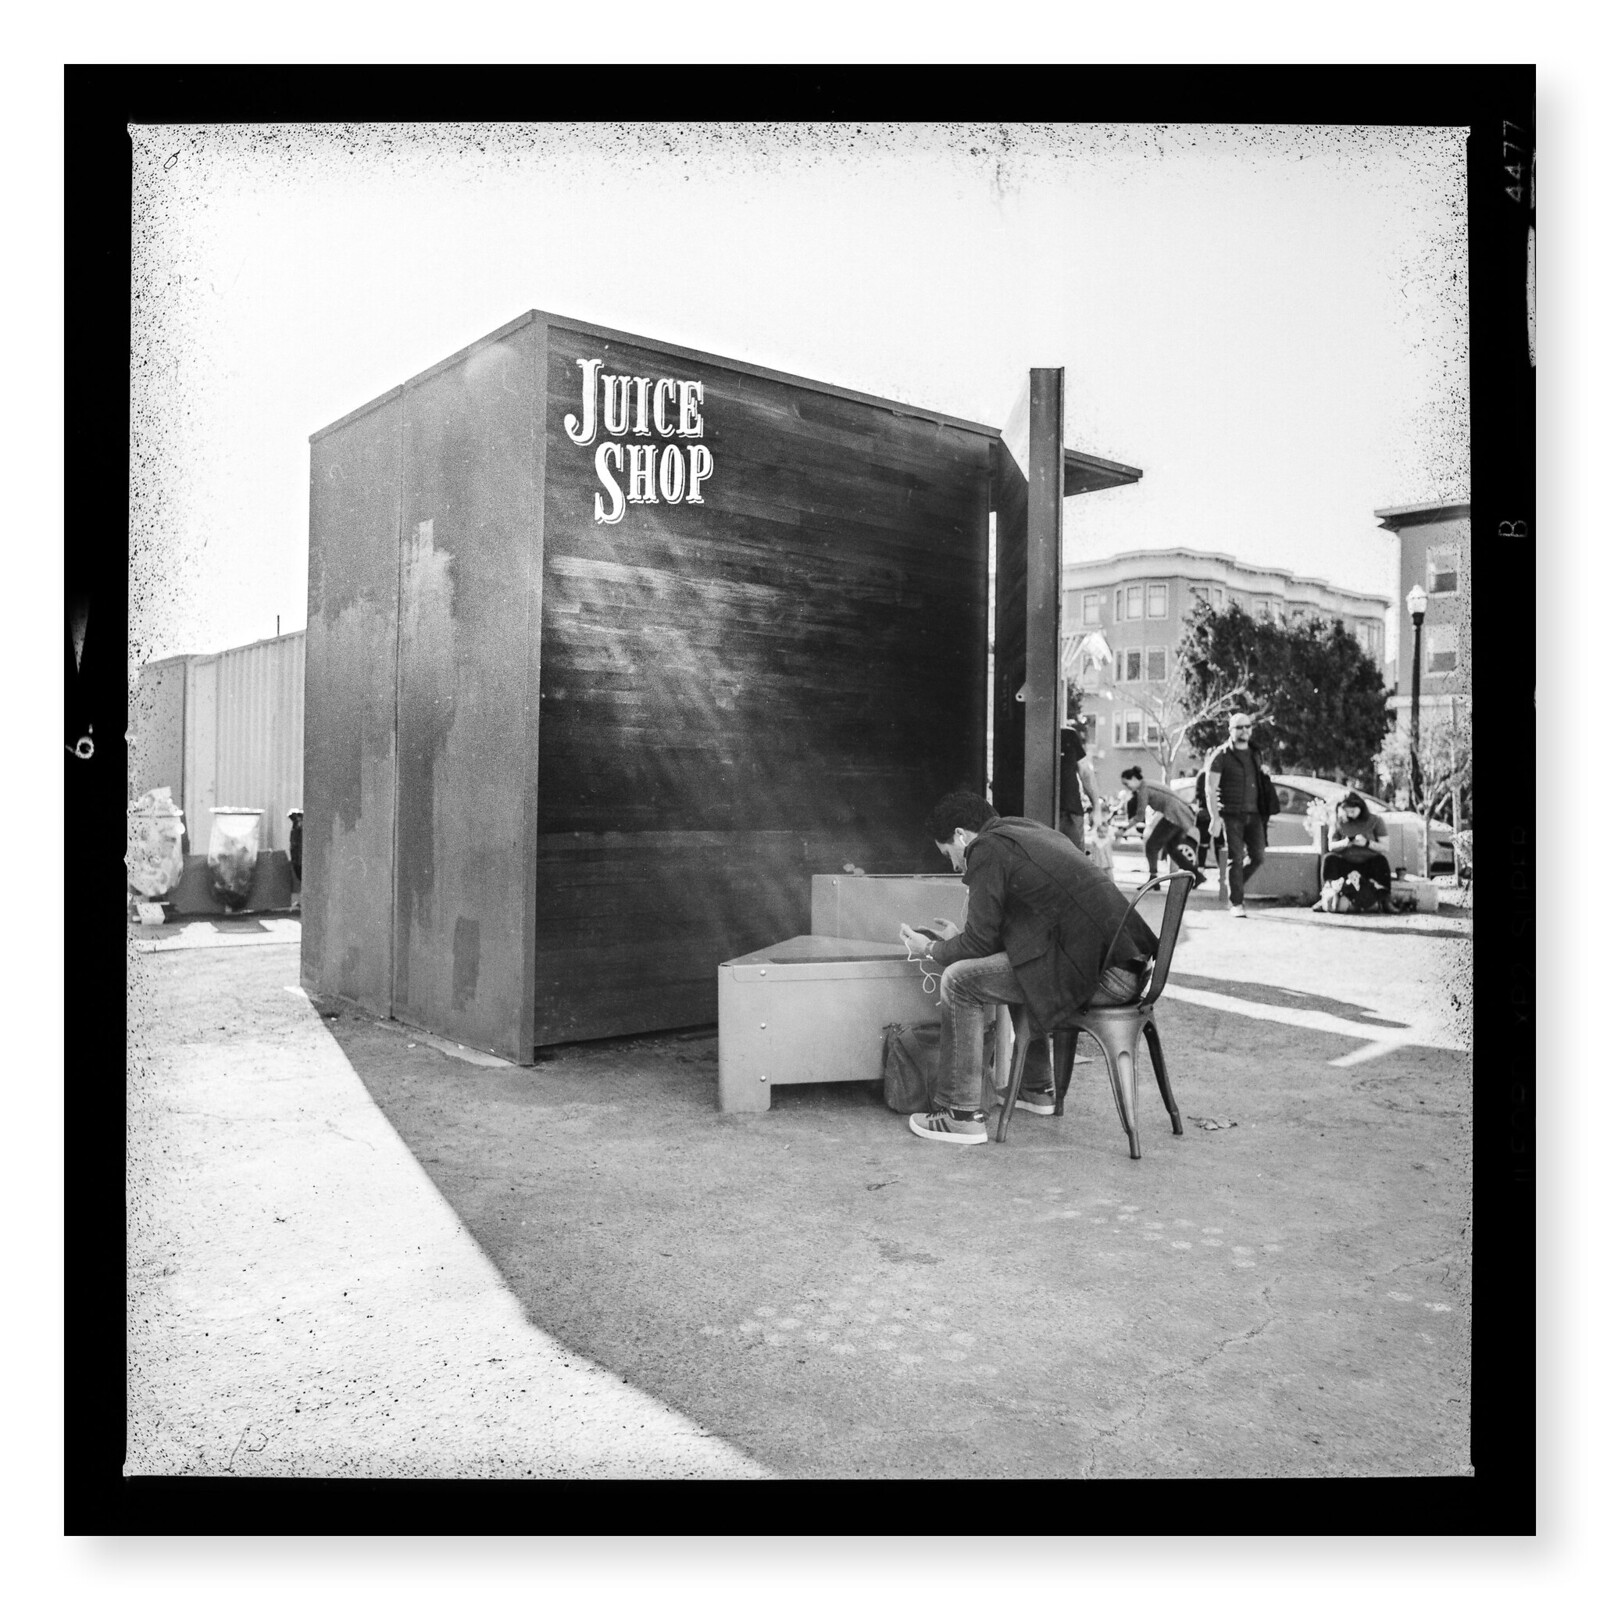
Juice Shop - San Francisco 2019 (2020 scan)
Hasselblad 500CM + Distagon 50mm f/4

I'm going to try using the CFVII 50c back on Hasselblad 500CM using the Makro-Planar 120mm and a couple of extension tubes to see if I get better results that way. If not, I'll stick with the lighter, shorter Leica R setup.

G
 

dougpeterson

Workshop Member
Well I've been compared to a car salesman, the conversation has veered to aliens and area 51, our decision not to put pricing on a forum has been categorized as a massive conspiracy (it's not; it's literally a call or email away), and I've been told I'm talking out of my ***, despite spending the better part of the last eight years working with image scientists and the most prestigious institutions in the film archiving world to carefully improve our system using objective measurement and international standards compliance.

It's kind of blurring together at this point, and well off the topic of helping the OP.

So, I think I'll politely end my participation on this thread, and go have a glass of wine.

@howard, if you run into issues with your DIY setup or have other questions you know where to find me.
 

Craig Stocks

Well-known member
I don't have much experience with transparencies but when I do flat art reproduction I find Capture One is much easier to get accurate results. It's not so much that you can't get there with Lightroom/ACR (which are the same processing engine) it just takes more work.

Resolution is never an issue when I photograph a painting; it wasn't when I started out using a mere 60 megapixel back and it certainly isn't today with 150 megapixels. The challenge is that painters are very sensitive to color and they expect the digital copy to have exactly the same colors and tones as the original. Even if I think a painting would look better with a little more contrast and saturation that's not my job - and it's not what the customer wants. I really prefer it when the artist also orders a print, then I can validate my entire process by creating a file where the print I make is a visual match to the original. (Of course that also adds printer, paper, profiles and even rendering intent into the equation but if I start with the right colors in the file then the rest is pretty easy.)

I normally use a custom Lumariver flat art reproduction camera profile with Capture One to get the best results, but the real advantage of C1 is the availability of a linear response curve. Standard curves add too much contrast and standard profiles tend to add too much saturation. That makes photos look good, but makes accurate copies difficult.

I did a quick test using my old Sony a7r2 and processed the same frame three ways, Lightroom, Capture One with the standard profile and Auto curve and Capture One with the Linear Response Curve. I set the exposure for the 50% gray patch on the Color Checker and white balanced on the 85% gray patch. Everything else was default. I did not use a custom profile nor did I do any additional processing.

Each image is shown below with an overlay showing reference colors for the Color Checker. The top-left of each patch is transparent so you can see the actual color of the photo. The bottom-right is the documented average color of each patch. The small square in the center of each patch is my measurement of my Color Checker.

As you can see the Capture One process using a linear response gives much more accurate tones and colors even without additional processing or a custom profile. With a custom profile and a little tweaking with levels and the color editor I can produce a nearly exact color and tone match.

FWIW I've also done similar comparisons in the past using the X-Rite custom profile process as well as Lumariver's flat art reproduction profile process for ACR and I always get better results with Capture One.

I would think that photographing transparencies would show the same difference and that the C1 toolset would make the process easier - and more accurate.
 

Attachments

hcubell

Well-known member
Well I've been compared to a car salesman, the conversation has veered to aliens and area 51, our decision not to put pricing on a forum has been categorized as a massive conspiracy (it's not; it's literally a call or email away), and I've been told I'm talking out of my ***, despite spending the better part of the last eight years working with image scientists and the most prestigious institutions in the film archiving world to carefully improve our system using objective measurement and international standards compliance.

It's kind of blurring together at this point, and well off the topic of helping the OP.

So, I think I'll politely end my participation on this thread, and go have a glass of wine.

@howard, if you run into issues with your DIY setup or have other questions you know where to find me.
Thanks, Doug. I appreciate your input on this thread. I was very intrigued to hear about the CH solution, though you readily acknowledged that it was a totally cost ineffective solution for me. It may very well be the state of the art in film scanning today, and I do want to know how close you can get to it with a DIY system using a camera like the Sony A7RIV or the Panasonic S1R with pixel shift technology. Hopefully, someone will take you up on your offer to help with such a comparison.
 

anyone

Well-known member
Let’s come back to the topic, since a great advantage of this forum is that we have knowledgeable contributors who are nice to each other.

I try to summarize the points made. I suppose the aim of the scanning would be to scan images of the personal archive and occassional prints from them, and we are going down the DIY route. Please apologize that I shortened some of your quotes.

So the ingredients are: solid copy stand, a camera & software, making sure that everything is parallel, a good light source , a negative / film carrier.

Solid copy stand
We originally used Kaiser columns and stands, years ago. Based on our experience we decided to start making our own.

If you do buy a Kaiser I'd strongly encourage you to do so only after you've physically inspected one in person in order to see if they fit your expectations. Preferably you'd have the chance to use one for several hours as the mark of a high-quality copy stand is how well/accurately it holds its calibration after you have aligned it (vs drifting, slacking, or settling into a position other than what you set it to).

Honestly, if you're looking for a way to hold the camera and can't justify the cost of a high-quality digitization stand like the DT Atom with DT AutoColumn then I'd suggest jerry rigging a cross bar system across two or three heavy-duty C-Stands with sandbags and using grip knuckles to support the camera from both the tripod mount and the opposite side of the camera. Changing heights will suck (read: be finicky and take a while), and it's nowhere near as elegant as a proper solution, but at least that way you won't have to deal with sag and slack that cause both uneven and inconsistent sharpness that can come with lower-cost copy stands.

If you happen to have a heavy-duty old-fashion camera stand, that can also be an option, as these were generally build like tanks and the ones intended to support large-format cameras at their furthest-extension will be very solid with a smaller camera at mid-extension.

Camera & Software
The two best camera scan cameras right now are the Panasonic S1R (my preference) and the Sony A7R IV. Both of these allow you to use pixel shift to achieve extremely high resolution files without stitching, and they're true RGB captures instead of the bayer readouts you get from the Phase backs unless I am mistaken. The scans I get from my S1R using the Sigma 70mm 2.8 ART Macro easily exceed what you get from Imacon/Hasselblad scanners. I would bet they match drum scans until you get to those extremely high resolutions (like 4000dpi from an 8x10 sheet). Plus the S1R outputs files that are easily read in ACR so they work with the best negative inversion software available today, which is Negative Lab Pro.

https://www.negativelabpro.com/
I normally use a custom Lumariver flat art reproduction camera profile with Capture One to get the best results, but the real advantage of C1 is the availability of a linear response curve. Standard curves add too much contrast and standard profiles tend to add too much saturation. That makes photos look good, but makes accurate copies difficult.

I did a quick test using my old Sony a7r2 and processed the same frame three ways, Lightroom, Capture One with the standard profile and Auto curve and Capture One with the Linear Response Curve. I set the exposure for the 50% gray patch on the Color Checker and white balanced on the 85% gray patch. Everything else was default. I did not use a custom profile nor did I do any additional processing.

Each image is shown below with an overlay showing reference colors for the Color Checker. The top-left of each patch is transparent so you can see the actual color of the photo. The bottom-right is the documented average color of each patch. The small square in the center of each patch is my measurement of my Color Checker.

As you can see the Capture One process using a linear response gives much more accurate tones and colors even without additional processing or a custom profile. With a custom profile and a little tweaking with levels and the color editor I can produce a nearly exact color and tone match.

FWIW I've also done similar comparisons in the past using the X-Rite custom profile process as well as Lumariver's flat art reproduction profile process for ACR and I always get better results with Capture One.
Making sure that everything is parallel
That's actually not as hard as you might think. I did it using the same approach I used to use to make sure my enlarger and baseboard were parallel. I made sure the surface holding the negative was level, put a mirror where the film that I want to scan goes, and then adjusted the camera on the tripod until the lens was perfectly aligned with the hole in my scanning template.
An L60 or L75 plus a Laser Alignment tool is your best bet given your budget/direction. In our experience bubble levels, even the high precision ones, are not really well-suited to this specific task.
Light source
First the tools from these guys are superb: https://www.negative.supply/

[...]Not being satisfied with the Kaiser Slimlight Plano they have recently developed their own light source which achieves 99 CRI. It's very difficult to do better with an LED unless you go with a trichromatic source from Heiland and dial in the correct settings for every roll/frame/sheet. Not really practical.
I'd strongly the DT Photon for its ultra high CRI/CQS and smooth (read: minimal spikiness) spectral characteristics.
Negative / film carrier
Even if you shoot just one frame per negative, I would recommend you use a template of some kind around the negative to block stray light. Wet scanning (fluid mounting) will save you some time in post cleaning up scratches and dust, and will give better results.
First the tools from these guys are superb: https://www.negative.supply/

They are rock solid, all metal, and as of recently made in the USA. I use the 35mm carrier regularly, and I beta tested the 120 carrier. They made me a custom platform for 8x10 and I use their stock 4x5 solutions.
Here I could chip in a little from my side, as I had the issue of film flatness during my whole scanning learning process.

Please correct me if I’m wrong, but solutions for flatbed scanning could work well for this application. I did like the Betterscanning film holders + custom masks to avoid stray light. It’s wet mounting, but fairly quick, as you do not need to tape everything down like on a drum scan.

Then there are the lomography digitaliza masks, very inexpensive, without glass, but also a very effective solution to get (smaller, lets say until 120 – do they even make larger ones?) images straight.

The magnetic holders of Imacon / Hasselblad are also really nice for that purpose I can imagine.

Alternative workflow description:
I use a Kaiser Slimlite Plano light tablet and sheet of optically clear glass to keep negatives and slides flat. This sits on the corner of a heavy desk, which I ensure is completely horizontal with a carpenter's level. Then my heavy Gitzo tripod is set up so it straddles the corner, one leg on either side and one leg back.

My Phase XF, IQ4-150 and 120 mm Phase macro lens are mounted on an Arca Swiss Cube which is adjusted to point vertically down. I have a short spirit level that I use to ensure the back is absolutely horizontal both fore and aft and side-to-side. The Cube makes fine adjustments easy.

I then shoot a test negative which has very fine detail, especially in the corners. I shoot at full aperture, tethered to my computer. I use the electronic shutter and vibration delay, releasing from Capture One to avoid any vibration. I check the corners of the image at 100% to make sure I have the back and the slide truly parallel.

Now I'm ready to "scan". I use f5.6 for the aperture as that's the sharpest for that lens. I use F8 for 35 mm mounted slides just to allow a bit of DOF to compensate for the fact they are not truly flat - unless I take them out of the mount. But most of my "scans" are 6 x 6 negatives or transparencies.
So, there has been lots of good knowledge on this thread, let's go back to the facts to build up a "as good as it gets" DIY camera scanning rig.
 

dj may

Well-known member
I have not tried any camera other than Leica S 006 and Leica S3 with APO-Macro-Summarit-S 120 lens. I use a Kaiser LED panel and negative carriers from an Omega D enlarger. I also tried a Doerr LED panel, but the Kaiser was better. I mask the LED panel so that the light only comes through the negative carrier. Leveling the camera and the negative carrier is not difficult, if using a tripod head. I also use a polarizer on the lens. The film emulsion is facing the camera.

In my scans, the film grain is clear edge to edge. I suggest, that if one can see the grain clearly edge to edge, then the gear has been successfully focused and leveled. Also, if the grain is clearly defined, then there is not much that can be improved, assuming the exposure is correct.

Using this setup, I have been able to "scan" more than 100 negatives in a day, mainly 4x5 negatives.
 

rdeloe

Well-known member
Let’s come back to the topic, since a great advantage of this forum is that we have knowledgeable contributors who are nice to each other.

<snip>

So, there has been lots of good knowledge on this thread, let's go back to the facts to build up a "as good as it gets" DIY camera scanning rig.
Super summary! Well done.

The only friendly amendment I'd make for DIY camera scanning is don't fear wet mounting. It sounds scary and dangerous, but it's really simple:
* Gamsol Odourless mineral spirits (available from your local art supply store once it re-opens)
* Some Duralar film (or similar)
* A "brayer" (a hard rubber roller used in print making)
* Some Bounty paper towels (or other very low lint)

None of the 4x5 negs I've scanned using wet mounting show any signs that I did that. I lean them up against something to allow air to reach both sides, and the mineral spirits dry cleanly.
 
Top