The GetDPI Photography Forum

Great to see you here. Join our insightful photographic forum today and start tapping into a huge wealth of photographic knowledge. Completing our simple registration process will allow you to gain access to exclusive content, add your own topics and posts, share your work and connect with other members through your own private inbox! And don’t forget to say hi!

Questions on trying to get better at using tilt on a tilt-swing

Greg Haag

Well-known member
I have been reading some of the great information provided in this thread and practiced a bit this morning. The 2 styles, if you call it that, that seem to fit my shooting and that I feel like might work best for me out in the field are first, Daves method (post #4) of everything level, focus to infinity then tilt to bring into focus. I love the simplicity of this! Second, is Rob's method (post #6), this feels like a method I can remember out in the field when pressed for time. I shot that method this morning and here are the results and a few BTS shots. Any feedback here greatly appreciated!

Tilt Test-1.jpg

Tilt Test v2.jpg

Tilt Test-2.jpgTilt Test-3.jpgTilt Test-4.jpgTilt Test-5.jpgTilt Test-6.jpg
 

algrove

Well-known member
Hey Lou!
Responding to the "comments please" in your post:

There are a few things in your process to experiment with. I think we all do this a little differently, and there is no "best" way. In some cases, it depends on the placement of objects in the scene you are capturing. In other cases, just personal preference.

First, whether to open up the lens while doing this then stop down after: I do that all the time, but really either works. I think it helps more with wide angle lenses vs telephotos. The DoF wedge is usually quite narrow with longer lenses, so the perceived difference from stopping down may not be much when looking through LV. I say "perceived" because I still don't think the screen quality in LV on a P1 back is all that good for fine detail. YMMV. With wider lenses, it does help me to position the plane of focus more accurately, then stop down and make sure everything I want is acceptably in focus.*

Second, I recommend at least trying either 1 degree (lens < 40mm eq) or 1.5 degrees (lens > 40mm eq) of tilt before step #2. In just about every case, it cuts down on the back and forth iterations. The exception would be product photography where you are trying to do something very specific that requires dramatic tilt angles. That still has to be thought through first unless you have Gerald's CapCam. ;)

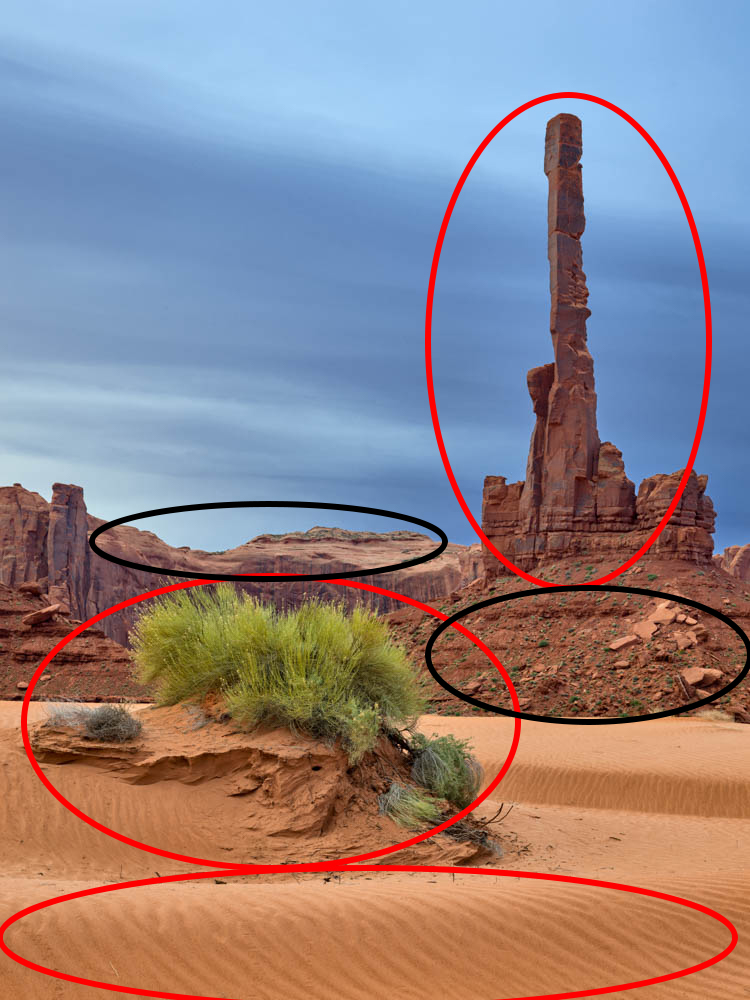
Third, some say focus close first, others far first, then dial in tilt to get the other (far or close). I think far first makes a lot of sense because of the point I made earlier about how the plane of focus rotates, but with one caveat: I might change this to say focus high in the frame first, and then tilt to get the lower portion of the frame in focus. For this context, "high" means whatever is important higher in the frame that you care about. "Lower portion" means the same. Not necessarily the physical top or bottom of what is in view. If there is a low foreground bush 5 feet away and a tree 30 feet away that extends to the top of the frame, then a mountain off in the distance that extends 2/3 of the way up the frame, the tree to might be more important to have sharp than the distant mountain. I might want to focus on that tree, even though it is closer than the mountain. Then tilt for the bush 5 feet away.

Dave

*Note: I am pretty convinced focus shift at the f-stops we normally use to check and shoot is irrelevant. Focusing a f/5.6 then shooting at f/8 - f/16. If you are using adapters and faster lenses like f/1.4 or f/2, then I'm in the weeds on this point.
Thanks Dave
Of course we all have variants to what I say. At times from experience I will first dial a small amount of tilt if I have a close foreground item and say far away mountains. Yes, I often just start at f10 on my 40mm and go from there. If tilt needed agree that close focusing might be easier to start with depending on lens. For sure the P1 LV for the price leaves a lot to be desired in terms of critical focusing.

There is one constant with tilt lenses and that is change.
 

dchew

Well-known member
I have been reading some of the great information provided in this thread and practiced a bit this morning. The 2 styles, if you call it that, that seem to fit my shooting and that I feel like might work best for me out in the field are first, Daves method (post #4) of everything level, focus to infinity then tilt to bring into focus. I love the simplicity of this! Second, is Rob's method (post #6), this feels like a method I can remember out in the field when pressed for time. I shot that method this morning and here are the results and a few BTS shots. Any feedback here greatly appreciated!
That's great practice, Greg! Just to clarify, the process I outlined in post #4 was just for practice / learning. It is not the process I use when I'm in the field unless I'm shooting the open ocean or flat fields of soy beans. :)

My normal process is:
  1. Dial in 1 to 2 degrees of tilt depending on lens selection. For me, the 35mm = 1 degree, 60mm = 1.5 degrees, 90mm 2 degrees.
  2. Lens wide open: Focus far/high in the frame; note helical position.
  3. Zoom in to the low/close object. Adjust focus to get it sharp. Note helical position.
  4. If the close/low object needed a closer distance setting, there is not enough tilt. If the close/low object needed a farther distance setting, there is too much tilt.
  5. Set the helical in between the two low/high focus points and adjust tilt until the close object is back in focus.
  6. Check the far/high object. It is usually spot on. If not repeat.
  7. Stop down the lens, verify everything is in focus and shoot.
The amount of tilt I auto dial in step #1 is really scene dependent and lens dependent. I often want a wedge that starts below the ground in the area in front of the lens' field of view, penetrates the ground just before the field of view, then rises up so the wedge front DoF covers the foreground and whatever is in the background gets covered by the back side of the DoF wedge. This is helpful because having the wedge start below the ground requires less tilt. Don't forget, less tilt equals a wider DoF wedge.

Here is the normal example I use. Red areas are sharp, black areas are somewhat soft. You can imagine how the DoF wedge propagates through the image. If I tried a more traditional, horizontal wedge with more tilt, the top of the totem would not have been sharp (90mm lens):


Dave
 

Greg Haag

Well-known member
Dave, completely understood that it was you trying to help a novice and not overwhelm him. I know enough about you to understand that was not the extent of your tilt workflow! It is still and awesome technique!
 

rdeloe

Well-known member
Don't forget, less tilt equals a wider DoF wedge.
Excellent advice in that post Dave. Your point about thinking through where the wedge goes is one of the "make or break" concepts for tilt, in my view. Once people start being able to visualize where the plane sharpest focus runs through the image, they're usually off to the races.

If I may offer one friendly amendment to the above principle, it would be that tilt increases/decreases the size of the wedge much more when focus is at infinity and when the camera is level. I notice this because I very rarely shoot the kind of landscape you have in your example. It's much more common for me to be working at close distances, with the camera pointing down strongly, and using angles of view between 1/2 normal and twice normal. My "carpet" picture above is actually fairly typical for me -- not for the subject, but for the focal length, subject size and distance, and angle of the camera.

This is nicely illustrated here: http://static.timparkin.co.uk/stati...gth=60&N=4&coc=0.02&cameratilt=-37&risefall=0
Changing the Lens Tilt variable has almost no discernible effect on the width of the wedge in this setup. As a result, I rely on small apertures more than people working at more typical "landscape" distances.
 

dchew

Well-known member
I can't believe this thread has gone this far without any of us mentioning the VERY most important thing to remember when using tilt: When you are all done capturing that fantastic image with perfect tilt technique, don't forget to RESET your tilt adapter to zero!!! That will prevent the act of crying at your computer when you realize all your subsequent images that didn't need tilt are soft everywhere except one unimportant spot in each image. At least that's what other people tell me happens.
:mad:

Dave
 

vjbelle

Well-known member
You are so right Dave!! With my Actus I developed a quick and easy way to get back to zero without looking for a brick wall. I use a very inexpensive Johnson cross check bubble level to get my front standard to the point where I know I am extremely close to perfect. I first level the rail and then use the cross check level on the front lens plate and position the bubble to the position where, from experience, I want it to be. That bubble position is not necessarily perfectly centered. In my case its just a little biased so that the front standard is very slightly tilted down. If I were to level the front standard to the rear standard I would be slightly out of plane. Both of my Actus cameras require this same amount of adjustment for accurate '0' regarding tilt. It's very quick and gets me back to Zero.

Thanks much for the great posts......

Victor B
 

rdeloe

Well-known member
I can't believe this thread has gone this far without any of us mentioning the VERY most important thing to remember when using tilt: When you are all done capturing that fantastic image with perfect tilt technique, don't forget to RESET your tilt adapter to zero!!! That will prevent the act of crying at your computer when you realize all your subsequent images that didn't need tilt are soft everywhere except one unimportant spot in each image. At least that's what other people tell me happens.
:mad:

Dave
Oh my yes! I have an entire routine now because there are so many movements on my camera. I have to check swing, shift, tilt and rise/fall on two standards.
 

Shashin

Well-known member
There are really only a few basic rules of thumb with movements. To have a plane in focus, there are only two options:

  1. The subject plane, lens plane, and sensor plane are parallel (the normal camera)
  2. The subject plane, lens plane, and sensor plane intersect (scheimpflug)

Note, this goes for swings as well as tilts. If you swing and tilt, you can imagine this gets complex.

The other rule of thumb is this:

  1. The lens movement controls the focus plane only (this is a bit simplified, but is a useful concept)
  2. The sensor movement controls the focus plane and perspective

If you keep the sensor plane parallel to the subject plane, parallel lines in the subject plane will not converge. Many times, you set the sensor plane to control perspective and then the lens plane to control the plane of focus.

Movements become less of an issue in landscape photography as DoF is so great that there is little benefit to using movements. And with 3-D scenes like forests, movements are not going to be helpful as the top and bottom of the frame need to appear equally sharp. Scheimpflug was really solving a problem with studio situations where subject distances are small.
 

algrove

Well-known member
Just remembered to ask if any with an Alpa setup put the tilt adapter between DB and frame body instead of between frame body and lens? If so, why?
 

rdeloe

Well-known member
Movements become less of an issue in landscape photography as DoF is so great that there is little benefit to using movements. And with 3-D scenes like forests, movements are not going to be helpful as the top and bottom of the frame need to appear equally sharp. Scheimpflug was really solving a problem with studio situations where subject distances are small.
I think that whether or not someone can agree with your point depends on how we define 3-D scenes and landscape photography.

For example, there are 52 pictures in this project: https://www.robdeloephotography.com/Works/Nameless-Streams Only one of the 52 was not made using tilt, swing, or tilt and swing in combination. It's the one made with my one and only Fuji GF lens which, of course, can't move.
 

Shashin

Well-known member
I think that whether or not someone can agree with your point depends on how we define 3-D scenes and landscape photography.

For example, there are 52 pictures in this project: https://www.robdeloephotography.com/Works/Nameless-Streams Only one of the 52 was not made using tilt, swing, or tilt and swing in combination. It's the one made with my one and only Fuji GF lens which, of course, can't move.
I made a book of landscapes of Tokyo, not one with made with tilts. But, like your example, that is simply anecdote. And the fact you use movements does not invalidate my statement.
 

GrahamWelland

Subscriber & Workshop Member
Just remembered to ask if any with an Alpa setup put the tilt adapter between DB and frame body instead of between frame body and lens? If so, why?
Well, the Alpa T/S adapter is a bit of a fickle adapter because it doesn’t tilt about the optical center of the lens and so can require some adjustment of the framing of the scene because you are essentially adding some rise/fall when introducing tilt. It was one of the reasons I adopted the Cambo Actus when I bought back in to technical / view cameras.

As to whether to use the tilt adapter at the front or rear? For the purposes of tilt discussed here you would want it at the front between the lens and body, assuming that you are keep the back perpendicular to the ground.

If you put the adapter between the back and the Alpa body, you are actually introducing rear tilt (Assuming again that the body is perpendicular to the ground). Rear tilt will change the relative perspective between near/far objects and is how you can introduce looming of near objects in the frame. Think in terms of all landscape shots with tiny foreground flowers enlarged compared to distant mountains.

So, front tilt for plane of focus. Rear tilt for plane of focus and perspective.

Thankfully we’re not introducing the subject of tilt of the entire body/rail yet ;)
 
Last edited:

Ray Harrison

Well-known member
This has been a supremely useful thread. I'm going to be dipping my toes into this world whenever Cambo gets around to shipping my WRS-1600/X-shutter-mounted lenses. I went sideways a bit from the Tim Parkin link(s) earlier and (re)discovered On Landscape, a great subscription resource. Tim does an interesting (to me anyway) video on YouTube on tilt/shift where he walks through specific examples out in the field here:
. Thank you to everyone here for being so generous with your knowledge and wisdom - truly!
 

dchew

Well-known member
Well, the Alpa T/S adapter is a bit of a fickle adapter because it doesn’t tilt about the optical center of the lens and so can require some adjustment of the framing of the scene because you are essentially adding some rise/fall when introducing tilt. It was one of the reasons I adopted the Cambo Actus when I bought back in to technical / view cameras.
Hi Graham! Yeah, all these models and visuals are based on a bellows-type camera system that tilts the way it should around the optical center of each lens mounted on a lens board. Helical-mounted systems can't do that. Adding tilt changes the focus distance, perspective and framing when using a "pancake" technical camera with helical-mounted lenses. One detail about the Alpa tilt adapter that most don't realize: It looks like it doesn't tilt around the centerline but it actually does. When you adjust tilt at the top screw knob, the adapter pivots around the centerline. It does not, of course, pivot around the lens plane and optical center. No "pancake" cameras with helical mounts do that. I suspect Cambo's tilt mounts are the closest to the optical center while Arca Swiss is the farthest away since Arca has it built into the camera body. Arca's advantage is you get it for every lens without paying dollars or weight. Alpa's design is somewhere in between Arca and Cambo.

Dave
 
Last edited:

BFD

Active member
Lots of good info here but ultimately you are just too close to the subject. It's such an extreme. Most people would use T/S in landscape or architecture work. What you were testing would almost be considered product photography and you really would just need to focus stack. Also, the advice on tilting your camera forward kind of defeats the purpose of T/S which is we ultimately don't want to distort or change our composition so we tilt the lens just a few degrees to get more in focus.

Also, if new to T/S, you could live view while tethered to a computer and watch how it affects your image in real time.
 

Jack

Sr. Administrator
Staff member
Now we just need to get into base tilt vs center tilt vs orbix on front and rear :ROFLMAO::ROFLMAO::ROFLMAO:

But any of us that came from LF likely used all of them at one time or another, and possibly a few in conjunction ;)
 

GrahamWelland

Subscriber & Workshop Member
...
One detail about the Alpa tilt adapter that most don't realize: It looks like it doesn't tilt around the centerline but it actually does. When you adjust tilt at the top screw knob, the adapter pivots around the centerline.
....

Dave
Dave,

Yes this is true. It's quite a mechanical swiss masterpiece with the springs, pivots, clamps and adjusters, especially the 17mm version. If it only pivoted at the base then it would only cost $1000 vs $1500 :ROFLMAO: That said, you typically only buy these things once and they will last a lifetime. Btw, I have the Cambo rear tilt adapter for the Actus - a similarly expensive tilt adapter but equally well made with the addition of an extra bellows.

...
Also, if new to T/S, you could live view while tethered to a computer and watch how it affects your image in real time.
If you have a back or system with focus peaking you can get immediate realtime feedback as you dial in tilt too. I find that very useful with my IQ4 150 and GFX on the Actus but obviously it would apply to to any other system when working with TS lenses too.
 
Last edited:

mota25

New member
Thanks to everyone. Very useful information. I was struggling to find how to properly use tilt with my Canon TSE lenses on Ay7rIV and the GFX. Couple of days ago I found an app like the one mentioned by Rob.
 
Top